CHICAGO HARDWOOD FLOORING BLOG
Tips and tricks for all your hardwood flooring needs by a local flooring company in Chicago.

A Wood Floor Refinishing Story In The Chicagoland Suburbs
In this blog post I walk you through one of our typical flooring projects from the perspective of my comedic alter ego, Mr Plus. We are a hardwood flooring company that services the Chicagoland area for Hardwood Floor Refinishing and Installation projects.
This is a comedic manifesto written from the first person perspective of my flooring alter ego, mr plus
Dear blogging familia. This project. Oh man. This project was really something. It was going to be my two weeks of heaven. I’d finally get to sleep in, because this place was in the Chicago suburbs conveniently nestled right behind my neighborhood in Highland Park, IL.
An absolute peach of a job, location wise. I got to snooze the alarm multiple times, this one was going to be a dream come true in the wild stardom of my flooring career. I was feeling like a bad boy that week too, so I said fuck it and bought a pack of cigarettes that I was going to secretly smoke throughout the week without telling anyone. To my girlfriend Terrah, babe if you’re reading this, I’m sorry. It was just all gas that week, I was feeling cool and there was no shot of slowing down when I was rocking the Sprinter van with Ferrari shades on.
7am - first day of the Project
Voila! We were off. Sprinter van chugging that beautiful diesel gold that it does, humming along beautifully. Rap beats blasting on my radio while I drove to work practicing my freestyle raps. Did Kanye truly live the life of Jesus? Could he have? When I was the one that was woodworking for the first 30 years of my life? Just the typical thoughts that ran through my head that day. What could possibly ruin this? There was absolutely nothing that was bringing down this energy baby, we were soaring through the sky.
Oh, except the screw we ended up hitting in the driveway later that day, which resulted in the flat tire that we then later got. But hey, that’s business baby. Now show me that wood.
Pulled up to the job
Sprinter brakes squeaking so badly my ear drums popped. Honestly, I have no clue if the brakes are even still good. Haven’t checked them in months. They still stop the car, so today could already be going a lot worse but it’s not. We’re keeping our head up.
I look over, my flooring ninjas are already there. These are the coolest, coldest, hardest working flooring cowboys from the south of the border that you’ve ever fuckin’ seen, pal.
There’s Mariano, a true G and one of my longest working/most loyal daily grinding pals. We’re homies for life.
Walking up with him is Jesus. Yes, you read that right. No further explanations needed. He’s short, yet they’d still need a cross twice the size they used on the original one.
And last but not least, the undisputed flooring heavyweight champion of the world, Mr. Julio. He’s young, like me, and he’s hungry which I respect greatly. He’s a true woodworking artist down to his blood with the machines and brushes. I could feel it since day one, he’s got that Flooring God particle in his DNA. The type of guy you know is running his own operation one day.
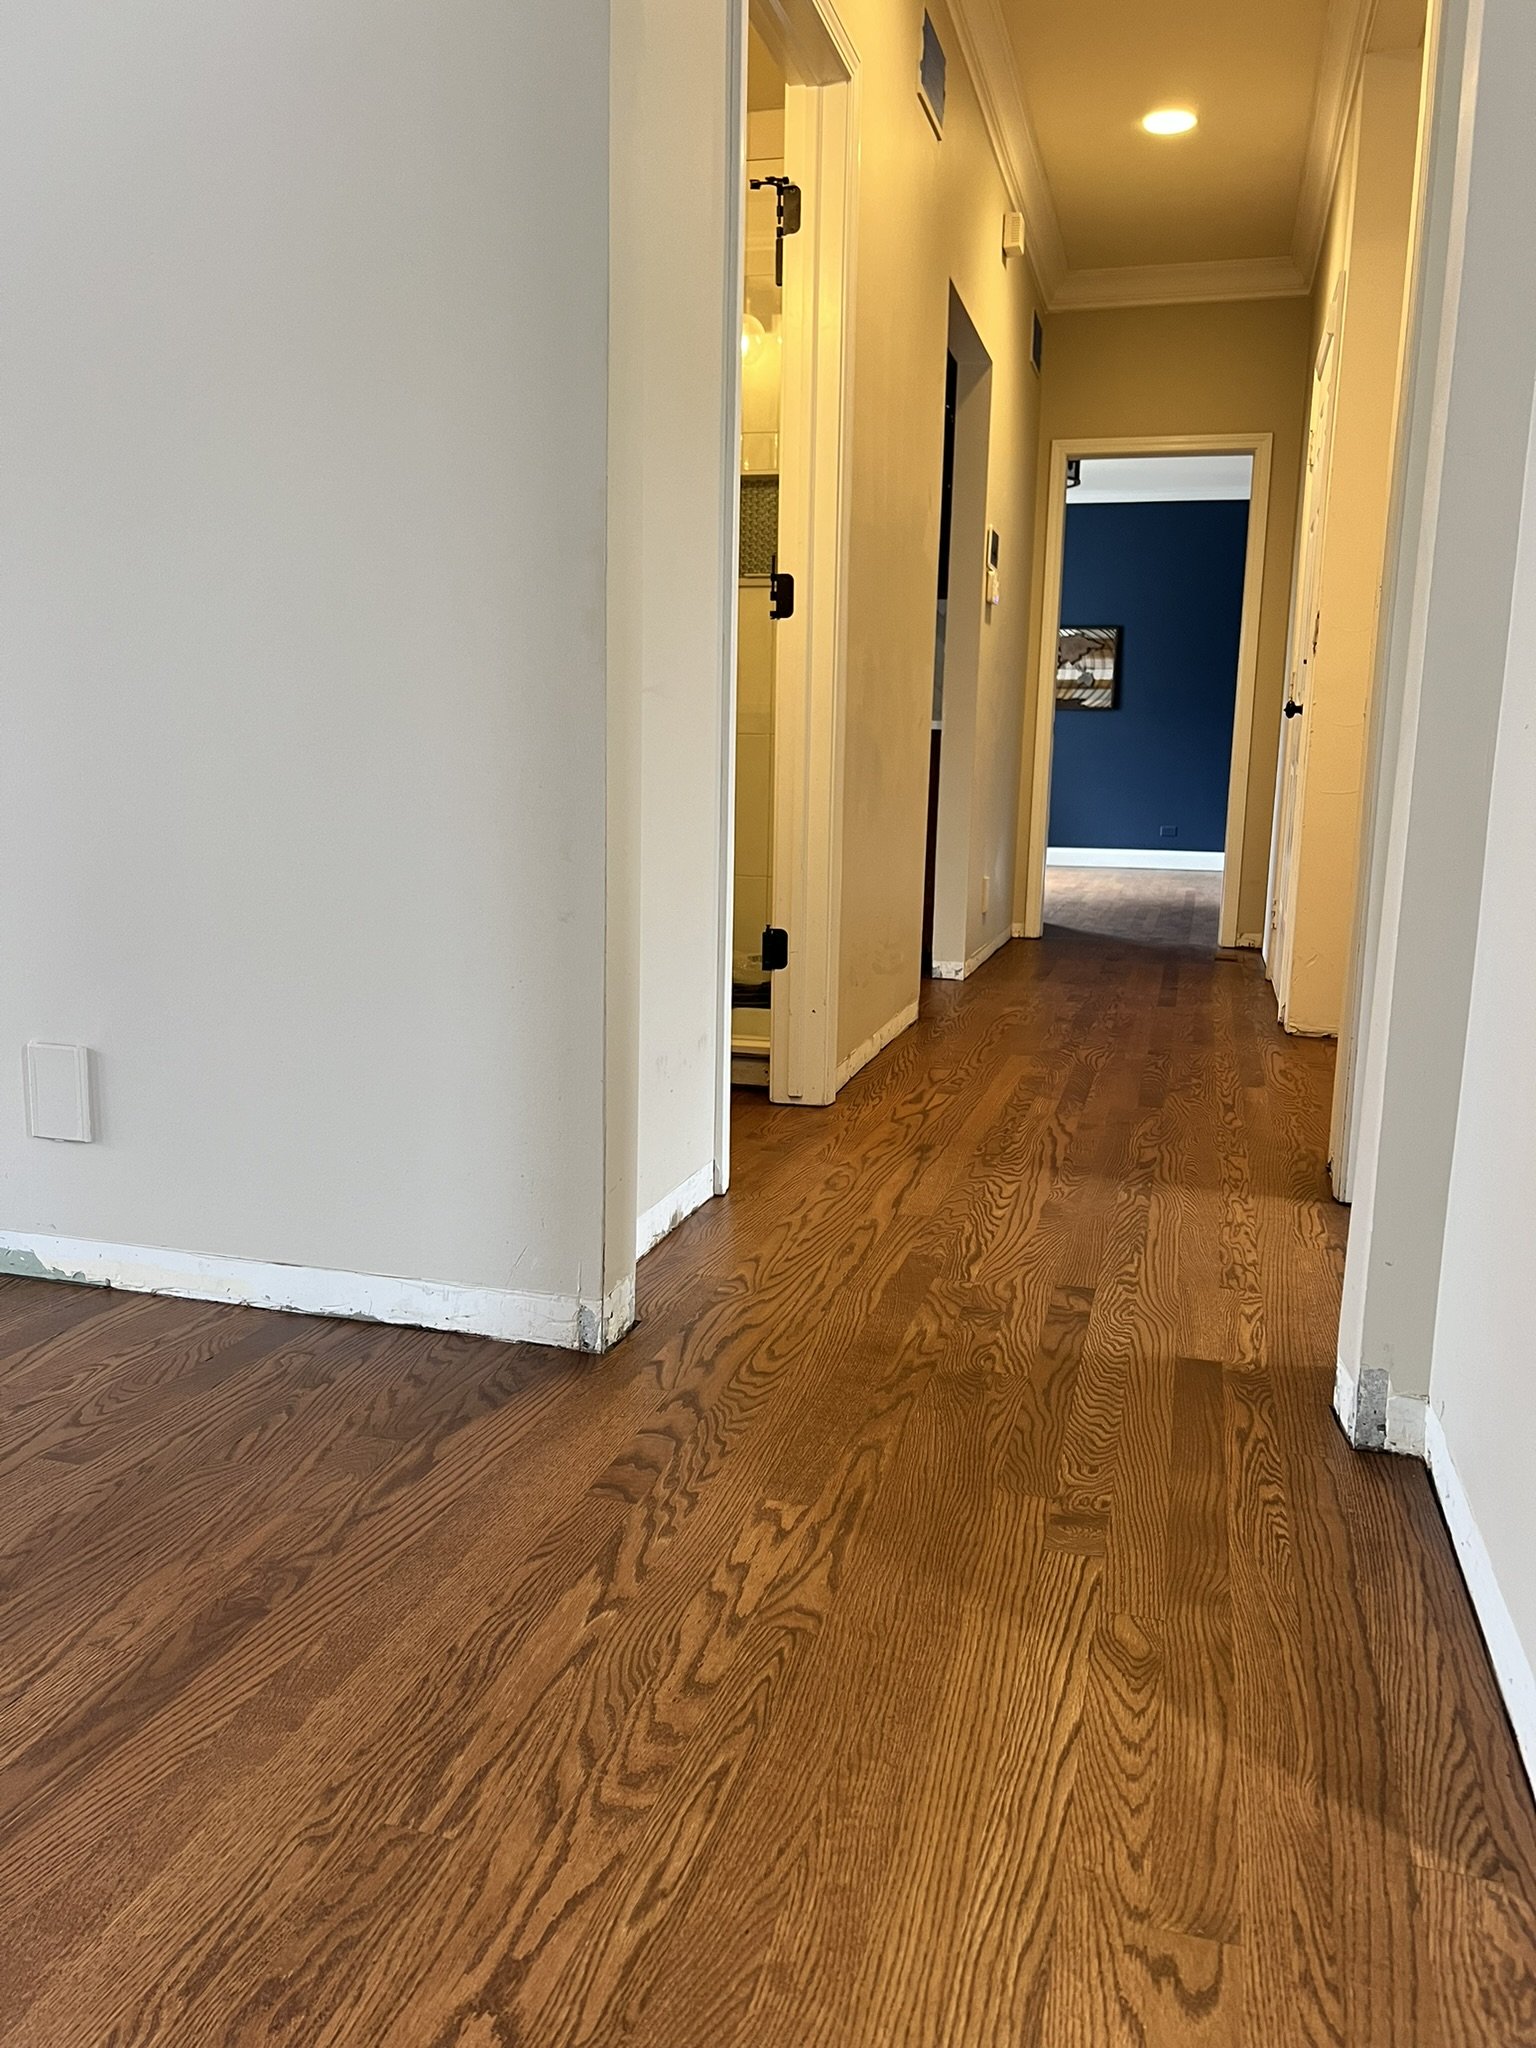
We bust open the door


Fuck! Guys, there is borders to replace and an entire room to install. We’ve gatta replace all of the red Brazilian Cherry borders with normal looking Oak. I’ll go get the red bulls, y’all start firing up the saws, this place is about to turn into a battlefield.
Wrecking Ball by Miley Cyrus playing on my way back to the same gas station I had already been at. Covered completely in dust for this second visit, the clerk was about to find out who I really was that morning. “Oh, haha, why am I dusty? I happen to be Mr Plus, baby.” I kiss my cross necklace right in front of them, and I walk out.
I make it back to the house. Wouldn’t you know it, things look worse then they did before. But some progress was good progress, so we were getting through.
By these next photos, it’s been days.


We’re still working on just getting through the very first installation portion of the job, and I was already contemplating a second pack of cigarettes.
Oh did I tell you, we were doing this entire staircase too, lol. But as you can see, the new railings are already finished and installed. I was too amped from a mixture of red bull & cigarettes that entire first week so I forgot to take a picture of the previous old stuff. Here’s the new stuff already installed.

Shit, did I also forget to mention there was an entire back staircase with a new railing system to be installed too? nervous laughing

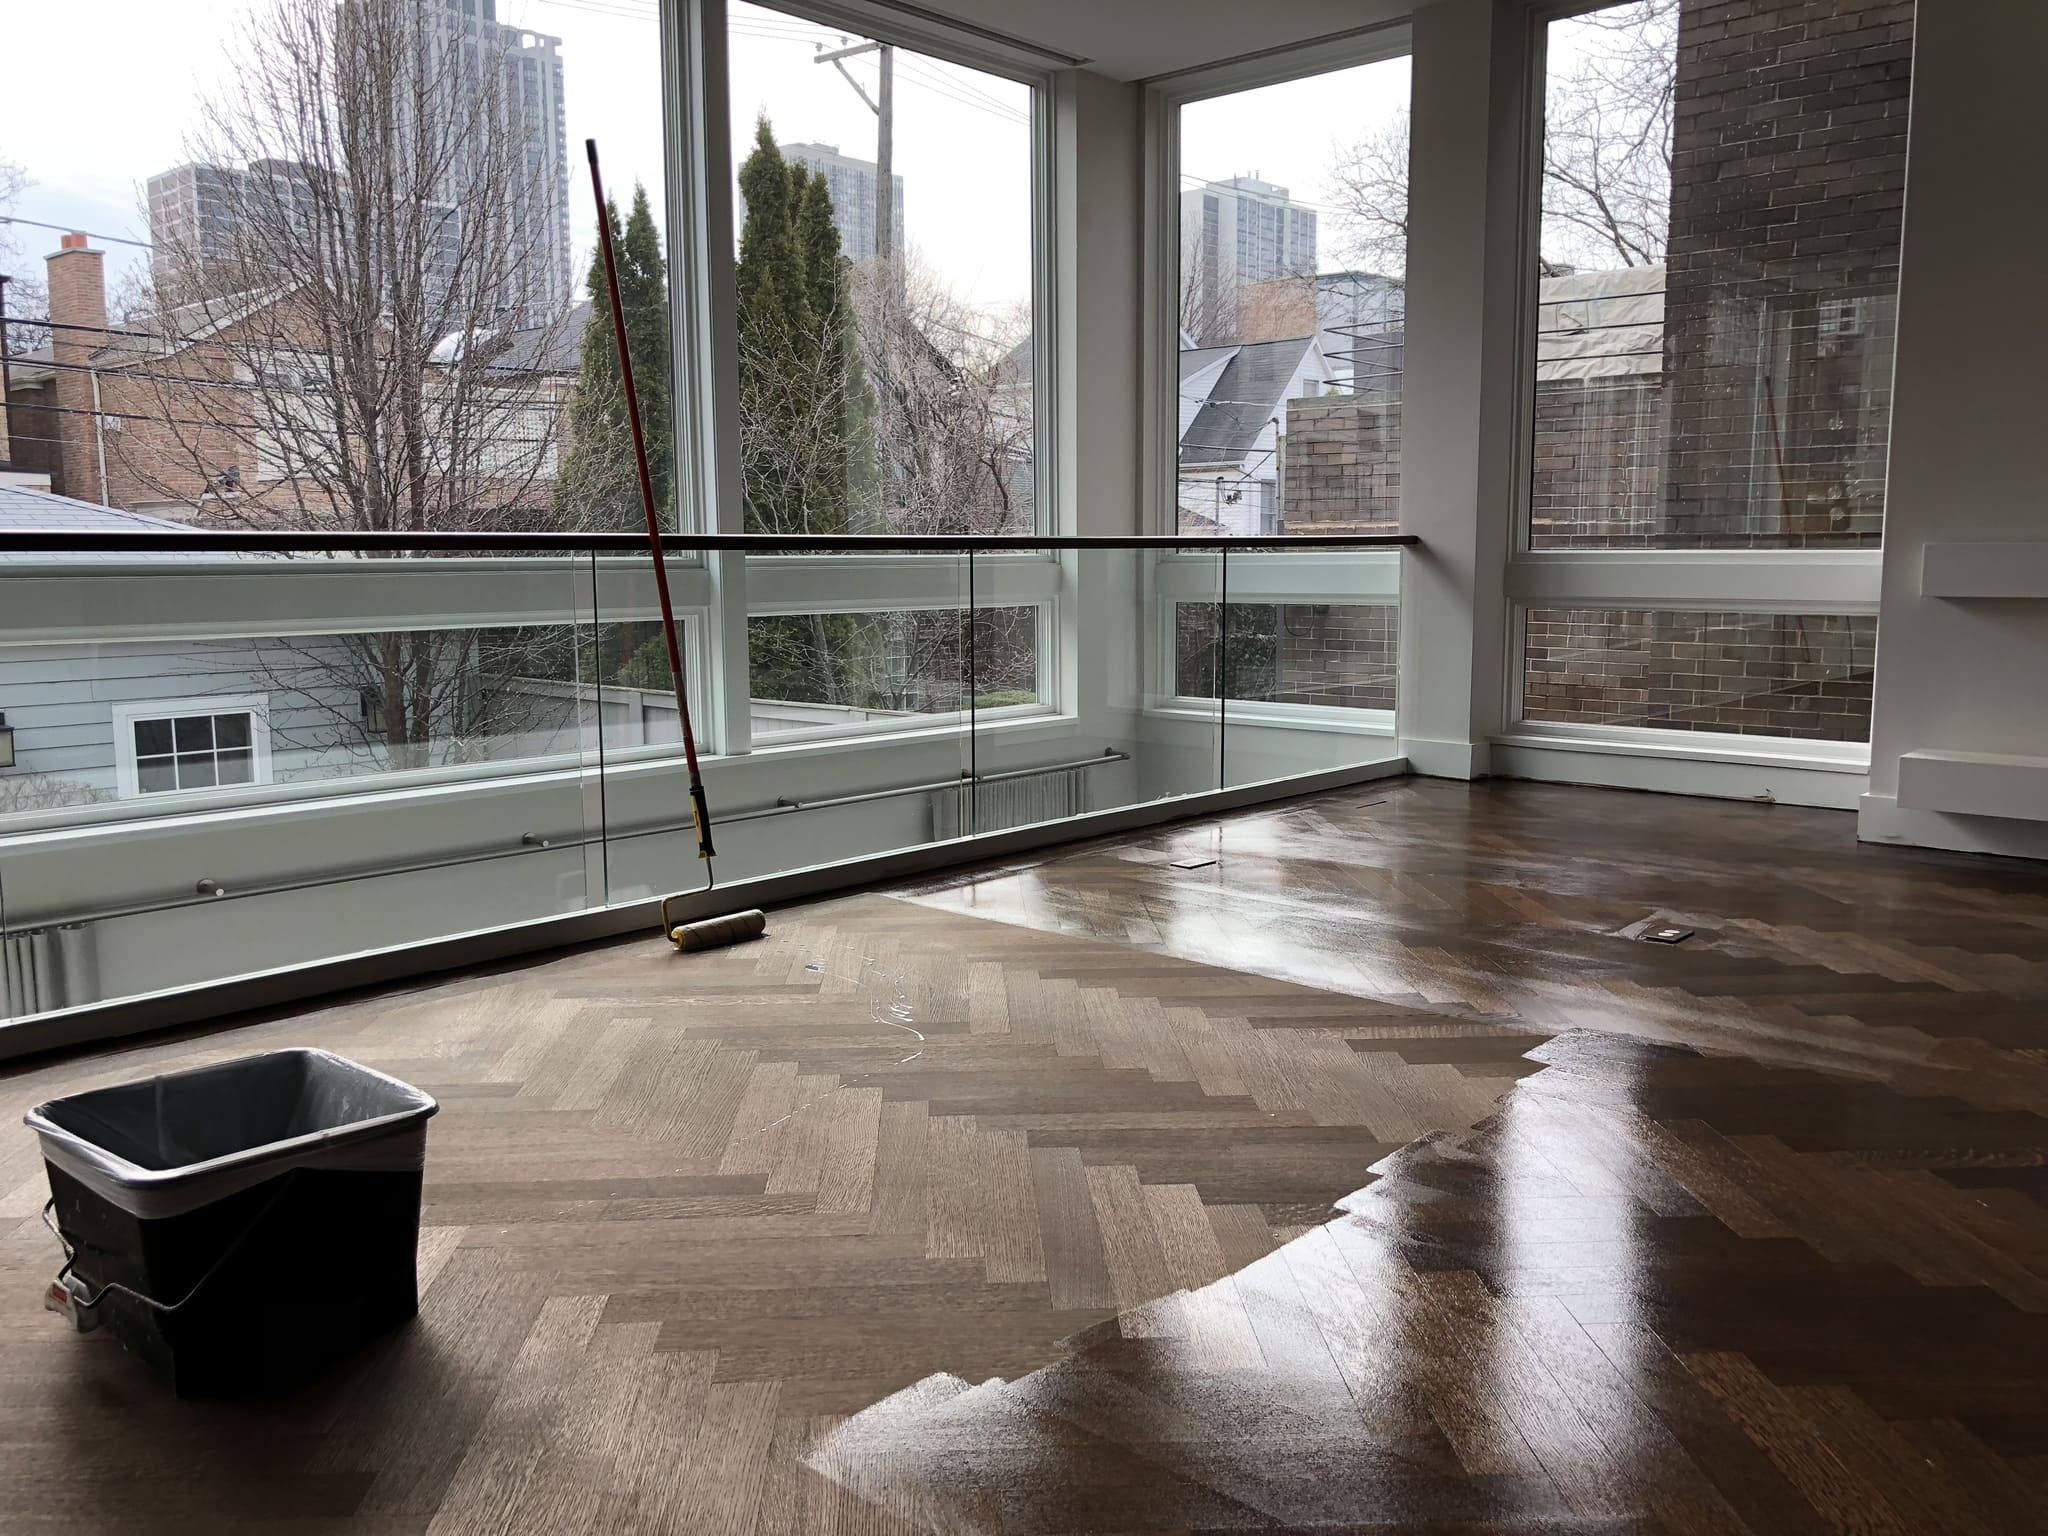
But hey. The messy shit was finally over. The installs were done. It was time to start ripping the runner off of those steps and rubbing sharp rocks against wood. The start of the fun stuff. Cruising that beautiful 30 year old belt sander over some not-super-terribly-old oak. The dust boogers from this one would be something of a marvelous feat. Dust boogers were medals, all well earned in this battlefield of wood floor sanding.
It Was Time To Choose A Color
This was it. This was the day. I have to meet them, the homeowners. Until this point the last time I had seen them was 4 months ago during the initial estimate. They had just closed on the place 3 days before we started, so we let ourselves in through a lockbox when the project began. I haven’t seen them in ages. Should I shave? Should I get a haircut? The flooring celebrity they had hired off of a 7 year old magazine cover was about to show them four colors of oil splotched onto some wood. It was my time to shine.
Walk in, big shot macho man energy, as I always do. Box of half opened and premixed stains in my hands, I’m ready to go.
As I’m walking up, the can in my left hand slips out and falls on my foot, then splashes onto the floor. First color sample done. Three more to go.
I begin tirelessly wiping these damn colors into the wood. As I do so, I think about all of the life choices I’ve made that led me to this point. By now, the fumes from the stain sample I’m making are hitting my head, hard. That beloved Bona brand is about to carry me back up into the sedated heavens with my nose.
As I finally start to come down from the quick high of stain fumes mixed with the constant wood dust floating through the air, I realize I’m done with the flooring samples. Beautiful. I shut my video camera off and wait for the homeowners.
Hardwood Flooring Stain Samples
the homeowners walk in
They’re nice. As I remember them. Very friendly. Followers off of my social media page, and younger folks too. About my age. The sample session flies by. She falls in love with the graphite color, no matter how hard I try to swap her towards the easier option of not doing any stain. Blast, you win this time Mrs. Homeowner.
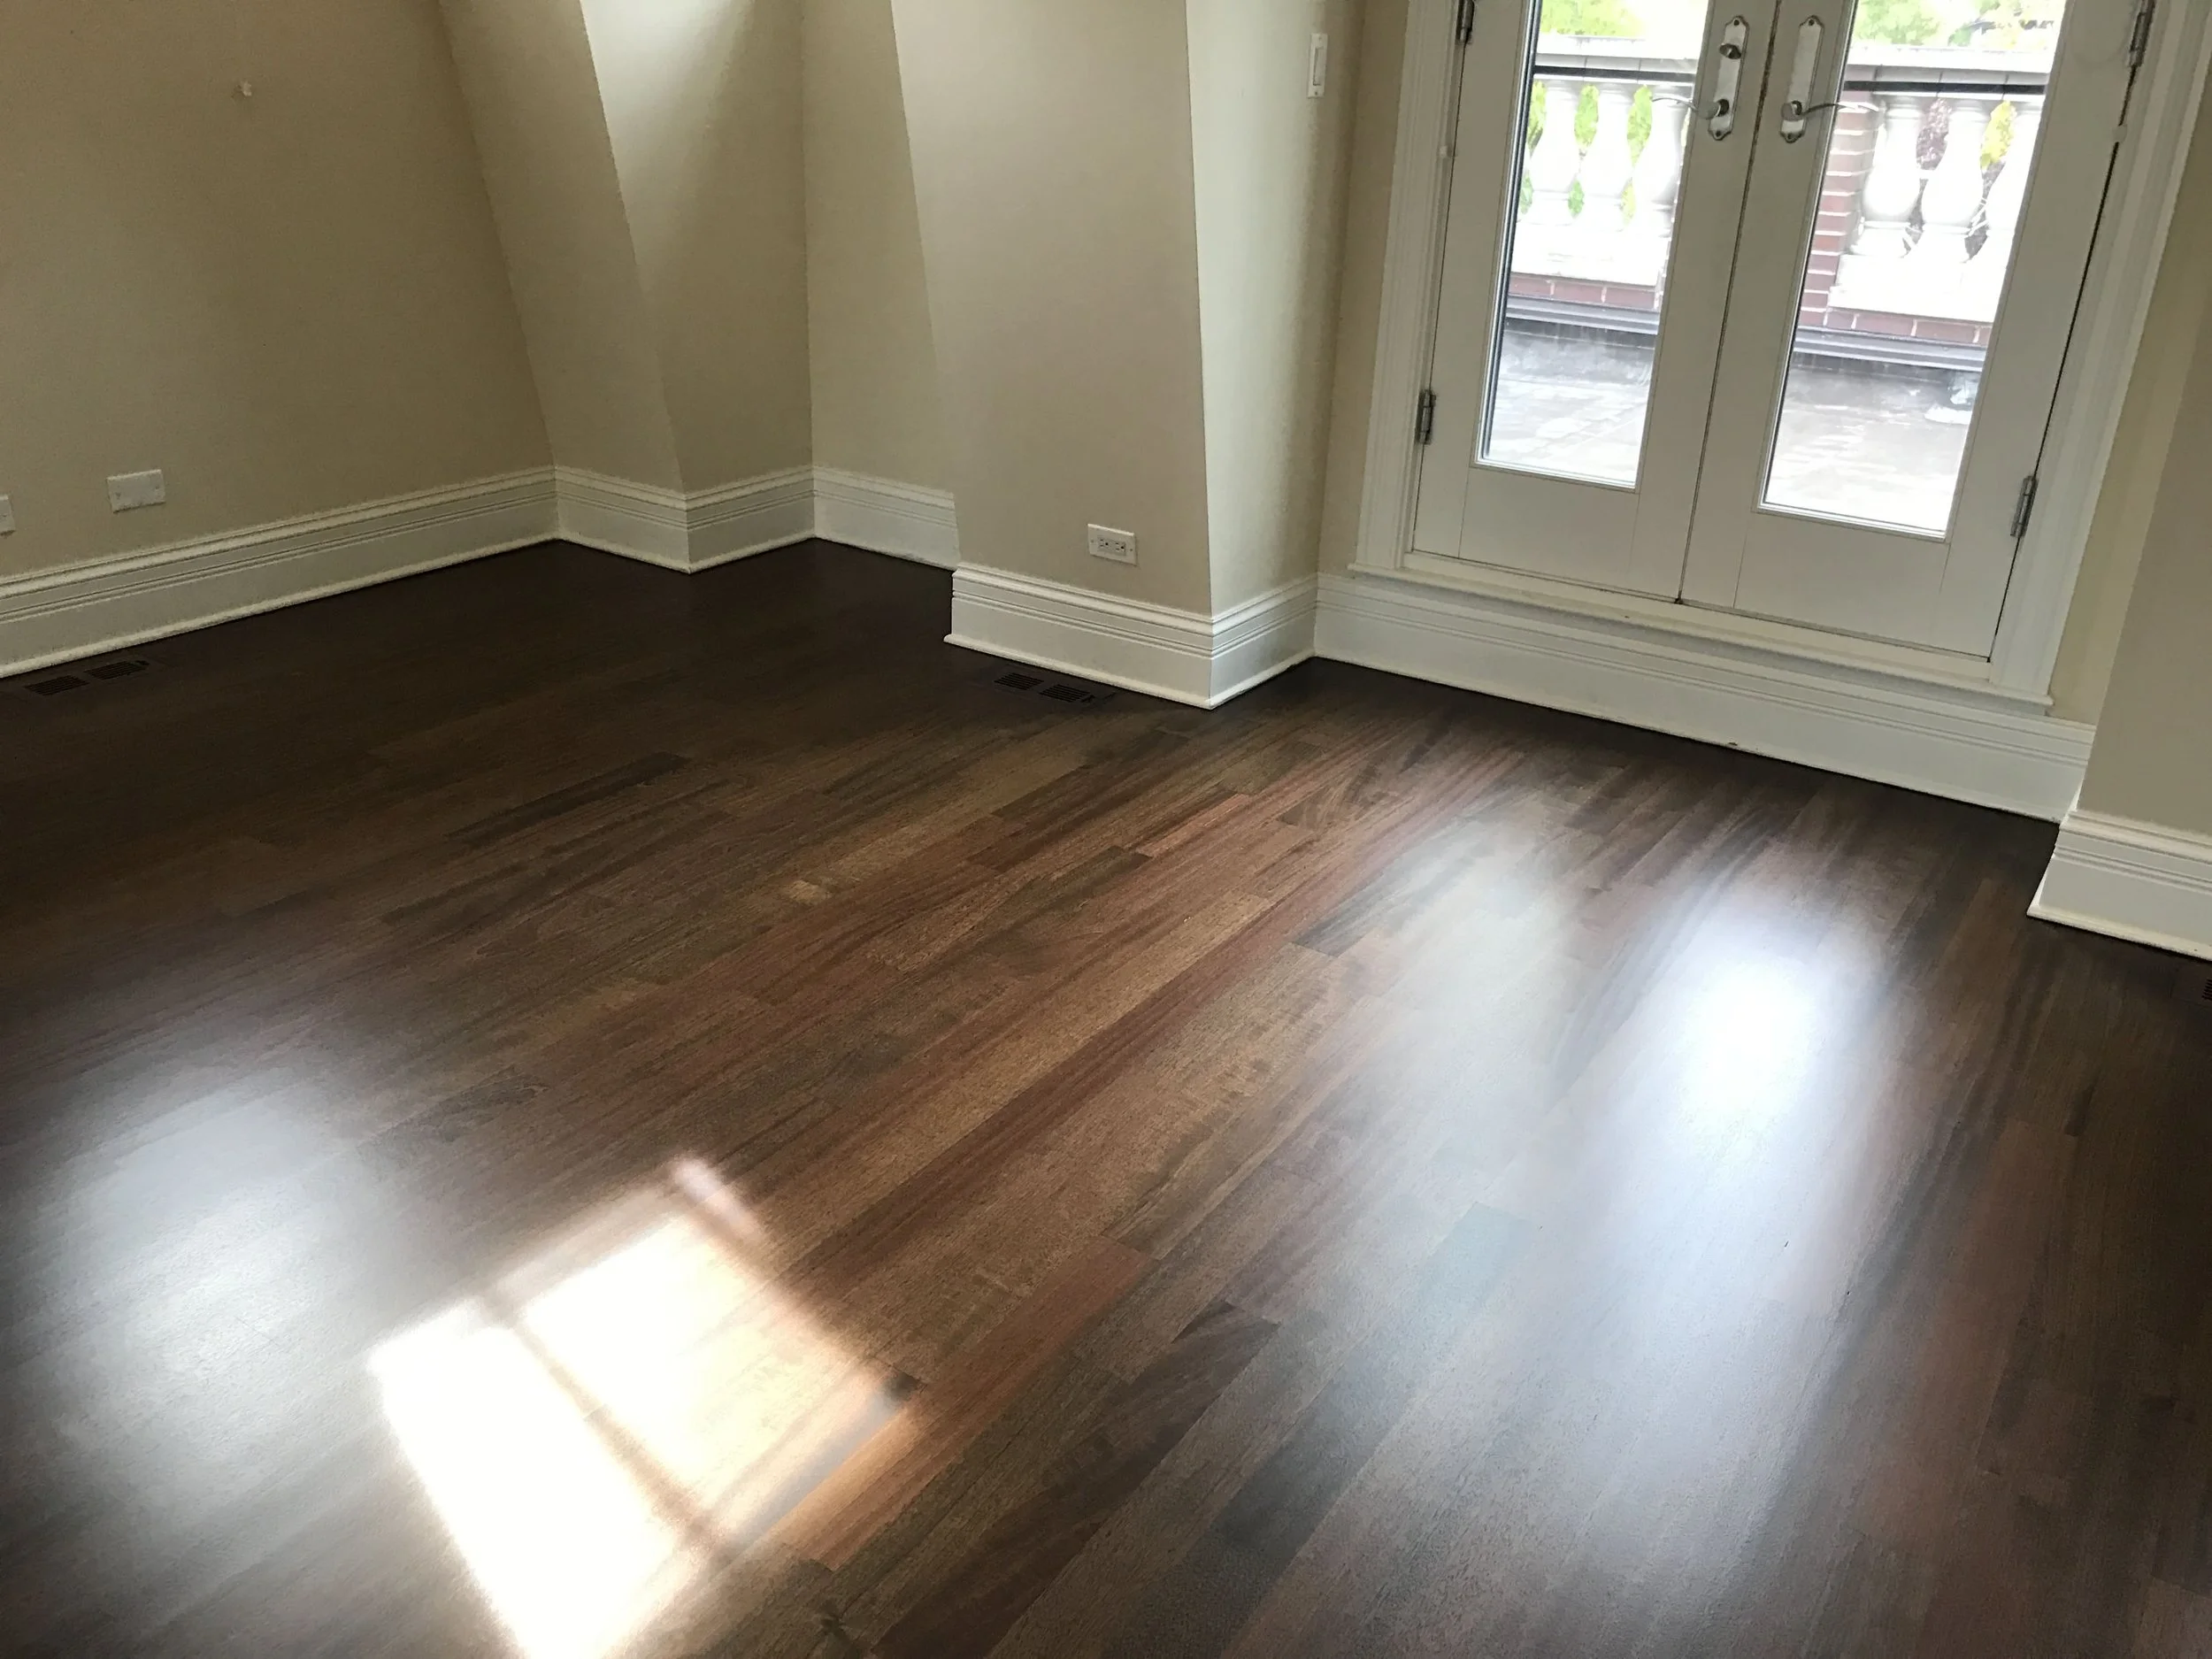
They walk over to the living room, where I’ve already sanded the floors with the belt sander. Turning around, they also check out the fire place. It was being redone too.
Crazy story? Fireplace guy & I used to street race our cars together when we were teenagers. Yea, the Fast And Furious movies bit me HARD when I was a kid. And here we were years later, remodeling some of the same houses on the streets we used to race through. A bond that can’t be replicated. And a story that can’t be mimicked by ChatGPT.
Anyways, the wife steps to the side and she opens the sliding door to check out the yard. My eyes immediately widen and I begin to panic. This was during the great Chicago Cicada Infestation of 2024. There were so many, that they had been passively falling down through their old fireplace the prior first week while we had been working.
She opens the sliding door. Everything is fine. Quick peak outside with her head, all good. She doesn’t dare take any actual steps outside as the cicadas are buzzing all around. She closes the door back up. They didn’t get her. Thank God.
Relieved, I walk up and show them the back railings. Freshly installed, they look incredible. I start telling them how we’re going to be ready to stain the place in the next couple of days and then I hear it!
The loudest cicada scream you could have ever imagined. Coming directly from her hair.
She starts screaming too. Louder then the cicada. Full pitch. Her husband freaks out and starts grabbing at her hair. Meanwhile, I was standing right in front of her during the scream. I fell over, startled, caught myself on the railing, and nearly broke the new wooden post we had just put in.
He gets it. Grabs it with his full hand, cups it, and like a champion he fucking WWE wrestling slam-throws it down onto the freshly sanded floor.
I take the time to ask him if he wants me to leave the mark from the cicada in the wooden floor, as a sort of trophy. He pleasantly declines and they disappear back into the vast unknown. I wouldn’t see them again until the end of the project. The best type of customers.
After they leave, I promptly begin to continue sanding, and sand off the samples I applied to the floors.

Hardwood Flooring & Staircase Staining Day
It was finally here. The day I dread. The day where I have to get highest out of the entire process of the job. But even the toughest of stains & the largest of square footage projects could never take down Mr. Plus.
The team and I put our disposable gorilla gloves on.
We had our shitty .99 cent chip brushes from Home Depot.
We were ready to turn up the Spanish music and have ourselves a stain infused fiesta.
Let’s get messy boys.


floor finishing day
We made it. Friday, of the following week. Exactly the same day I promised them the project would be finished. Total luck shot on timing? That stays between Mr. Plus and myself.
The staining we had completed the day before turned out incredible. I mean truly, a masterpiece. It’s always good when you don’t have a single spot on the floor to touch up. Unfortunately, on this one, we had about 20. After touch ups were done, we could start vacuuming and applying coats of finish.
We had our tools, we were ready, yet again. Difficulty wise, today was no different than the staining day yesterday. We just had different roles today.
Flooring roller duty seniority is totally a thing in our world of small floor sanding businesses. You can ask any floor sanding companies HR department, it truly is real. Needless to say, I’m the boss man, so I get to cut the line in front of the older guys, obviously.
The feeling of a brand new generic brand paint roller cover while rolling finish. My god, it’s truly indescribable. They just don’t make them like these generic Amazon 6 packs anymore. Covered over a freshly bought Lowe’s Purdy Roller sleeve. If heaven was a paint roller it would be this one. I know these things are plastic, but I tell ya what, they’re putting the same AI technologies into these things that they are into the new golf clubs they make these days. This thing rolls and swings at such a perfectly balanced weight ratio. Most days I feel like I could hit a golf ball better with my paint roller rather than my actual golf clubs.
Finish was pouring on the floor, paint brushes and finish rollers were making their beautiful harmonic symphonies. Things were being finished up. Everything went without a single problem. I’m serious this time too! Pure beauty, pure perfection, and the pure smell of chemicals, all bottled extravagantly into a decently sized suburban home. A lovely scent mix that would ensure the woodworking in this home was renovated properly. One might say this scent is similar to the type of romance you feel with your nose when entering the lumber section of a Home Depot. The same type of aura for sure.

Another battle was conquered, another flooring war has been won. Mr. Plus was able to spend the next 3 days resting easy, while playing video games with his delicate artistic flooring hands resting at the computer. He would sit back, awaiting what future flooring endeavors hit his email inbox next. As soon as they call upon him, he serves.
Finito
Final Project Results Below


Hey, before you go, want to see something super cool? Check this out.
Lol jk. The Amazon affiliate link helps me pay for the massive amount of time it takes to write these stories out and upload so many photos, especially as a full time small business owner. So if you just pressed the link & hit me with some commisshhh, I appreciate it. Also, thank you, Mr Jeff Bezos, please don’t kill me.

Hardwood Flooring Installation & Refinishing Project In Barrington, IL - North Chicago Suburbs
In this blog post, I will discuss and walk you through a large hardwood floor installation & sanding project. This particular project also has a brand new staircase railing installation that we will go over. The project is located in the northern suburbs of Chicagoland. Specifically, in Barrington Illinois.
Well howdy there gang! How is everyone doing?! Patrick here again. I hope you’ve all been well. My last project diary post about our flooring project in Lake Forest did incredibly well. So, I figured, why not share some brand new content with my favorite hardwood floor diary family, since you all seemed to love the last post! This time, I’m back on the scene with the crew in a brand new location, in Barrington, IL. We’ve got not only a brand new flooring install, but also hardwood floor refinishing as well as the installation of a brand new railing system at this Barrington, IL project! We are going to be completely renovating the staircase and restoring it into a brand new modern beauty with brand new Oak railings. We’re going to be adding some brand new Oak floors in some rooms\hallways, and we’re also going to be refinishing all of the pre-existing Oak floors that are everywhere else throughout the home. So strap up, grab some popcorn, and enjoy reading along as I walk you through this massive project! And as always, if you are in the area and interested in having your own flooring project completed by us, feel free to reach out here.
start of the flooring project - initial walkthrough & Demolition
Well, things kicked off on a sunny but cold & windy Monday morning in Barrington when we arrived on the jobsite. The weather was cold, but let me assure you, the coffee was extra hot. The homeowner opened the door extra happy to see the crew and myself ready to tear into their project. The homeowners had made sure to completely clear out the home of all furniture and belongings, as we request with every job, before we arrived and got started.
Tile Removal
After performing a walk through with my excellent team, it was obvious this project was going to be a tough one. There was loads of tile to rip up in the hallway, the front entry foyer, and the entire kitchen. All of the tile was to be demoed, removed, and the plywood was to be cleared of any junk as well as properly resecured in order to prevent any squeaks in the future. But boy oh boy, the whole team knew the kitchen would be a nightmare! Why you ask? Great question. The tile in the kitchen was running underneath ALL of the cabinets. This means there was no great way to bust it up and remove it. In order to prevent any damage to the cabinetry, we would have to cut & chisel every single piece by hand. A true nightmare for any skilled tradesman. Surely, though, we were ready for the task. Our handy dandy grinder made things a little bit easier, but not by much. Here is what all of that tile initially looked like:

Entryway\Foyer completely tiled, starting to remove baseboards before tile removal

Hallway completely tiled. This hallway also led into a tiled bathroom and laundry room that we would be demoing as well

Demolition starting in the completely tiled kitchen (that’s my 70 year old Dad goin’ ham!)
Staircase Demolition
Well guys, now that all of the tile removal was underway, we could also start the next portion of the project. The staircase! It was time to have my phenomenal railing craftsman, Gerardo, come in and start demo on the staircase. And let me tell ya, it was it a lot of work. He started by initially cutting out all of the railings, spindles, and newel posts. Then, he started removing all of the carpet runner from the steps, pulling all of the padding & staples out as well.

Original staircase before the start of demo

Staircase halfway through the demo
As you can see, we were making great progress. Not only on the staircase, but also the flooring as well. The tile was coming up painfully, but at least it was coming up. The second picture of the staircase and the hallway being cleared was after about a week worth of demolition work, and many Redbulls.
Existing Hardwood Floor Refinishing
Yes, I know what you’re thinking, “Patrick, there’s still more to this project?!” That’s right, there is! And that would be the fact that we were also going to be sanding and refinishing all of the pre-existing oak flooring that was already running throughout half of the home as well. Here are a couple of photos of the rooms that had flooring in them already, so you can compare them to what they look like afterwards.

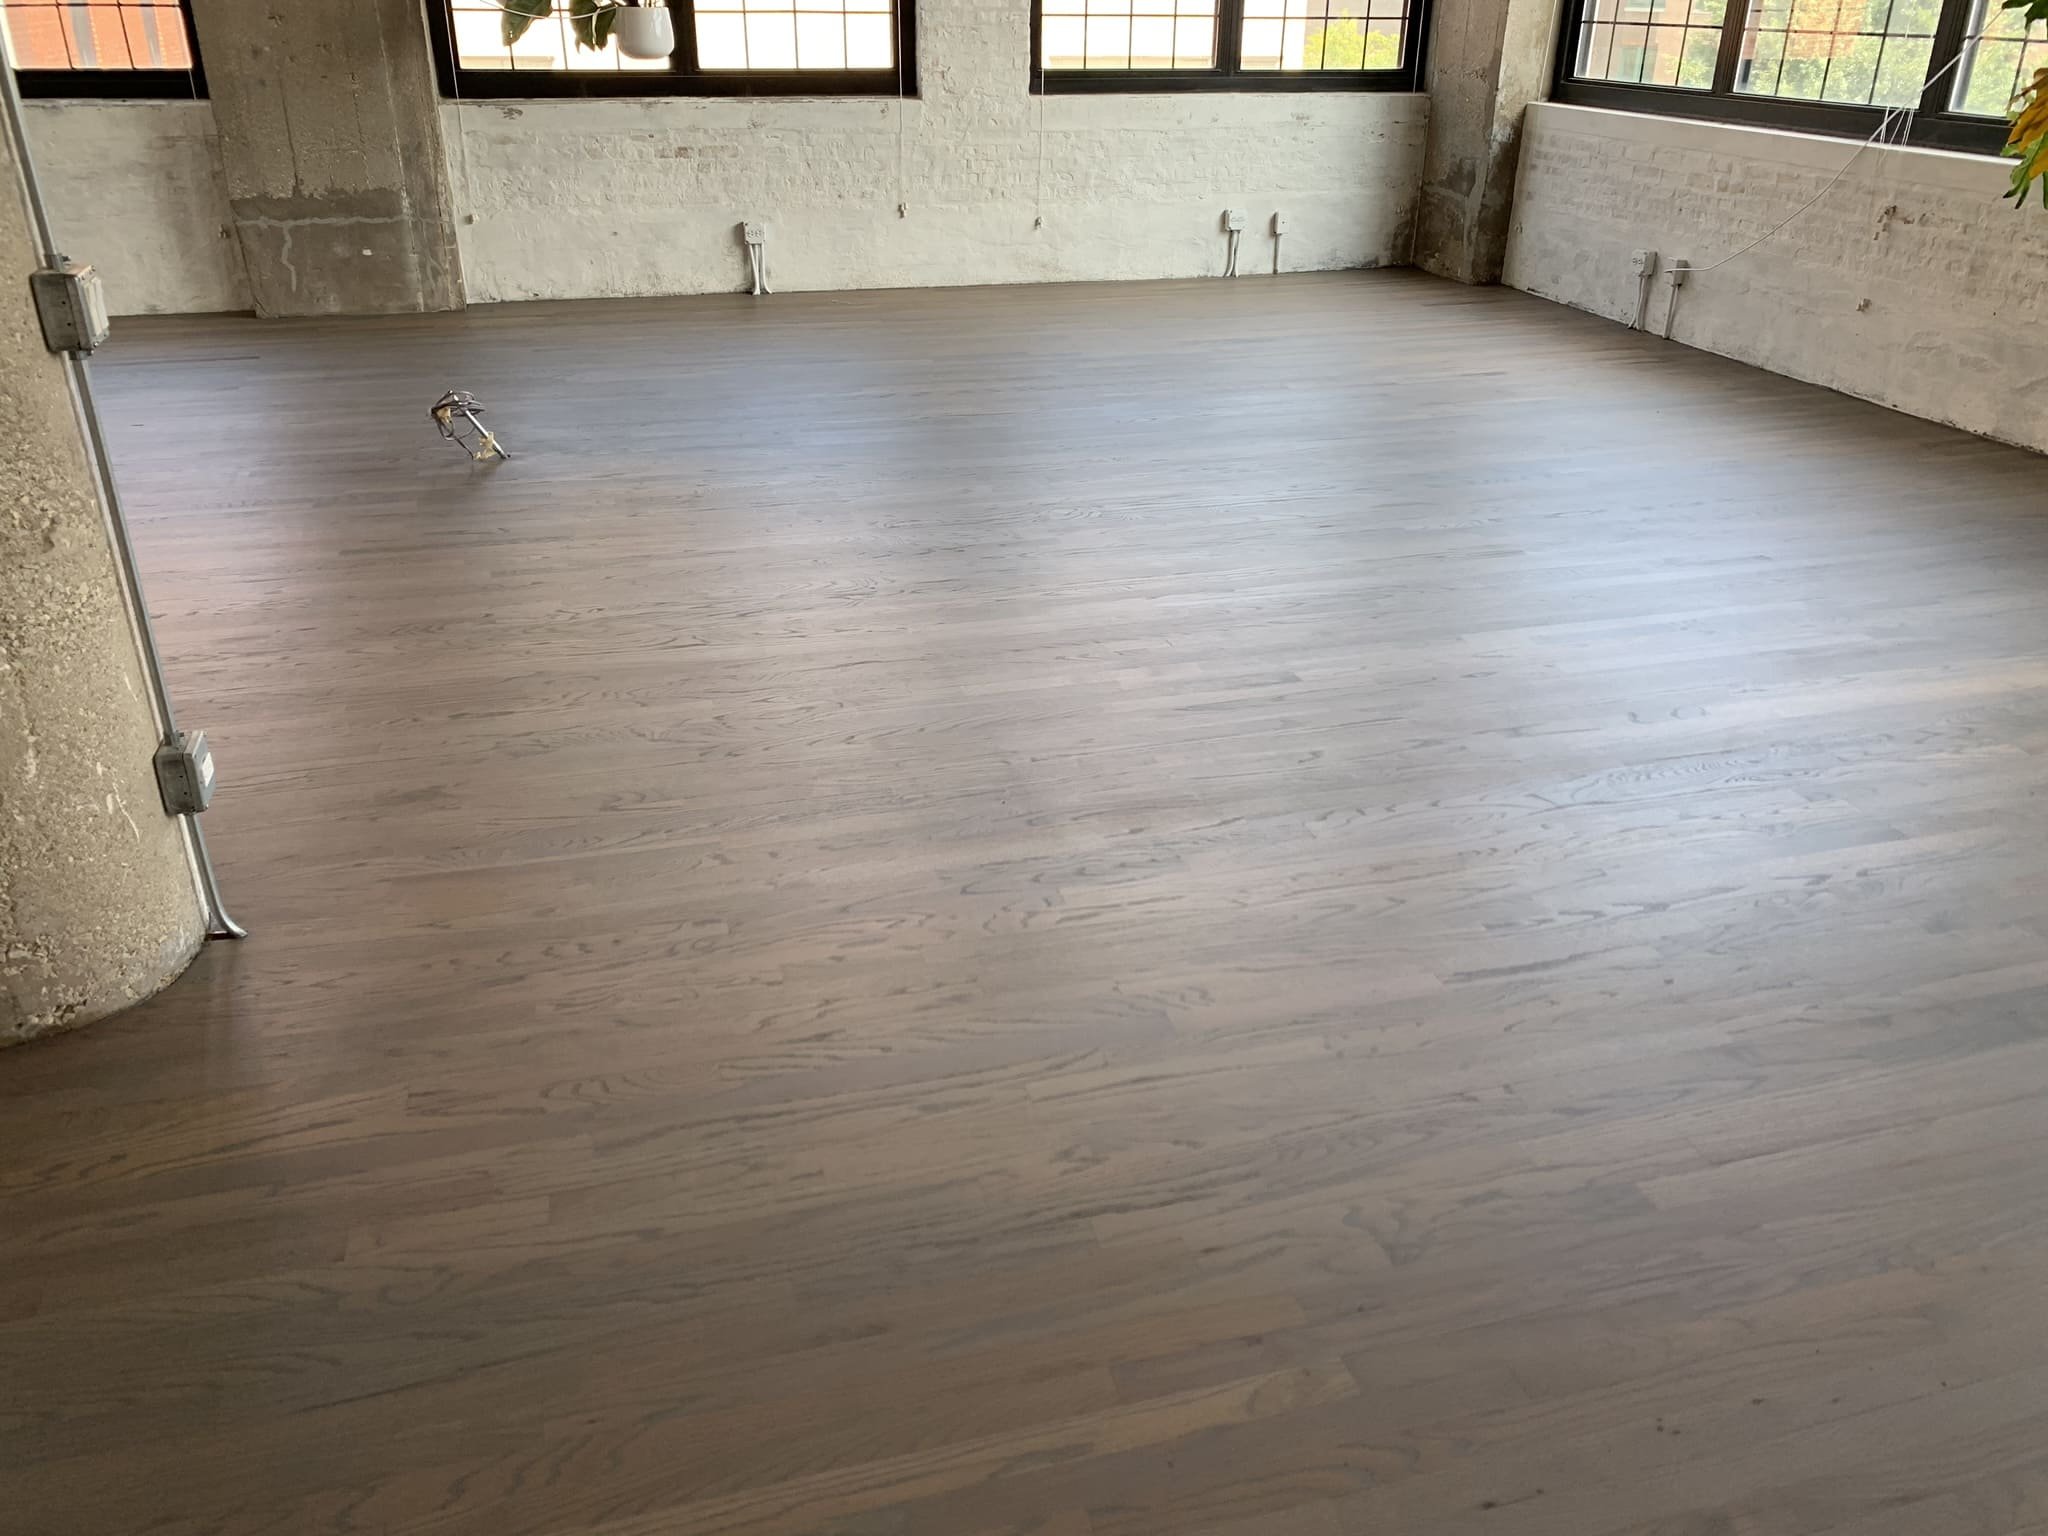
Pre-existing Oak floor in the Living Room

Pre-existing Oak floor in the Dining Room & Front Room
Staircase Refinishing & Starting New Oak Floor Installation
After about a week and a half of grueling demo work and preparing the subfloors to accept their new hardwood flooring, it was finally time to begin installation. Great progress was being made on the staircase too. After Gerardo removed all of the railings, we were able to refinish all of the stair treads perfectly without having any spindles or posts in the way of our sanding machines. The homeowners would be painting all of the risers and spindles white when we concluded our flooring & stairwork. This would help achieve the most modern outcome for the staircase.
Treads of staircase sanded, railing install underway!
First lines of flooring getting nailed in
New Stairs, New Railings, & New Oak Hardwood Floor Installation
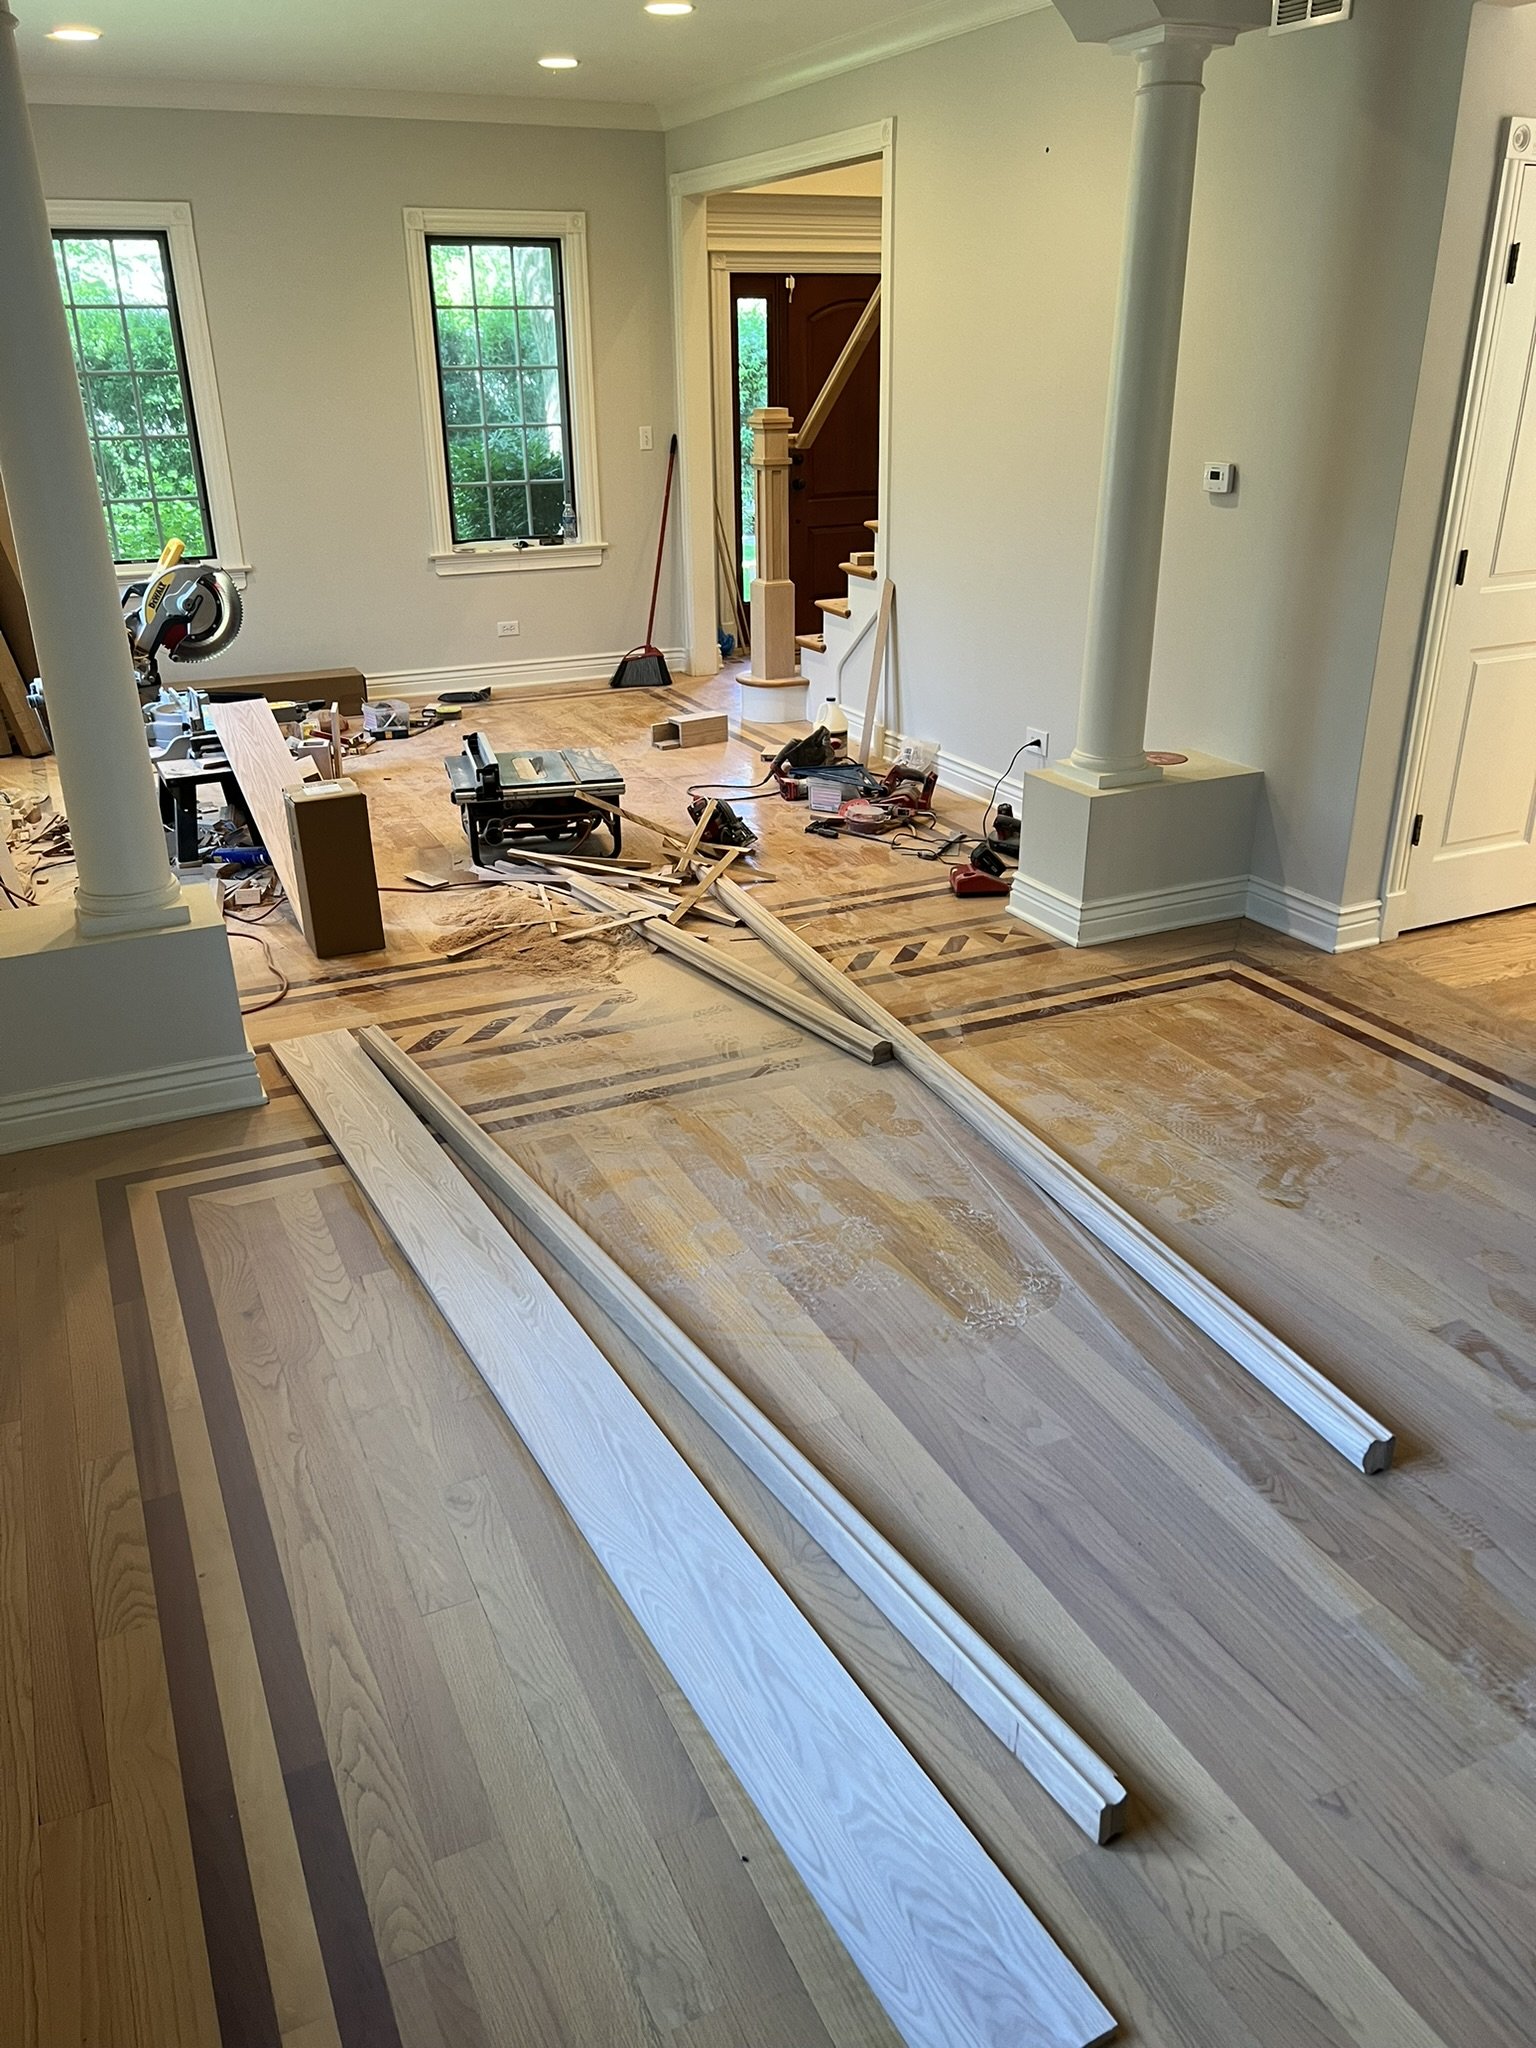
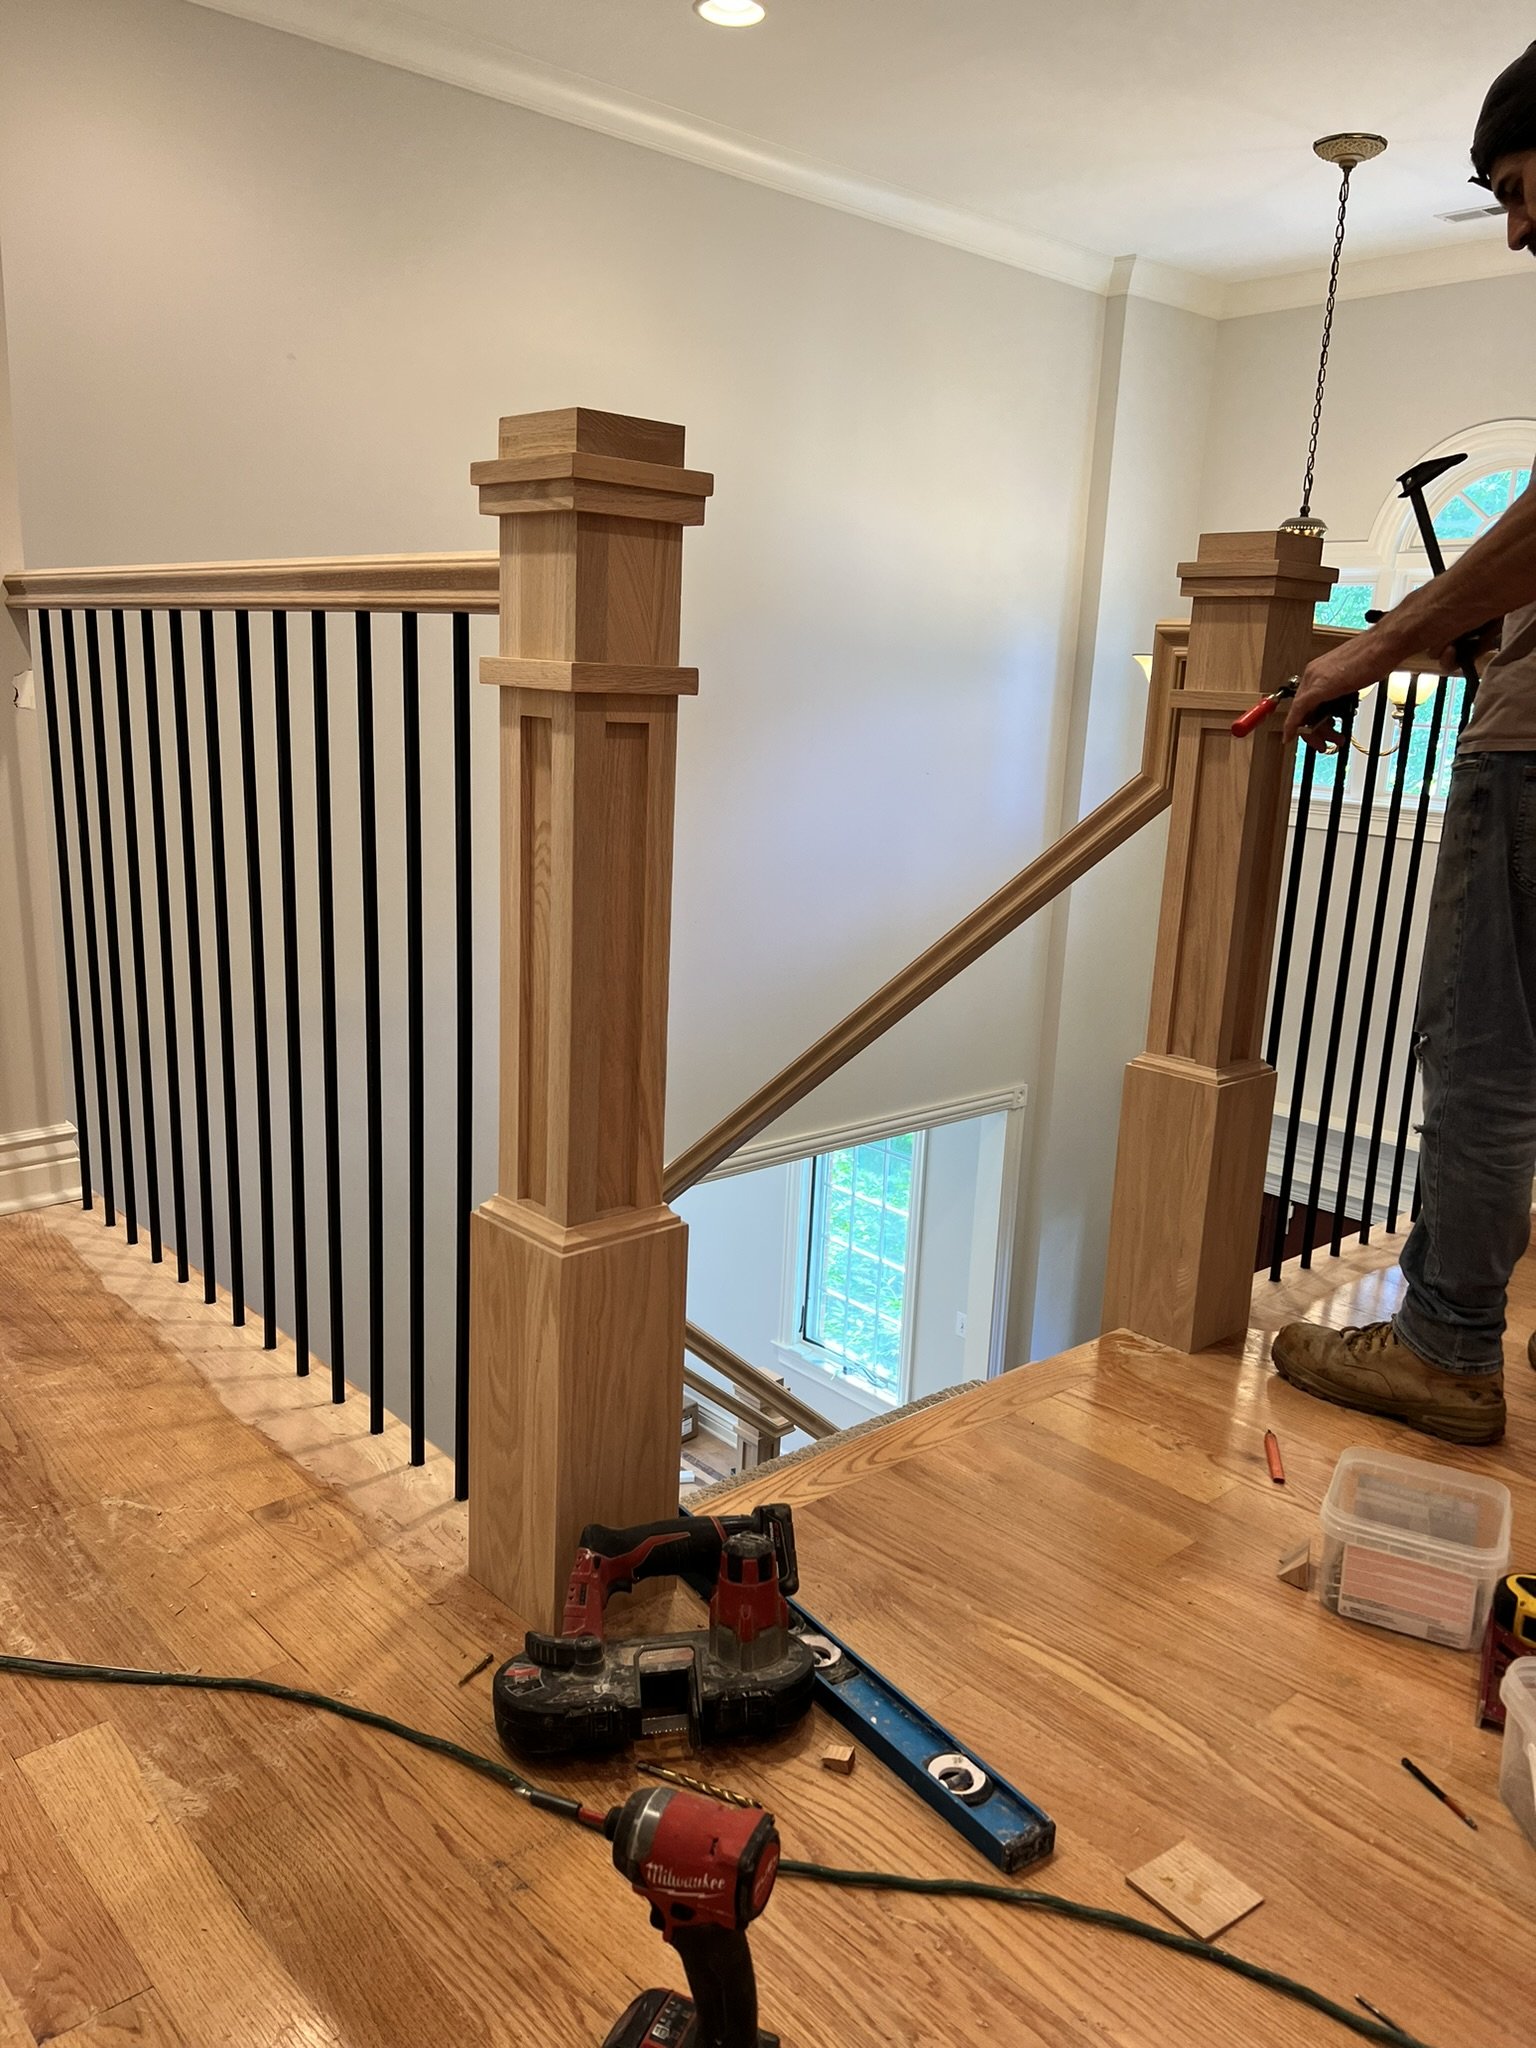
After another couple of days on the project, things were moving along nicely! The plywood was finally all cleaned up, we had all of the areas around the kitchen cabinets cut out & cleaned, and the new floors were starting to install beautifully. Gerardo was making wonderful progress on the railing systems & had most of the posts installed. The customer chose these posts and these spindles.
There was tons of old glue from the tile on the plywood, which the team and I were forced to scrape off by hand. This allowed for a smooth surface for the new floors to be installed over in order for there to not be any weird bumps or un-levelness in the new hardwood floors.
Things kept moving along very well now that all of us were pushing full steam ahead and focused on the installation portion of the project. We were really starting to make some great progress. As you can see, most of the Newel posts of the new railing system were installed, the steps were totally sanded, and the railings were ready to go in! We also decided with the homeowner, that straightening the first stair tread would be a great idea, in order to make the staircase even more modern in appearance. So that is exactly what we did. Gerardo totally rebuilt the first stair tread from scratch, in order to make it straight instead of curved. It came out lovely!

Stairs sanded, Newel posts installed!
Loads of hours later, the railing system was totally installed, the beautiful new iron spindles were in, and the hardwood floor installation was completed! You can see from the photo below, that in the entryway foyer, the homeowner paid an extra fee in order to have us install the new floor board by board into the old floor. In our industry, this can be referred to as a couple of different things, but most commonly, it is called a “tie in” or a “tooth in”. It is an additional upcharge because it goes without saying, that this is a ton of extra work! But the end result is a seamless transition from the old floors to the new ones. Both the homeowner as well as myself decided that this would be the best appearance for the front door entryway right as you walk in. Whereas, in the back of the house, between the kitchen and the living room, we left a turn board in place to make installation easier.

Installation of railings, posts, spindles, and floors finished! Time for floor sanding!
Hardwood Floor refinishing project
Well my friends, the time was finally upon us. After all of the hardwood flooring had been installed, the steps were rough sanded, and all of the railings were installed. It was finally the portion of the project where we get to show off our sanding skills. This, of course, happens to be my favorite part of the entire project! Why? Because this is what sets apart the real craftsmen and artists, from the guys that just do this for a paycheck!
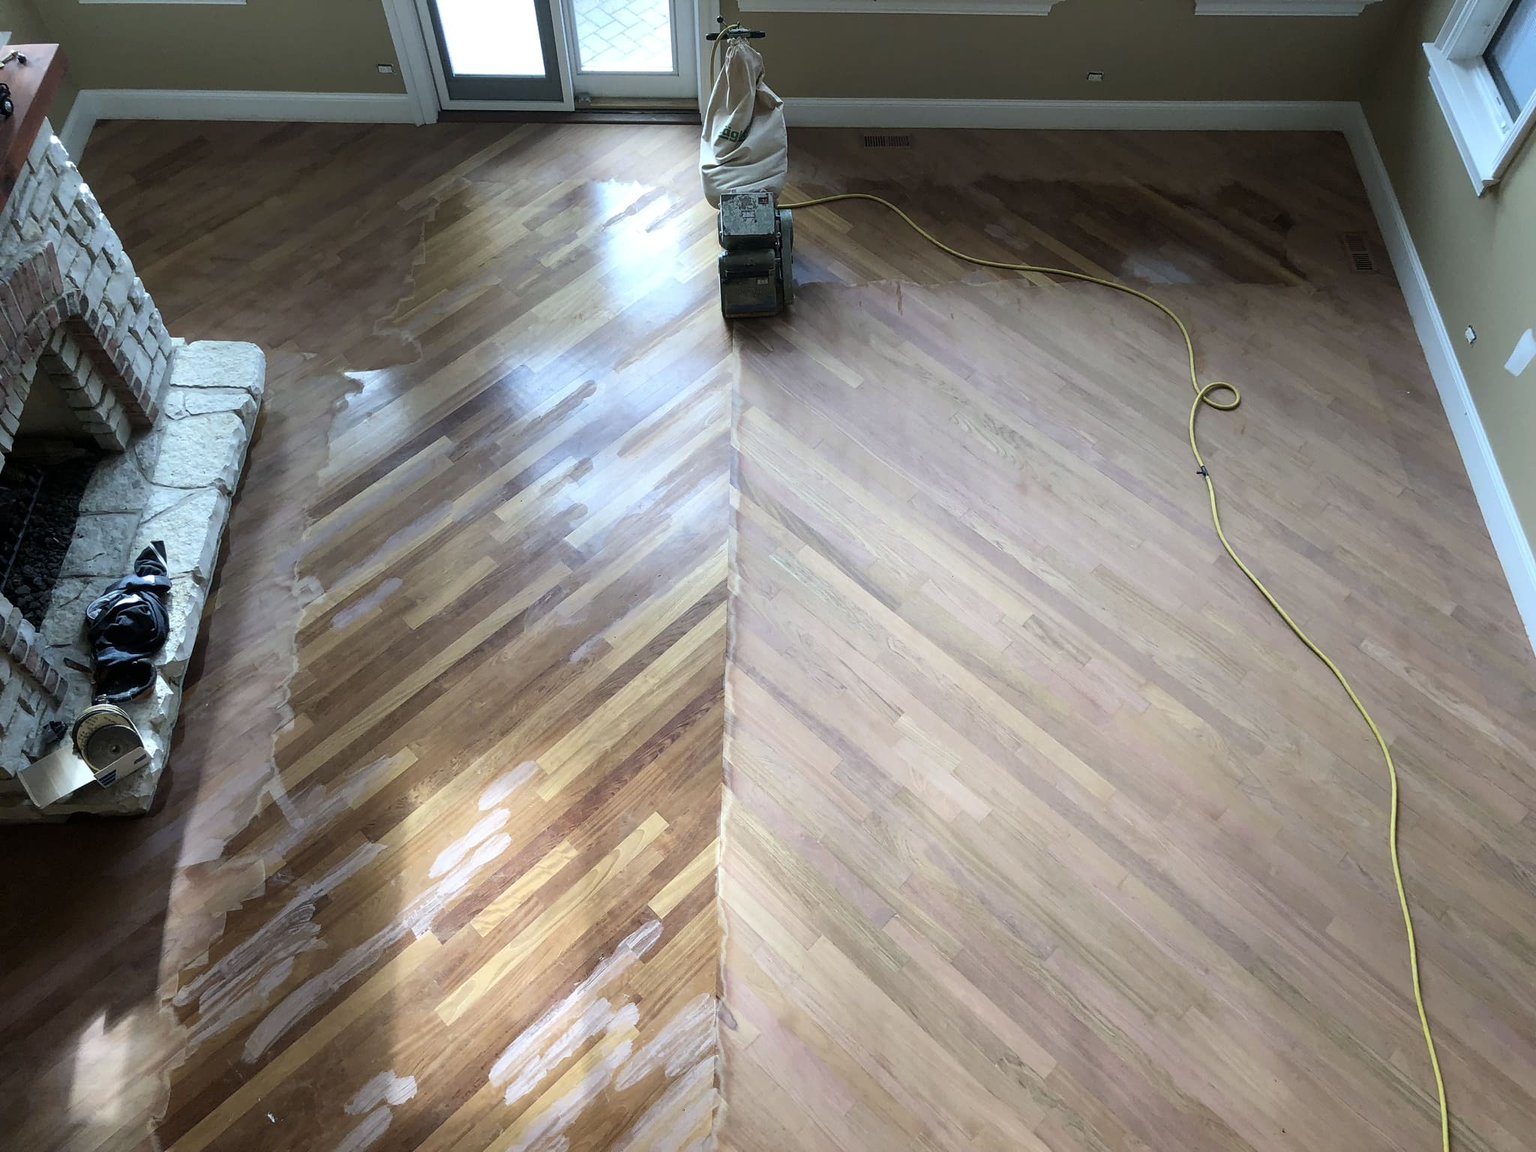
On a hardwood flooring project, sanding is everything. Proper sanding technique is very crucial, and of course, everybody has their own way of doing things no doubt. Sanding wood floors is very tricky, and has to be done in an unbreakable step by step series of grit sequences that can not be done out of order, or you risk a nightmare. Great sanding paper and machines are also the backbone of any proper floor refinishing project. Most companies around our area in the Northern Chicago Suburbs don’t use the high end machines that we do. But what can I say, over here we are wood nerds! So we use the absolute newest and highest end equipment available. Mainly, we use a large German planetary sander called a Lagler Trio. We use this machine to complete all of our medium & fine sanding. Most other companies around this area will simply use a belt sander and a buffer, so the quality doesn’t even come close when you compare it against our floors!

Sanding all of the hardwood flooring in the home
Stain Selection
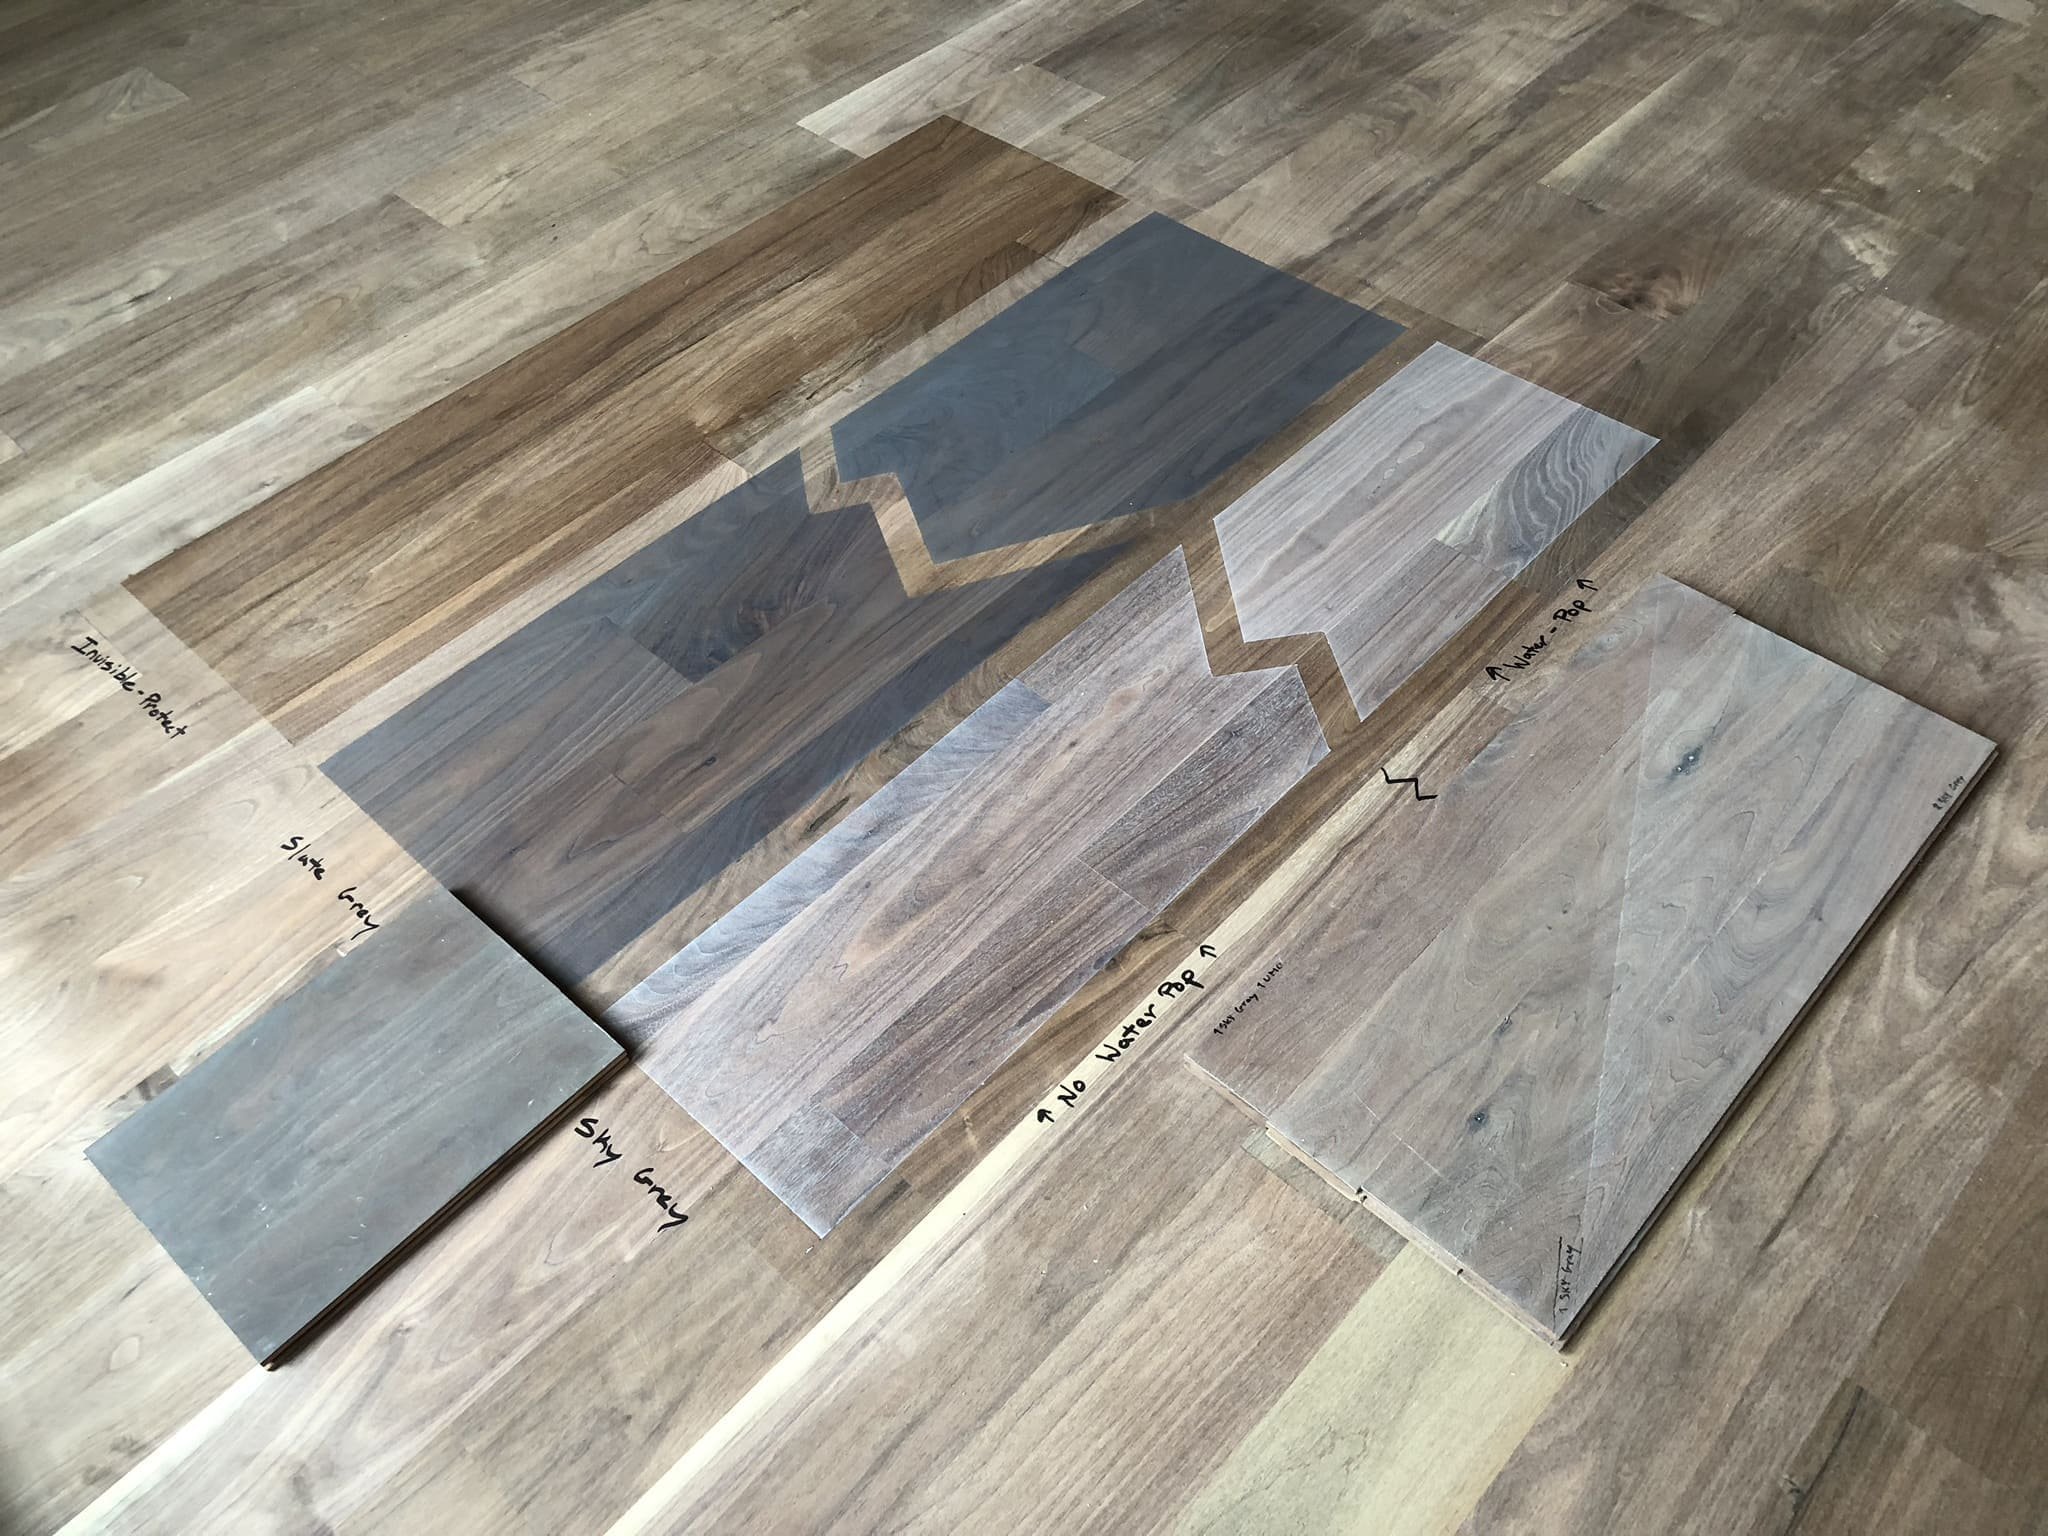
If memory serves me right, I believe it took us about 3-4 days of full on sanding before we were finally ready for the fun stuff, stain sample selection! The staining day was fast approaching and it was time to lock in a color with the homeowner.
As with all projects, I had the homeowner select their top 3-4 favorite colors from an online brochure. After the rough sanding was completed, I would then apply these stain selections directly to their floors in sample swatches that I would make by hand, in order for them to receive the closest color sample to what they would actually be getting on their own floors. Over the years, I’ve found different floors can take stains and colors differently. So to me, it’s important to show the homeowner these samples during the sanding project, on their actual floors, instead of stand alone samples which can sometimes end up looking a bit different.
The colors that the homeowner chose were: Golden Oak, Special Walnut, Medium Brown, and Gray.
I’ll be honest, I threw the Gray in myself as a wildcard, haha.
From left to right: Golden Oak, Special Walnut, Medium Brown, Gray
Flooring Stain Application
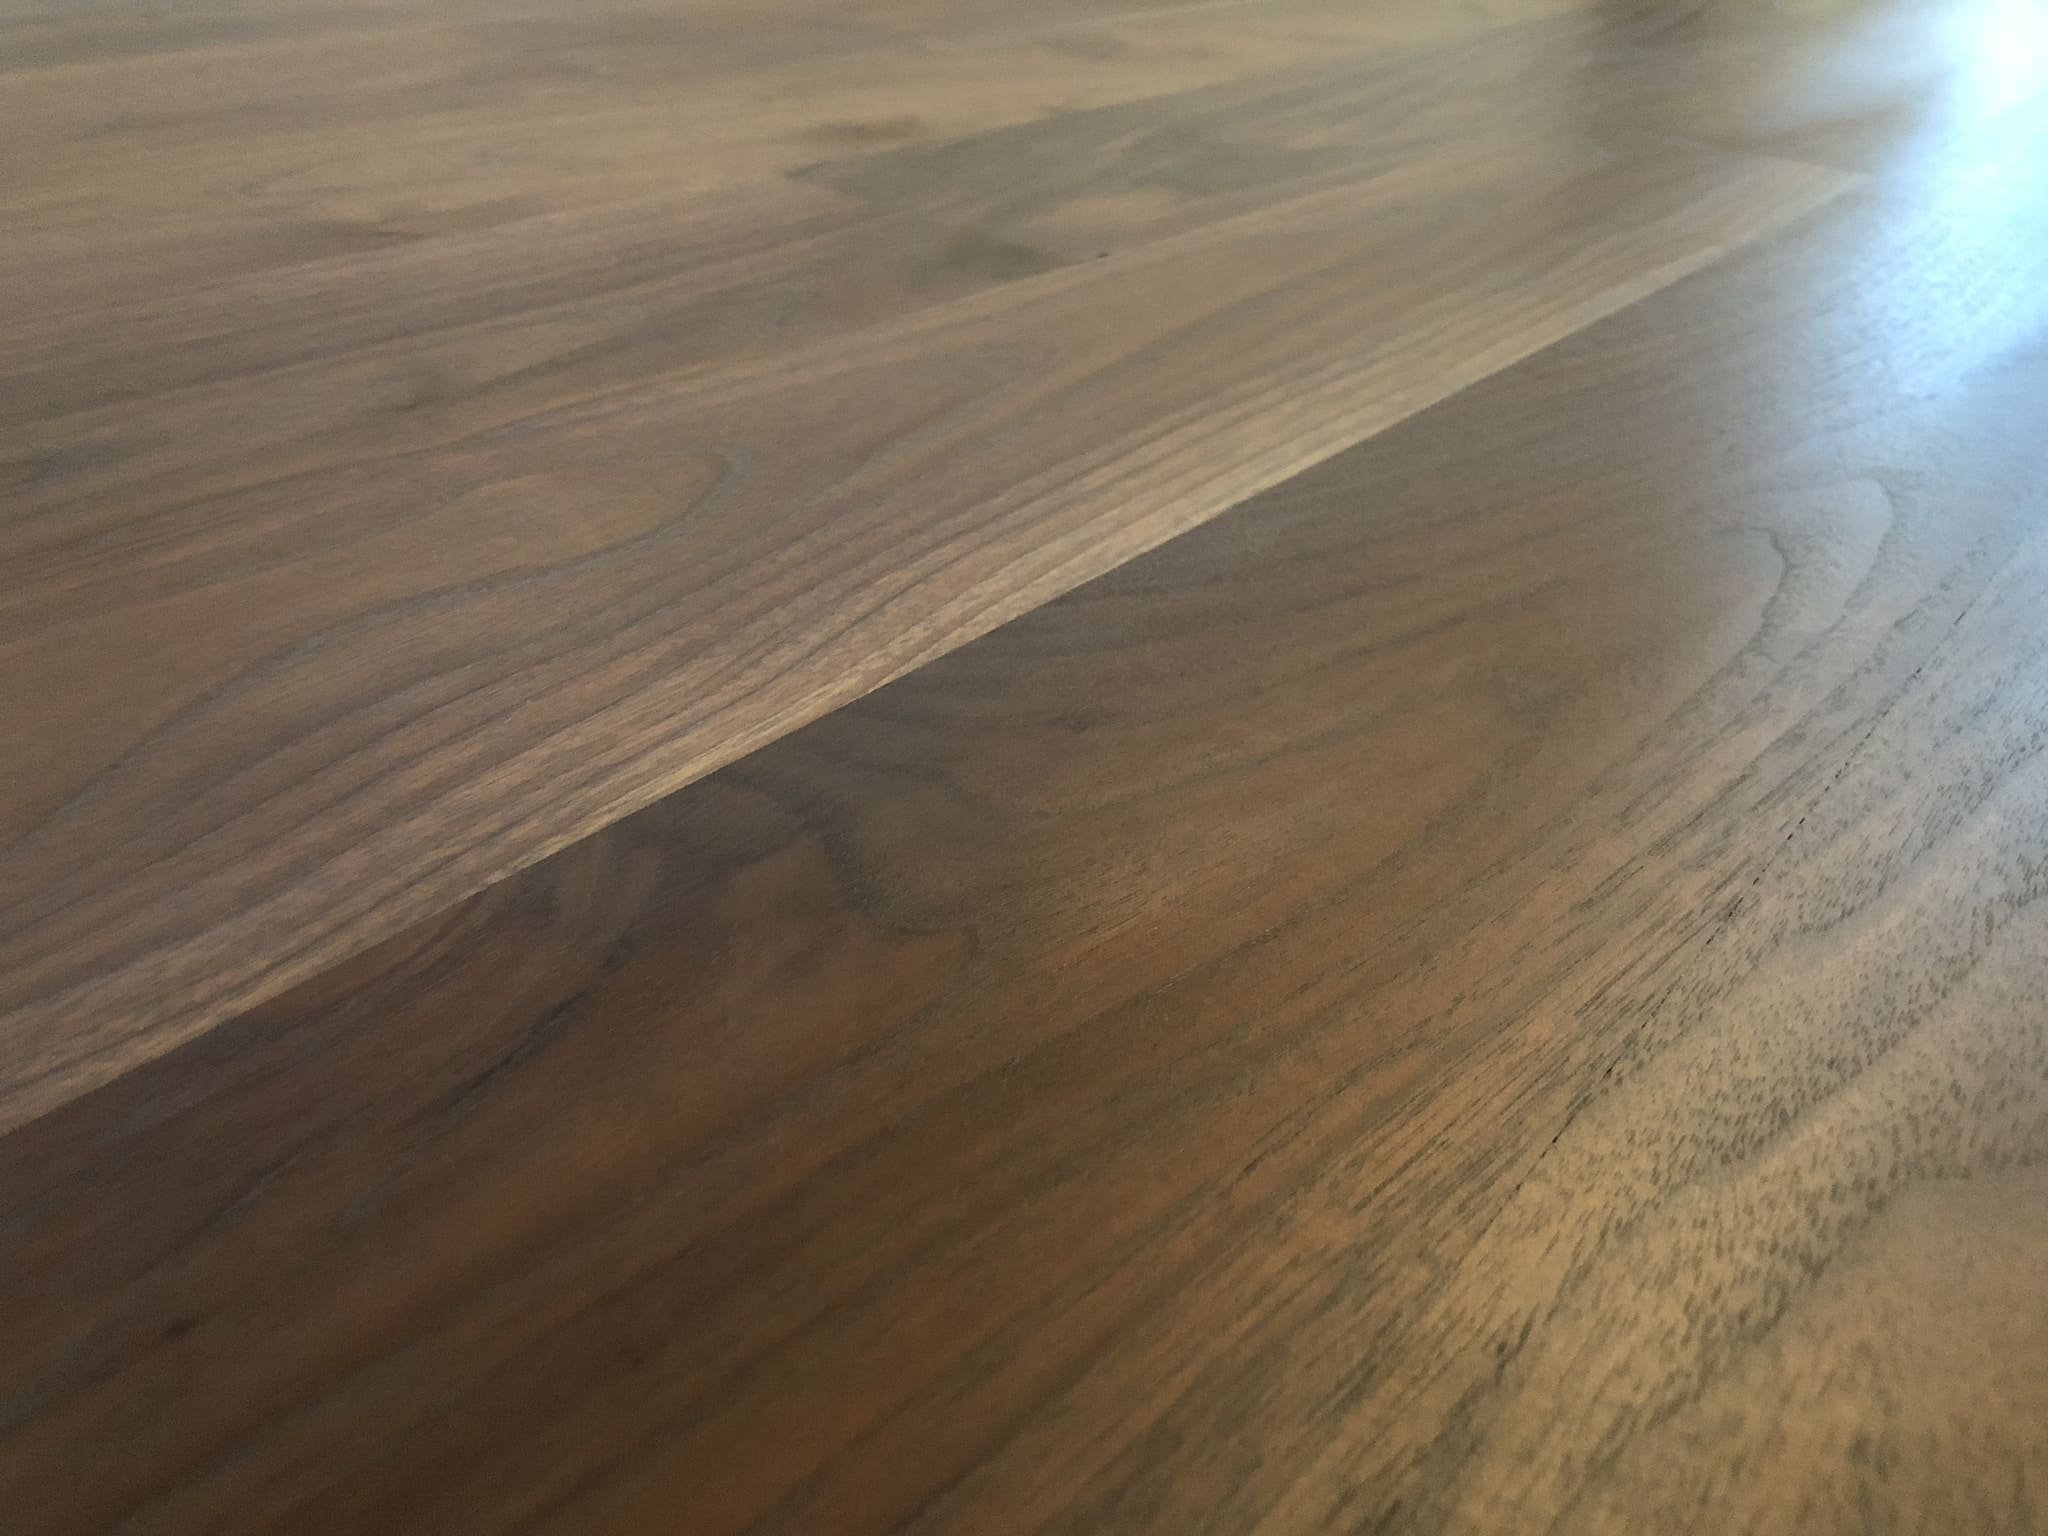
Color selections were in! The homeowner knew exactly the color they had wanted, and if I’m being honest, I think it was a perfect pick. They decided to choose Special Walnut. A color that would be perfectly fitting for the home. It was something that would not only make things a bit more modern, but wouldn’t be too drastic of a change from what they had before. Also, it was a color that we knew would play very nicely with the wooden cabinetry in the entire kitchen. It was time to get messy, it was time to sling some stain!
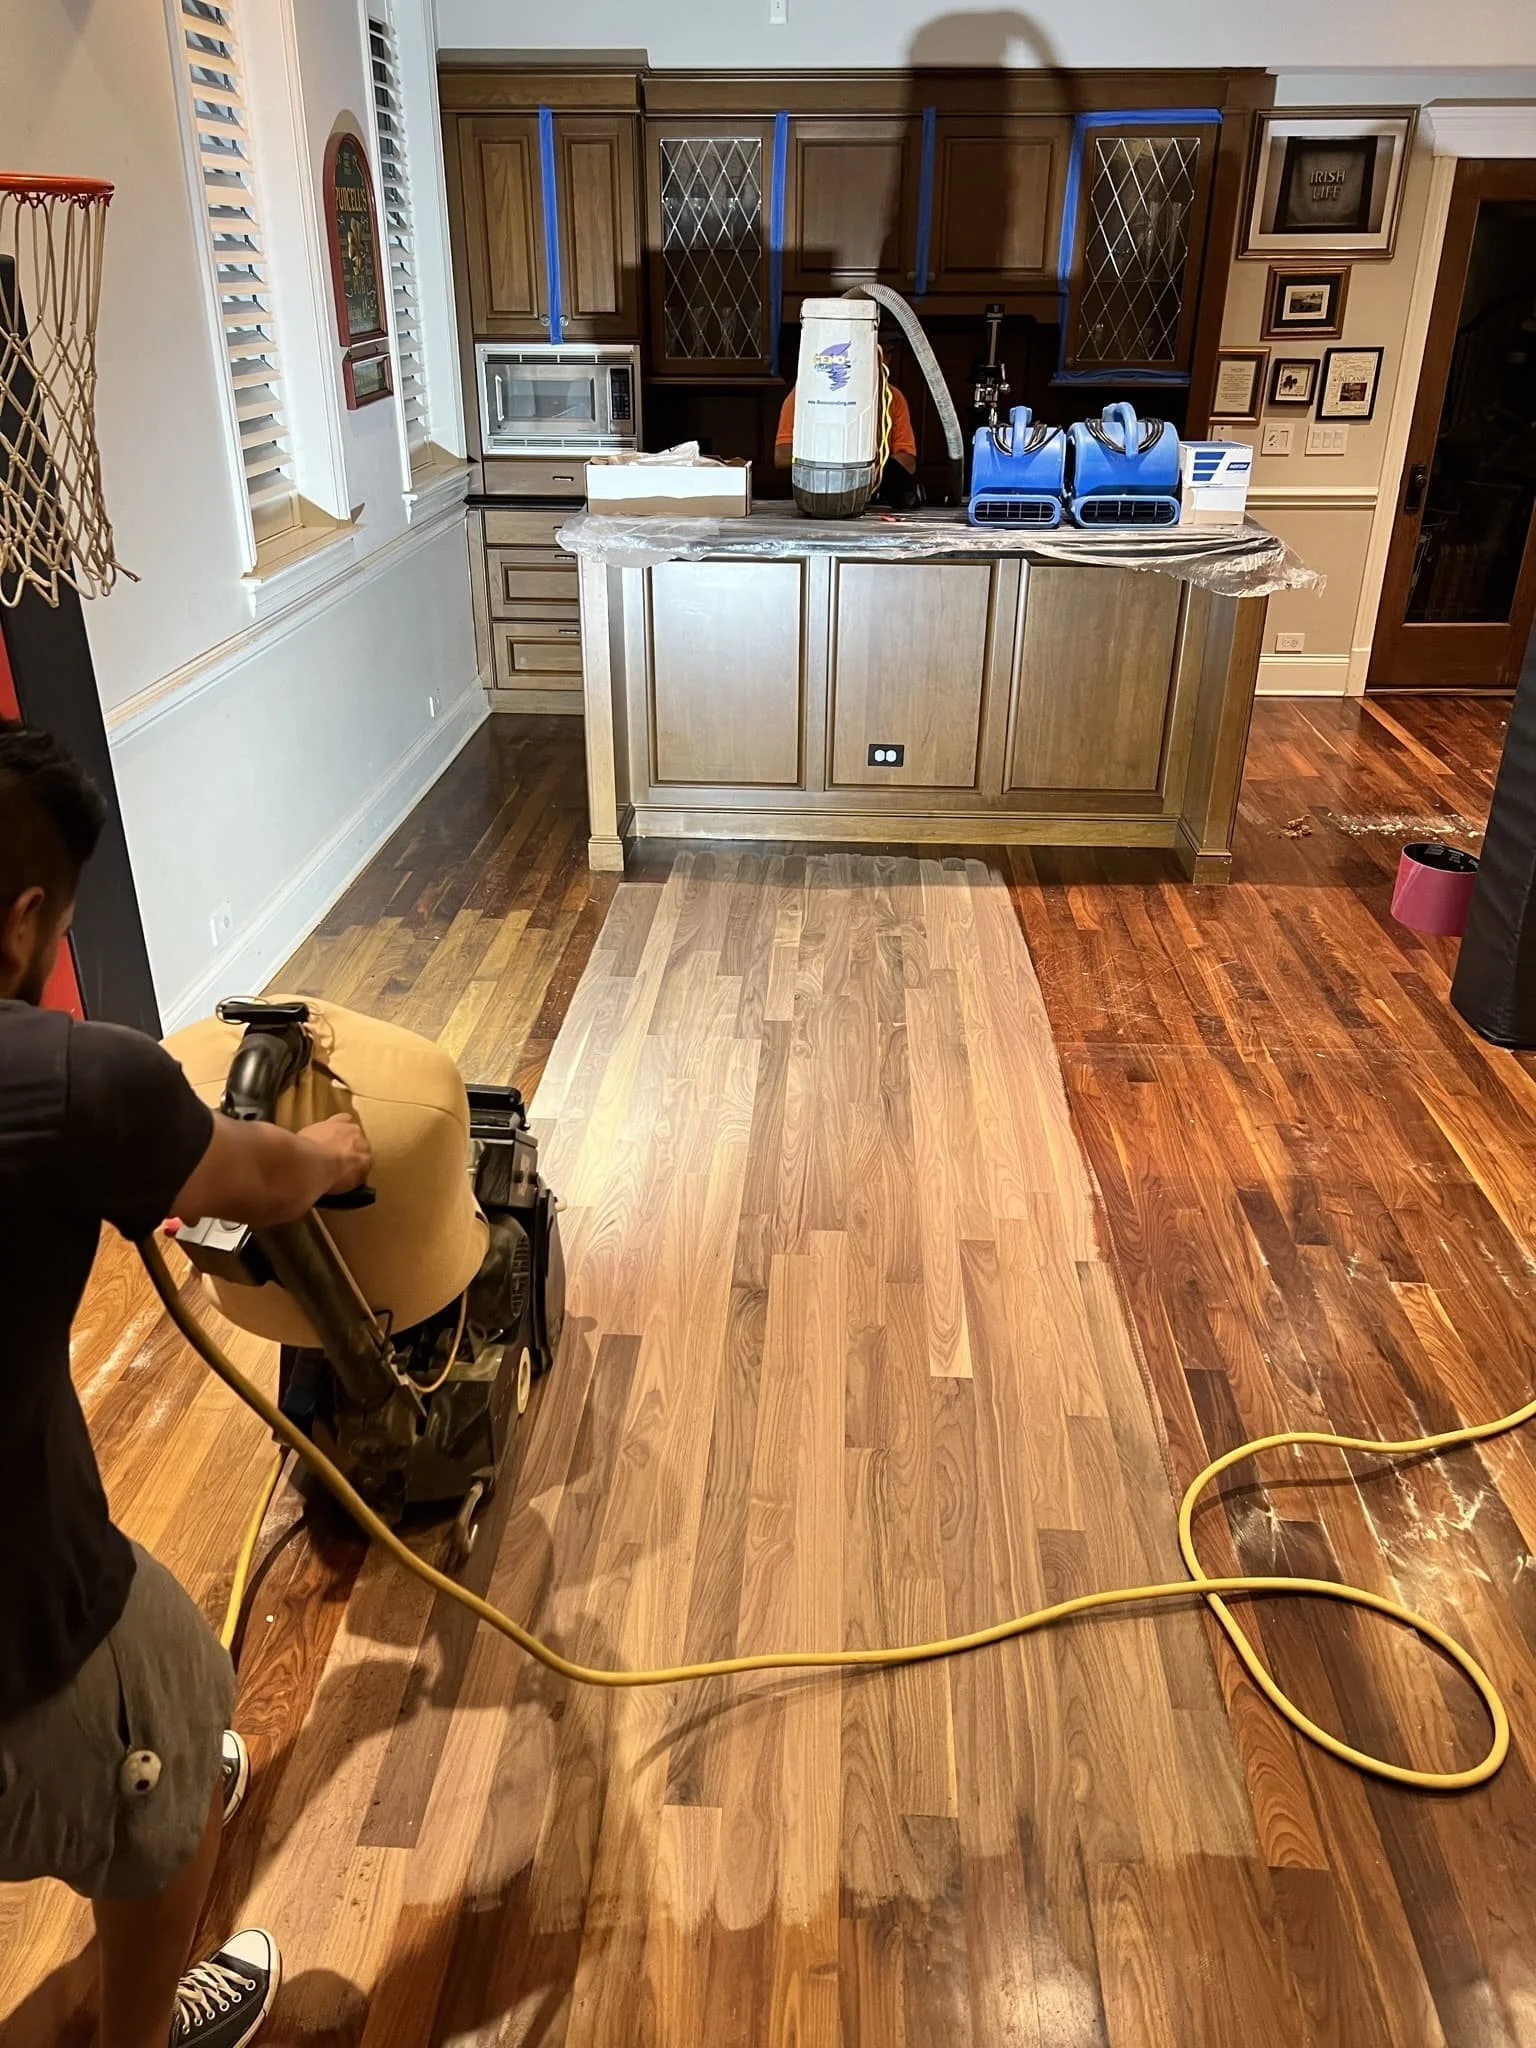
Floor stain application timelapse in kitchen
Flooring Finish Application
Well folks, my favorite day of the project was finally upon us, the final finishing day! Staining had gone incredibly well the day prior. The stain applied perfectly even, and there weren’t even any spots that needed any touching up. It applied incredibly well over both the old floors as well as the new ones. A difference between old & new was now completely impossible to see.
I personally enjoy applying stain with a buffer using carpet pads. I feel like it goes a bit quicker, and certainly uses way less stain than doing it by hand. But that still doesn’t save you from the edges! All of the edges everywhere still need to be done completely by hand. Buffed on, and buffed off with rags. To minimize mess, we initially cut all of the edges in with a brush. However, when staining a floor, paint touch ups will ALWAYS be necessary. Because of how quickly we have to work applying it in order to avoid lap marks, leaving marks on white base boards is always inevitable.
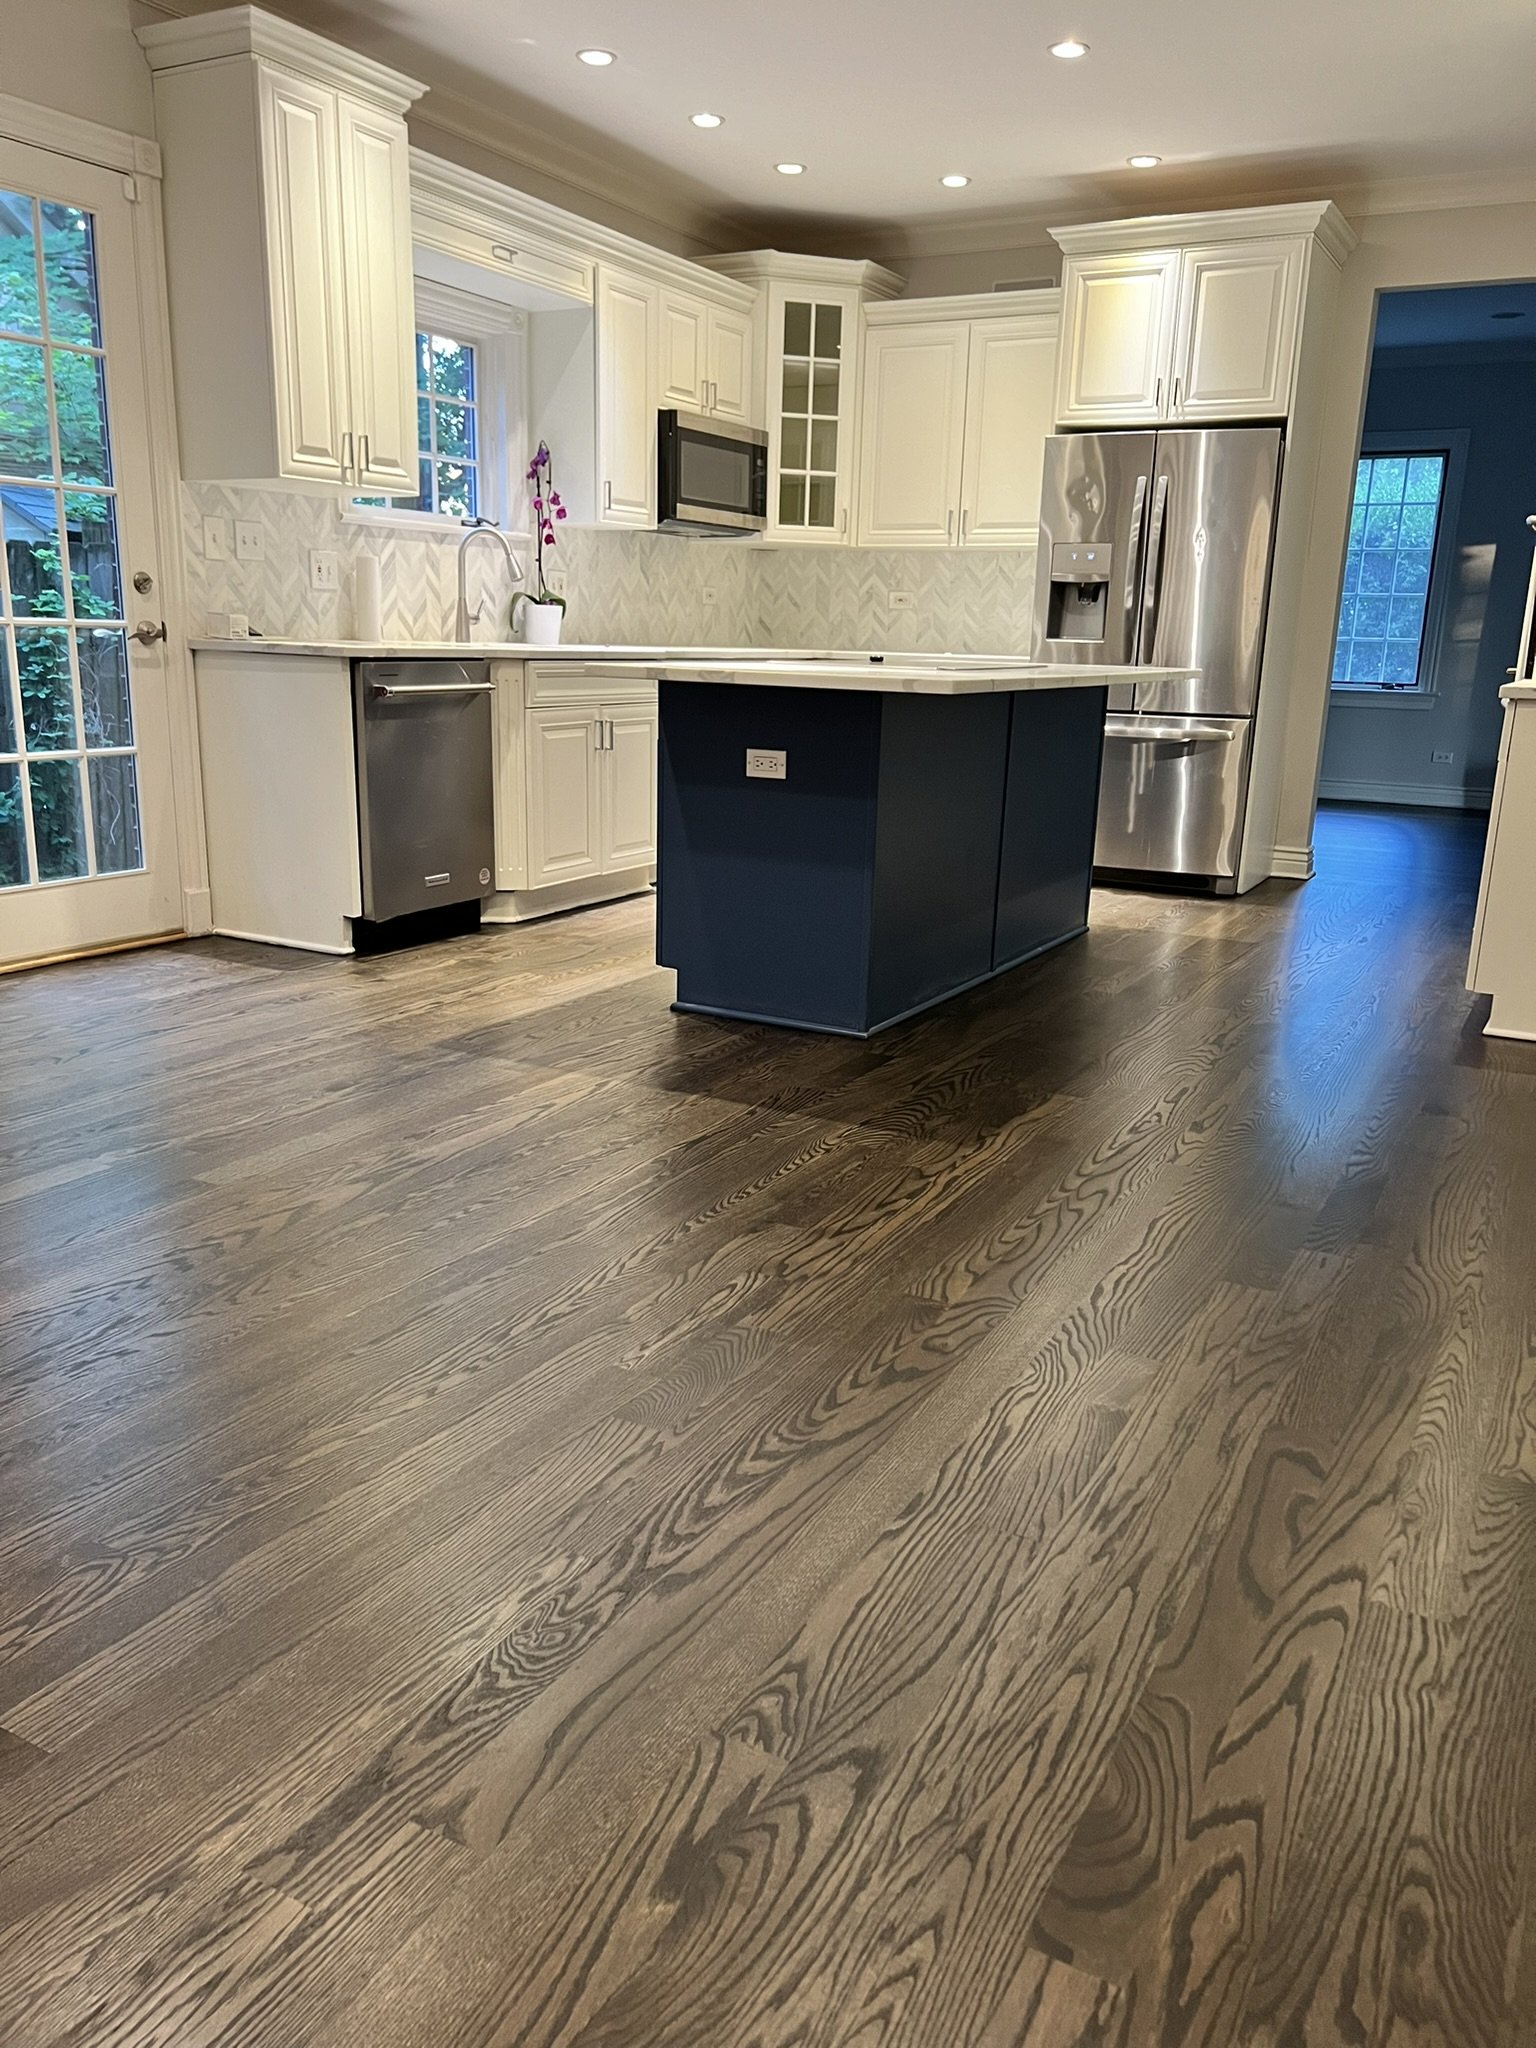
After a full day\night cycle of drying time, the floors were ready for the finish application. On this project, the homeowner opted for our Elite water based finishing package. I always recommend this option as it is incredibly beautiful. And lets be honest, oil based poly is so out dated these days that using it is just more of a hassle than anything else!
Applying water-based hardwood flooring finish
Finished Project!
The time had finally come! All that hard work, all of the blisters, all of the chugged cans of Redbull & Coffee! Was it worth it? I’ll quit blabbering and let you decide for yourselves my wonderful friends…


But Pat…
Whoa, whoa, whoa. Wait just a second. I know what you’re asking yourself, “Pat, did you really leave the staircase like that? It looks terrible! WTF?”
Yes, yes I did. I thought that closing out here at the end, it would be a great opportunity to show people the realistic expectations you must have with a project this large, and how it can sometimes be very difficult to visualize the end result even AFTER our flooring work is completed.
Our work was concluded, but that doesn’t mean that the project was concluded. Remember what I mentioned to you in the beginning of this blog post? Paintwork must ALWAYS come after flooring work. All portions of the staircase that still look ugly, had to get painted! Yes, we could have actually finished those brand new posts with stain to look like the floors, but for more of a modern look, the homeowners opted to paint them white as well. And ya know what? I think it came out looking incredible! So fear not, my fellow bloggers, I’ve saved the best for last. Your final, finished photo, with this incredibly beautiful staircase fully finished and painted.

Fully finished project after staircase paintwork was completed
concluding thoughts
Well hey, if you’re still here and you’ve made it this far, thanks for reading this. I hope you enjoyed our fun Hardwood Flooring project in Barrington Illinois. Hopefully by this point, you’ve happily realized that this post wasn’t written by ChatGPT or some crazy AI. Even though, most days, I worry that AI is taking over the world and we are going to somehow end up in some weird version of either The Matrix or I, Robot. Haha. Guess until that happens, I’ll just keep chugging along and sanding floors.
If you happen to be interested in the flooring services that I offer, and you have a project in the area, don’t be shy. You can always reach out to me here. I offer all types of hardwood flooring services.
Have a good day kitties, I love you all.
-Patrick
Hey before you go, want to see something super cool? Check this out.
Lol jk. The Amazon affiliate link helps me pay for the massive amount of time it takes to write these stories out and upload so many photos, especially as a full time small business owner. So if you just pressed the link & hit me with some commisshhh, I appreciate it. Also, thank you, Mr Jeff Bezos, please don’t kill me.

Boosting Resale Value: Luxury Vinyl Plank vs. Engineered Hardwood
Two of the most popular options for upgrading your floors are luxury vinyl plank and engineered hardwood. Dive into the benefits of each as we explore increasing the resale value of your home.
Hardwood floors have the potential to increase the value of your home. But with a variety of choices available, it’s not always clear which option delivers the most bang for your buck. In this blog post we'll sort through the differences between luxury vinyl plank and engineered hardwood, two popular options known for their appeal and ability to enhance resale value. Get ready to give your home a flooring makeover that will impress both you and potential buyers!
Durability of Luxury Vinyl Plank
Luxury vinyl plank has gained immense popularity in recent years — and for good reason. Luxury vinyl plank is designed to mimic the look and feel of natural hardwood while offering exceptional durability and low maintenance. It's constructed with multiple layers, including a wear layer that protects against scratches, stains, and moisture. This makes luxury vinyl plank a fantastic choice for high-traffic areas, families with pets, or homes prone to spills. Luxury vinyl plank is also highly resistant to fading, making it ideal for rooms with abundant natural light. With a wide variety of styles, colors, and textures available, you can find luxury vinyl plank that perfectly suits your aesthetic preferences and complements your home's design.
Beauty of Engineered Hardwood
Engineered hardwood is renowned for its timeless appeal. It's constructed by layering real wood veneers on top of high-quality plywood, resulting in a durable and stable flooring option. Engineered hardwood offers the authentic look and feel of solid hardwood while providing better resistance to moisture and temperature fluctuations. This means you can install it in areas like basements or kitchens without worrying about warping or cupping. Engineered hardwood comes in various wood species, grains, and finishes, allowing you to find the perfect match for your home's style. Its natural warmth and elegance can create a sense of luxury that appeals to potential buyers.

Comparing Resale Value
In terms of resale value, both luxury vinyl plank and engineered hardwood have their advantages. Luxury vinyl plank tends to have a lower upfront cost compared to engineered hardwood, making it an attractive option for budget-conscious homeowners. Its durability and low maintenance requirements can be appealing to buyers looking for a hassle-free flooring solution. Engineered hardwood, on the other hand, offers a higher-end and premium look that can elevate the perceived value of your home. Its natural wood beauty and long-lasting quality can make a lasting impression on potential buyers.
Ultimately, the choice between luxury vinyl plank and engineered hardwood depends on your specific needs, budget, and style preferences. It's essential to consider factors such as the condition of your home, the neighborhood's market expectations, and the overall aesthetic you want to achieve. Consulting with a flooring professional or real estate agent can provide valuable insights tailored to your situation.
As you weigh the benefits of luxury vinyl plank and engineered hardwood for increasing the resale value of your home, remember to consider factors like durability, maintenance, cost, and aesthetic appeal. Luxury vinyl plank offers luxurious durability, while engineered hardwood provides timeless elegance. Both options can enhance the value of your home and attract potential buyers.
As always, we're here to help you make an informed decision and achieve the home of your dreams. Send us a message if any questions or concerns pop up during your decision-making process.

Gleaming Elegance: Your Guide to Cleaning and Maintaining Hardwood Floors
In this blog post we will go over best methods and practices on how to clean your hardwood floors. We will also go over some preventative maintenance as well as good future proofing solutions.
Ahh yes…by far the most frequent question that I have ever received from homeowners. Floor cleaning and floor maintenance questions. Sit back, we’re going to deep dive this topic today with some helpful tips and suggestions for all of you homeowners! Also, with the holidays quickly approaching, if you’d like to learn how to protect your beautiful floors after you’ve cleaned them, check out my other blog post from a few years ago.
Start with a Gentle Touch
✨ Gentle Beginnings: The Art of Regular Cleaning ✨

Your hardwood floors, like a fine piece of art, deserve a delicate touch. Begin your cleaning routine with a soft broom, tack cloth, or vacuum equipped with a hardwood floor attachment. This ensures you whisk away dust and debris without scratching the surface. Embrace the tranquility of a clean slate beneath your feet!
Mop Mastery: Navigating the World of Hardwood-Friendly Cleaners
🌊 Mop Magic: Choosing the Right Cleaning Solution 🌊

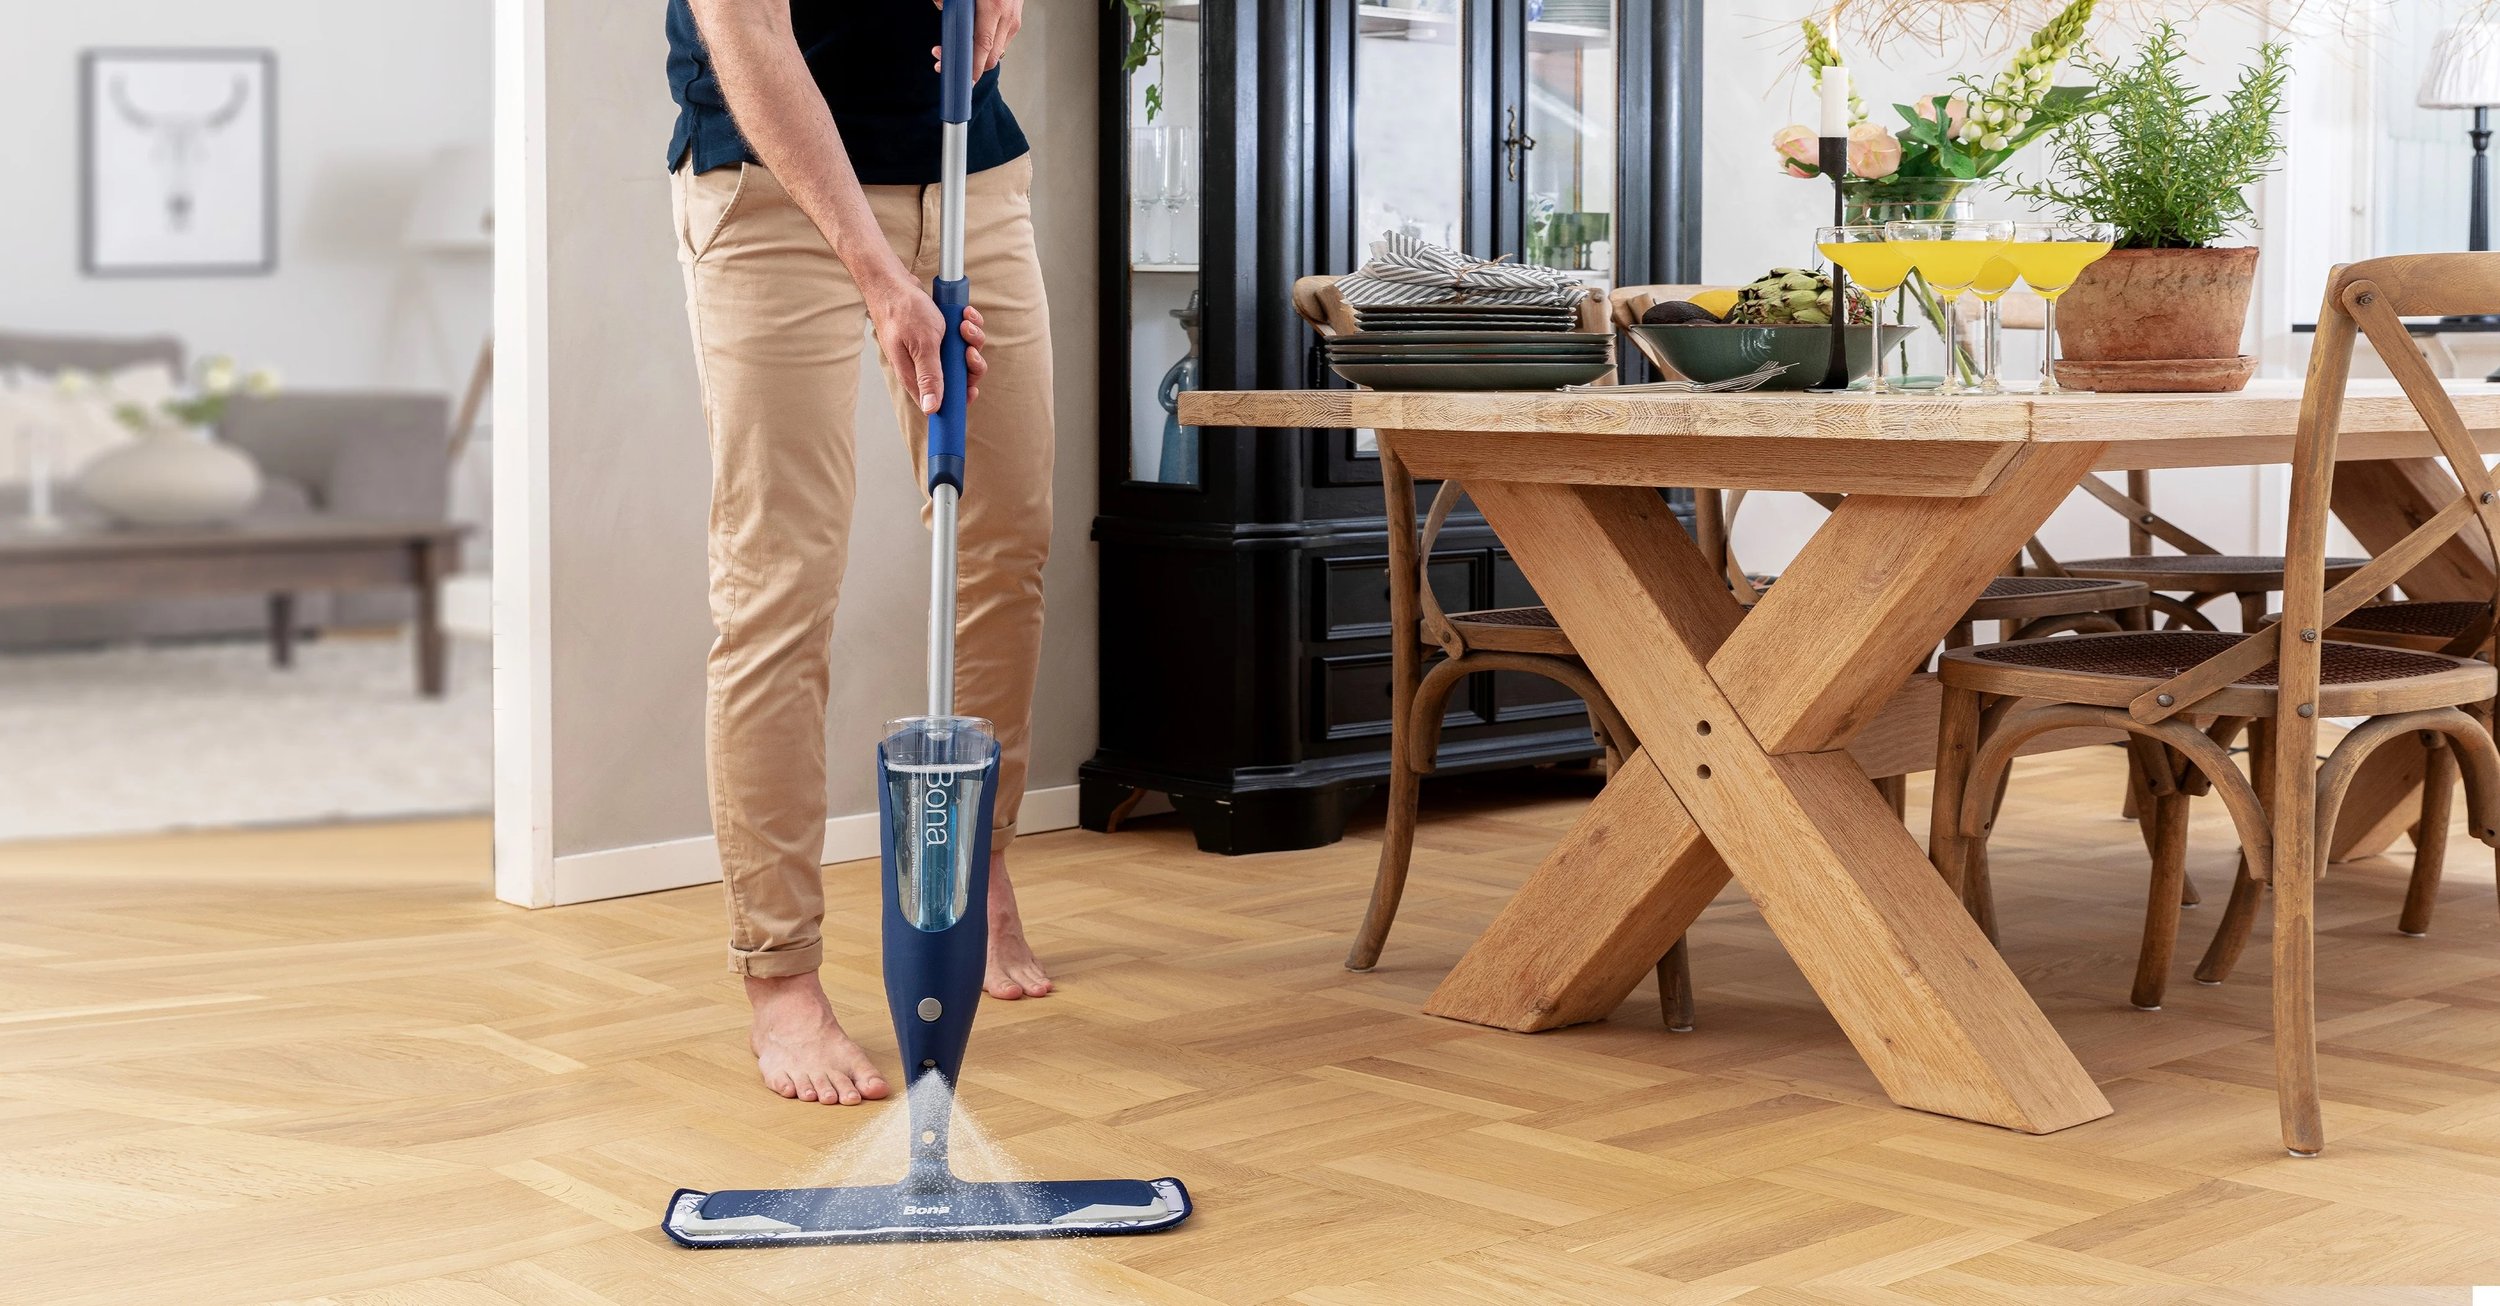
Once the dry sweep is done, it's time to bring out the mop! Choose a pH-neutral hardwood floor cleaner for a spa day for your floors. DO NOT use any cleaners with wax based products in them. Stay far away from products that claim to “shine up” or “rejuvenate” your floors. Use only water based cleaners, I recommend Bona cleaning solutions or Loba cleaning solutions. These cleaners gently lift away dirt without compromising the integrity of your wood. A lot of these cleaners also include the tack mops into their packages. But remember, excess moisture is not a friend to hardwood, so wring out that cloth mop well while enjoying the therapeutic act of preserving your floors' brilliance.
Banish the Scuffs: Navigating the Dance of Prevention and Protection
🚫 Scuff-Free Paradise: Protective Measures 🚫

Prevention is the key to maintaining hardwood floors that stand the test of time. Place felt pads under furniture legs, use area rugs in high-traffic zones, and banish those high heels indoors! To revive your floors' natural luster, consider periodic buffing and recoating. This simple act not only adds a brand new sheen to your floors, but it also acts as a shield against everyday wear and tear. I usually recommend recoating your floors once every 3-6 years. This is a service we perform in house and it usually only takes a day. It removes all minor scuffs and scratches.
Conclusion: Elevate Your Floors with Refinishing Expertise
Your hardwood floors are a testament to your home's timeless beauty, and proper care is the secret to keeping them gleaming for generations. If you dream of restoring that initial radiance or want professional advice on maintaining the grandeur of your hardwood, we're just an email away. Let's embark on a journey to revive and elevate your hardwood floors, ensuring they remain the focal point of your home's elegance. Contact us today, and let the transformation begin!

Eco-Friendly Hardwood Flooring Options for Your Home
Eco Friendly flooring options are important for a modern home. Find out some great tips and advice on how to choose the best eco friendly flooring for your home remodeling project today.
Well hey there fellow homeowner. My name is Patrick and I have a question for you. Are you dreaming of a home that echoes sustainability without compromising on style? Look no further than this blog post! These beautiful and environmentally conscious flooring choices not only elevate your space but also contribute to a healthier planet. Let's explore five tips to help guide you towards making the best eco-conscious decisions for your home.

Species Selection for Sustainability
🌳 Tip 1: Choose Wisely, Choose Sustainably 🌳
When opting for hardwood floors, consider choosing sustainable wood species. Look for certifications like FSC (Forest Stewardship Council) that ensure responsible forestry practices. Some popular sustainable woof floor species choices are: Oak, Hickory, and Maple. Any of these wood species will make your floors a statement of environmental responsibility. If you need some more help in choosing the right species of wood, check out my other blog post here!
Finishes Matter: Go for Non-Toxic Options
🍃 Tip 2: Beauty Without Harm 🍃
Eco-friendly flooring extends beyond the wood itself. You must be sure to always select finishes that are low-VOC or water-based to minimize indoor air pollution. Not only do these finishes contribute to a healthier living space, but they also bring out the natural beauty of the wood, ensuring your floors are both stunning and safe. Two wonderful finishes we use that are also Eco friendly are Loba (a water-based finish) and Rubio Monocoat (an eco friendly hardwax oil).

Applying Rubio Monocoat With a Trowel
Engineered Hardwood for Sustainability
🔨 Tip 3: The Strength of Engineered Solutions 🔨
Consider engineered hardwood for an eco-conscious alternative. It utilizes less solid wood, incorporating layers of sustainable materials, making it a durable, stable, and environmentally friendly choice. This innovation allows you to enjoy the elegance of hardwood without compromising on responsible resourcing. The only downside of this type of flooring compared to a solid site finished floor, is the beveled edges. Sometimes these bevels can catch and trap a lot of dirt in them, so also keep this in mind when considering this type of flooring.
Recycled Wood: A Second Life for Your Floors
♻️ Tip 4: Embrace the Past, Redefine the Present ♻️
Give your old wood a new purpose by opting to refinish the floors that you currently have inside of your home. Many old floors can be fully salvaged through refinishing. These old refinished planks bring history and character into your home while reducing the demand for new timber. It's not just a floor; it's a story beneath your feet.

Floor Sanding in Progress
Local Sourcing and Installation Expertise
🌏 Tip 5: Think Global, Source Local 🌏
Reducing your carbon footprint is a crucial step in creating an eco-friendly home. Choose a local supplier to minimize transportation emissions, and don't forget to hire experienced professionals for installation. Their expertise ensures that your beautiful, sustainable floors are laid with precision, enhancing both longevity and aesthetics.
Conclusion: Let’s Transform Your Home!
Ready to make the leap to eco-friendly hardwood floors? Our team is here to guide you through the process, from choosing the perfect wood to ensuring a flawless installation. Together, let's create a home that not only captivates but also cares for our planet. Contact us today to begin your journey towards a greener, more stylish space!

Patrick's Quick Guide to Selecting Your Ideal Hardwood Flooring
There's a lot to consider when it comes to picking out the right hardwood flooring species for your home. Join us as we dive into the specific characteristics that make each species stand out from the crowd.
Well hey there fellow homeowner! My name is Patrick, and I'm thrilled to be guiding you through the fascinating journey of choosing the perfect hardwood flooring for your home. Selecting the right flooring can seem overwhelming with so many beautiful options out there. That's why I've put together this quick but detailed guide to help you navigate these choices with confidence and ease. So, grab a cup of coffee and let's get into this wonderful world of hardwood flooring!
Understanding Hardwood Flooring

Installing a White Oak hardwood floor mid-process
As a passionate advocate for the timeless beauty of hardwood floors, I believe in the transformative power they hold. They're not just floors; they're a canvas for your life's memories. In this post, I'll explain what makes hardwood an outstanding choice, delve into its benefits, and show you the main wood choices that are available for a new hardwood floor.
Choosing the Right Hardwood Flooring Species
Each species of hardwood flooring has its own unique story, texture, and character. Let me walk you through some of my favorites, and the main options I’d recommend considering for your own home:
Oak: Classic Elegance

Close up of a raw Red Oak floor after just freshly being sanded with the Lagler Trio
Oak is a personal favorite of mine for its versatility and strength. Its grain patterns range from subtle to bold, making every Oak floor uniquely charming. Ideal for both contemporary and classic interiors, it's as resilient as it is beautiful, perfect for any area of your home. Oak also has incredible sanding and staining qualities. This wood looks beautiful whether you finish it naturally, or apply a stain to it.
Keep in mind, that with this wood, you have another subset of options to choose from. If you choose Oak for your home as most people do, you will still be left with the choice of deciding whether you’d like Red Oak floors or White Oak floors. I’ve got a blog post that can help you figure out exactly which type of Oak you need right here!
Maple: Light & Modern

Maple hardwood floor finished with Loba Invisible
For those who love a clean, modern look, Maple is a top contender. Its smooth grain and light color bring a bright and airy feel to any room. Don't be fooled by its delicate appearance; Maple is incredibly durable, standing up well to the daily hustle and bustle of most homes. Maple is by far harder and more durable than Oak.
Another key point to consider about Maple, is that it does NOT stain well. Sure, you can apply stain to Maple, and we have many times before. But, it is a very unique look that most homeowners do not care for. Maple can appear to be “blotchy” when stained, so if you are leaning in this direction, please take the time to research exactly how your Maple will look after the stain color you choose.

Fully stained & finished Maple floor (I chose a stained Maple picture so you can see the “blotchy” that everyone describes)
Brazilian Cherry: Bold and Exotic
Freshly finished Brazilian Cherry hardwood floor, finished with Loba Supra 2k
If you're looking to make a statement, look no further than Brazilian Cherry. Its deep, rich hues and intricate grain patterns are absolutely mesmerizing. Perfect for creating a warm, inviting atmosphere, it's as sturdy as it is striking. This wood is extremely tough & durable, it will hold up perfectly to any occasion.
The main drawback of this wood, however, is that it is very RED. The longer that the floor sits after being finished, whether it be with a water or oil based finish, this wood floor species will continue to turn a deeper and deeper red color.
Walnut: Timeless Sophistication

Preparing a Walnut floor for the final coat of floor finish
There's something undeniably luxurious about Walnut. Its rich, dark tones and swirling grain patterns add elegance and depth to any space. It's a superb choice for those seeking sophistication and durability in equal measure.
Usually, this wood tends to be a bit softer than the other ones that I listed here today. Walnut is still plenty durable, just simply not as hard as some of the others. The trade off for the higher price and softer floor, though, is a floor that will surely be a conversation started for anybody that enters your home. This wood looks very unique, very high end, and is very difficult to source in large quantities.
Other Considerations for First-Time Buyers
At the end of the day, choosing the right hardwood flooring species involves considering various factors such as durability, aesthetics, and personal preferences. Oak offers classic elegance and versatility, while Maple provides a modern and clean look. Brazilian Cherry brings exotic charm, and Walnut delivers timeless appeal. By understanding the characteristics of each hardwood flooring species, you can make an informed decision that aligns with your home, budget, and lifestyle.
Conclusion: Making Your Decision
Take your time, explore samples, and consider factors like durability, maintenance, and color compatibility with your existing decor. Ultimately, the perfect hardwood flooring species will not only enhance the beauty of your home but also provide long-lasting comfort and value.
If you ever have questions or need some advice, feel free to reach out. I'm here to help you find that perfect hardwood flooring that you'll love for years to come.

Can My Wooden Floor Be Refinished?
Wondering if your floor can be refinished? Join us through the process of revamping hardwood floors, from assessment to rejuvenation. Discover expert tips. Because your floors deserve a second chance to shine!
Hey there, amazing readers! It's Patrick, your friendly hardwood enthusiast, back for another exciting exploration into the world of home transformation. Now, let me set the scene for you – picture this: you stroll into a room, and bam! Your eyes are greeted by the warm, inviting glow of a hardwood floor. That timeless elegance, that classic charm – it's a vibe that's hard to beat.
But, here's the scoop – even the most beautiful things need a little tender loving care to stay on top of their game. Enter stage left: hardwood floor refinishing. It's like a magical makeover for your floors, breathing new life into them, making them look as fresh as the day they were installed, and adding precious years to their lifespan. Exciting, right?
Now, I get it. The world of hardwood floor refinishing might seem like a bit of a maze, especially if you're just getting started. But fret not, my friends! This guide is your personal lantern in the labyrinth, ready to illuminate every step of the way. From figuring out if your floor is refinishing-ready to keeping that newfound radiance alive, we're leaving no stone unturned.
So, are you ready to sprinkle some fairy dust on your hardwood floors and bring back their former glory? Well then, grab your metaphorical toolbelt, because we're about to dive headfirst into the wonderful world of hardwood floor refinishing. Let the adventure begin!
Key Takeaways
Assess your hardwood floor’s potential for refinishing by evaluating its type, wear layer and signs of damage.
Repair any damage before refinishing to avoid Issues. The process involves sanding, staining and finishing.
Regular maintenance is key to extend the lifespan of refinished floors by protecting them from wear and tear.
Assessing Your Hardwood Floor's Refinishing Potential

Removing an old Maple floor that was too damaged for refinishing
Before you even start the task of refinishing a wooden floor, it’s important to first very closely evaluate the condition of your hardwood floors. Are they solid wood or engineered? How worn is the top layer? Are there telltale signs that a refinishing is in order? Answering these questions is key to prevent undertaking a task that may be too challenging, or a task that may not even be possible. Understanding each of these aspects will help you better gauge your floor’s refinishing potential.
First off, I’ll identify the type of hardwood flooring that you have. Knowing your floor type can make all the difference in the world when it comes to refinishing. It’ll also help you better prepare for the project. Next, we’ll measure the wear layer of your floor. A floor with a thick wear layer is a green light for refinishing, while a thin one might necessitate replacement rather than refinishing. Last but not least, I’ll guide you to better recognize the signs that your floor might need a refinish.
Ready? Let’s get started!
The first sanding pass on a very old Brazilian Cherry hardwood floor
Identifying the Type of Hardwood Floor That You Have
Are you aware that your hardwood floor type can have a significant impact on its refinishing capabilities? From oak to acacia, from hickory to walnut, each species of hardwood has its own unique characteristics and refinishing needs.
Solid wood floors like oak or hickory can be refinished multiple times, making them an excellent choice for high-traffic areas. Conversely, engineered wood floors, made of a solid wood veneer on a plywood base, may not hold up as well to refinishing. While their rustic charm and wide planks can be a feast for the eyes, the thin veneer can only withstand a limited number of refinishes. Usually just one or two at most. So make sure you know your proper floor type before you start the refinishing process. Now is also a good time to look into whether you’re going to go with an oil-based finish or a water-based finish as well. Check out some of my other blog posts where I discuss the main differences between the two! You can find all of my other blog posts here.
Measuring the Wear Layer

The wear layer of an engineered wooden floorboard
If the type of hardwood floor is the soul of your refinishing project, then the wear layer is its heartbeat. The wear layer is the top layer of your floor that endures the most from daily activities. Every scratch, every scuff, every piece of furniture dragged across it, all these activities wear down this top layer over time. This top layer is the only part of the floor that can be refinished. Once the wear layer is sanded through, the floor will begin cracking and falling apart.
To determine whether your hardwood floor is a good candidate for refinishing, you’ll need to measure this wear layer. The process is quite straightforward and involves using a drill bit, a pinless meter, and a thermo-hygrometer. A wear layer of at least 3/32 of an inch or 2.5mm is typically necessary for a successful refinishing. Anything less than this, and you might need to consider replacing your floor instead of refinishing it. Most times, you can pretty safely eyeball this wear layer.
Signs You Might Need to Refinish
Now that you’ve identified your floor type and measured the wear layer, it’s time to look for signs that your floor might need a refinish. These signs are like a cry for help from your hardwood floors, signaling that it’s time for some TLC.
The most common signs that your hardwood floors need to be refinished include:
Visible scratches
Dents that are becoming more noticeable or have altered the color of the wood
Fading, particularly in rooms with rugs
Water damage, manifested by spots on the wood or darkened areas
If you notice any of these signs, it might be time for a refinish.
The Lifespan of Hardwood Floors and Refinishing
One of the many beauties of hardwood floors is their impressive lifespan. With the right care, solid wood floors can last a lifetime, or even longer! But like any long-lived entity, your hardwood flooring may need a little pick-me-up every now and then to keep them looking their best.
Refinishing can significantly extend the lifespan of your hardwood floors, but it might not always be the suitable solution. There comes a time when replacement, not refinishing, is the best course of action. But, for most homeowners, a good solid refinishing will fix 99% of the issues on your floors.
When to Say Goodbye
While it’s true that hardwood floors have an impressive lifespan, they’re not immortal, and they’re certainly not concrete. Eventually, the wear and tear of everyday life will take its toll, and your floors will reach the end of their lifespan. Common signs that it’s time for a replacement include mold or rot over the hardwood, extreme wear, and compromised integrity. If you can literally feel the floors giving in below your feet, chances are you can’t refinish them anymore.
When to Refinish
For most homeowners, it will really just come down to the physical appearance of the flooring. If the floors are developing a lot of scratches, or if you are noticing that the top polyurethane layer of the floors is almost no longer existent, then it is certainly time for a refinishing. A telltale sign that the protective layer of your floors is too worn down is when the wooden flooring itself starts to turn black and dirty in color.
Below, is a picture of a floor we recently redid in Chicago. As you can tell on the top left corner, you can see the floors had been so worn down in spots that there wasn’t even any finish remaining! So all of the dirt and grime from walking over the floors was just getting ingrained deeper and deeper into the raw wood of the floors. This causes them to look more and more “dirty”.

A very old floor in the city. Notice the discoloration, black dirt\grime, and all of the scuffs as well as scratches
Same floor, same angle after a full sanding + finishing with Rubio Monocoat Hardwax Oil

Same floor finished with Rubio Monocoat, different angle
Preparing for the Refinishing Process
So, you’ve assessed your hardwood floors and determined that they’re good candidates for refinishing. Great! Now it’s time to roll up your sleeves and prepare for the refinishing process. Before you start sanding, make sure your floors are in the best condition possible.
This might involve fixing any issues like loose boards, gaps, or protruding nail heads. It might also involve a bit of patching to ensure that the refinishing process goes smoothly.
But don’t worry, most of these repairs are simple and can be done with basic tools. For example:
You can tighten loose boards with a few nails
You can fill in deep scratches and big gaps with wood putty
If you encounter any nails sticking out of the floor, you can hammer them down with a nail set. Afterwards, fill the hole with wood filler
The Refinishing Process

The first sanding pass on a hardwood floor with our fancy pants Lagler Trio sander
Now that your floors are in their best shape, it’s time to refinish them. This is a multi-step process that involves sanding, staining, and finishing. Each step is crucial to achieving a beautiful and durable finish. I’ve got plenty of blog posts that can guide you through this process step by step.
Don’t be intimidated by the process. With the right tools and a bit of patience, you can breathe new life into your floors. Here are the general refinishing process steps.
Sanding Your Floors

Sanding the edges of a hardwood floor before the next Lagler Trio sanding pass
Sanding is the first step in the refinishing process and perhaps the most important one. It involves removing the old finish and smoothing out any imperfections on your floors. This step is crucial in preparing your floors for the new finish.
To sand your floors, you’ll need a drum or belt sander, a dust mask, and a bit of elbow grease. Start with a coarse grit sandpaper to remove the old finish and gradually move on to finer grits for a smooth finish. Remember to always sand in the direction of the wood grain to avoid scratches and uneven surfaces.
Staining and Choosing Finishes
After sanding your floors, you can start adding color. Staining your floors can enhance the natural beauty of the wood and give your floors a fresh new look. Plus, it allows you to customize the look of your floors to match your home’s decor.
When choosing a stain for your floors, consider the type of wood and the overall look you’re going for. Light stains can bring out the natural grain of the wood, while dark stains can add a touch of elegance and sophistication. Once you’ve chosen a stain, it’s time to apply a finish to protect your floors and keep them looking great for years to come.
Cost Considerations for Refinishing Hardwood Floors

Applying stain with a floor buffer
Refinishing your hardwood floors is a worthwhile investment. Not only does it enhance the look of your floors, but it also increases their lifespan. However, like any home improvement project, it comes with many challenges and a cost. From hiring a professional to doing it yourself, the cost of refinishing your hardwood floors can vary based on several factors.
So, how much is the expected cost of refinishing your hardwood floors? And is it more cost-effective to do it yourself or hire a professional? I’ll try to quickly touch on these questions as I close out this blog post.
DIY vs. Professional Refinishing
If you’re handy and have some time to spare, you might consider refinishing your floors yourself. DIY refinishing can save you a pretty penny, but it does require a significant amount of time and effort. Plus, you’ll need to rent or buy the necessary equipment, which, if not planned properly, can end up costing you more then just hiring someone to do it.
Hiring a professional to refinish your floors can save you time and ensure a high-quality finish. However, professional services come with a higher price tag, typically ranging from $5 to $10 per square foot around our area. Weigh the pros and cons of each option to decide which is the best fit for your budget and schedule.
Maintaining Your Refinished Hardwood Floors

Freshly finished hardwood floors with Rubio Monocoat 2c Pure
After refinishing your hardwood floors, it’s important to maintain their appearance. Regular maintenance can extend the lifespan of your floors and prevent the need for another refinishing down the line.
Proper maintenance involves more than just regular cleaning. It also means protecting your floors from everyday wear and tear. Let’s examine some methods to maintain the look of your refinished floors.
Protecting Against Wear and Tear
Take the following steps to protect and maintain your hardwood floors:
Place felt pads under your furniture to prevent scratches
Avoid wearing shoes or heels in the house to minimize dirt, dents, and grime
Use products specifically designed for hardwood floors when cleaning
Stay away from any cleaning products claiming to “shine up” your floors
With these safety measures in place, you can enjoy the newly refinished hardwood floors in your home for many years to come.
Summary
Revitalizing your hardwood floors is truly a rewarding adventure, one that can infuse a whole new energy into your living space. I've had a blast being your guide on this journey, sharing insights from assessing your floors’ refinishing potential to preserving their newfound radiance. Think of it as a roadmap to a home transformation, crafted just for you!
Now, I understand that diving into the refinishing world might seem like stepping into the unknown, but fear not, because armed with the right knowledge and a dash of enthusiasm, you're fully equipped to restore your floors to their magnificent best. Picture it – the warmth, the glow, the sheer timeless elegance that your hardwood floors are about to exude!
Ready to embark on this exciting venture? Why not kickstart your refinishing journey today? Your floors are eagerly awaiting the magic touch that only you can provide. And hey, if you find yourself in need of a little extra guidance or want to explore professional flooring services, don’t hesitate to swing by our website. There, you’ll discover a treasure trove of tips, and on our contact page, you're just a message away from turning your hardwood dreams into reality. Here's to a future filled with the enduring beauty of your newly refreshed floors. Happy refinishing, friends! 🌟
Frequently Asked Questions
When can wood floors not be refinished?
Wood floors cannot be refinished if they are more than 150 years old, have extreme movement between boards, or have substantial structural problems that require the flooring to be removed and the subfloor fixed. In these cases, a replacement is necessary.
Is it cheaper to refinish floors or replace?
Refinishing your hardwood floors is almost always more cost effective than replacing them due to the additional costs associated with wood, installation, and labor.
Can damaged wood floors be refinished?
Yes, damaged wood floors can typically be refinished if the damage is minor enough. Floors with cracks, scratches, discoloration, mild warping, and gaps can all be repaired through sanding, refinishing, patching, etc.
What type of wood is best for flooring?
Oak flooring is the most popular choice for wood flooring due to its durability, color range and reasonable cost. Other good options include maple, cherry, bamboo, walnut, ash and mahogany, with more exotic species such as teak, jarrah and mesquite available at a higher cost.
How often should I refinish my hardwood floors?
It is recommended to assess the wear layer of your hardwood floor every 15 to 20 years in order to determine when refinishing is necessary.

What is the Best Finish for Walnut Floors? Your Complete Guide
Are you interested in the proper finishes and finishing procedures for Walnut hardwood flooring? In this blog post we include all recommended finishes, waiting times, and safety tips + best practices for your Walnut hardwood floors.
Hey guys, Patrick here! Today is all about Walnut flooring. Walnut floors are undoubtedly a stunning addition to any home, but how do you ensure they stay that way for years to come? The secret lies in choosing the perfect finish. With the right finish, you’ll protect your floors and enhance their natural beauty, ensuring that they remain a focal point of your home. If you aren’t sure about what kind of wooden floors you have in your home, or what kind of wooden floors you want in your home, check out my other blog post which will help you narrow it down!
From understanding the unique characteristics of walnut floors to exploring various types of finishes, we’ll guide you through the most important factors to consider and even provide our top recommendation for the best finish. Are you ready to unlock the secret to gorgeous, long-lasting walnut floors? Let’s go!
The first sanding pass on a walnut hardwood floor
Key Takeaways
Proper finishing is key to protecting your walnut floors, with oil-based polyurethane offering enhanced graining/knotting but higher VOC levels compared to water-based finishes.
We recommend Loba Water Based Finish due to its durability, scratch resistance & low VOCs, hire us or follow the correct application process yourself.
If you’re just here looking for the product, then here is an Amazon link to the best Loba water based finish that I recommend. If you are more interested in going with the less expensive oil-based alternative, here is a link to that one.
Understanding Walnut Floors
Walnut is a sought-after wood for flooring, known for its rich color and unique wood grain. But not all walnut floors are created equal. There are two main types of walnut flooring available: Brazilian and American Walnut, each with their distinct properties and benefits.
Finishing your walnut floors is a pivotal step in safeguarding them from daily wear and tear, including scratches, stains, and moisture damage. A properly applied finish can also enhance the natural beauty of walnut, showcasing its unique grain patterns and color variations. Let’s examine Brazilian and American Walnut in greater detail and understand the significance of selecting the right finish.
Brazilian Walnut vs. American Walnut
Brazilian Walnut, also known as Ipe wood, boasts impressive durability and longevity. With a Janka hardness rating of 3690, it is highly resistant to wear and damage, making it an excellent choice for flooring applications. On the other hand, American Walnut, often referred to as Black Walnut, has a lower Janka hardness rating of around 1010, meaning it’s softer and more prone to wear and damage compared to its Brazilian counterpart. Both types of walnut will require proper finishing to ensure their protection and longevity.
While Brazilian Walnut is denser and more durable, American Walnut offers a wider range of colors, from creamy white to dark brown, and is known for its stability and good shock resistance. Irrespective of the type of walnut flooring you opt for, selecting a suitable finish that enhances the wood’s natural attributes and provides sufficient protection against daily wear and tear is necessary.

Rubiomonocoat samples and finishes on an American Walnut floor
The Importance of Proper Finishing
A proper finish is the key to preserving the beauty and durability of your walnut floors. It not only protects the wood from damage but also enhances its aesthetics by bringing out the natural color and grain. A good finish also makes cleaning and maintenance easier, as it prevents dirt and spills from penetrating the wood surface.
There are various types of hardwood floor finish available, each with its own advantages and disadvantages. Some popular finishes for walnut floors include:
Oil-based polyurethane
Water-based polyurethane
Rubio Monocoat Wax
Other natural finishes
Evaluating the advantages and disadvantages of each type of finish coat, including their sheen levels, is necessary to determine which one will meet your needs and preferences best.
Types of Hardwood Floor Finishes
Oil-based and water-based polyurethane dominate as the most popular choices for residential hardwood floor finishes. Understanding the distinct advantages and disadvantages of each finish type is key before making a decision.
To aid your decision-making, let’s examine the primary types of hardwood floor finishes: oil-based polyurethane, water-based polyurethane, rubio monocoat hard wax oil.
Oil-Based Polyurethane

One quart of Duraseal oil based poly
Oil-based polyurethane is a popular finish made from drying oils like linseed oil, soya oil, or tung oil, combined with a resin. This type of finish provides a warm, amber hue and is known for its durability. However, it has a longer curing time, typically around 30 days, and emits higher levels of volatile organic compounds (VOCs) compared to water-based polyurethane. For a finish like this, it is never recommended to stay inside of your home when it is applied or drying.
Despite its longer curing time and higher VOC levels, oil-based polyurethane can provide a beautiful, durable finish for your walnut floors. It enhances the natural graining and knotting in hardwood planks and offers excellent scratch protection and elasticity. But it might be more susceptible to yellowing over time than water-based finishes, so consider these factors when deciding on what the best finish will be for your specific living situation.
Water-Based Polyurethane

Loba Invisible 2K Water-based Finish
Ah yes, my absolute favorite, Water-based polyurethane. It is an eco-friendly alternative to oil-based finishes an it offers several advantages:
It dries VERY quickly
It has low VOC levels
It forms a strong bond with the wood, making it resistant to scratches, stains, and fading
It provides a clear, natural look that complements walnut floors beautifully
It does not have the yellowing effect of oil-based polyurethane
Although water-based polyurethane may cost more than oil-based polyurethane, it comes with several benefits, such as quicker drying & curing time (around 5 hours) and reduced VOC levels. In my personal opinion this finish not only looks better than the other options, but it also performs much better. If you have a home with pets and children, or you need to be back in your home asap, this is definitely one of the best options available. The choice between oil-based and water-based polyurethane will ultimately depend on your individual needs and preferences.
Rubio Monocoat Hardwax and Other Natural Finishes

Rubio Monocoat Hardwax Oil Finish
Rubio Monocoat and other natural finishes, such as shellac and wax, offer a low-sheen, natural look for your walnut floors. They can enhance the wood’s natural appearance but may not be as durable as oil-based or water-based polyurethane finishes. Over the years, I’ve applied a ton of this finish to floors.
These finishes typically require more work to apply and more maintenance. With Rubio Monocoat, you will need to have it re-waxed and re-applied every three to six years. These are very high end designer finishes and they are going to be by far your most expensive option. The re-application process works a lot like a buff & recoat, the floors will NOT need to be sanded back down to raw wood for a maintenance rewaxing.
While these finishes may not offer the same level of durability to spills and chemicals as a water based finish, they tend to have better scratch resistance because of the low sheen layer. If you have the budget for this option, I actually highly recommend it. The colors that Rubio Monocoat has are unmatched by any other manufacturer in our industry. Also, in my professional opinion, the way the floors physically look when they are finished with Rubio is incredibly unique, and truly stunning.
Factors to Consider When Choosing a Finish
Rubio Monocoat samples on a walnut floor
Selecting the best finish for your walnut floors involves considering factors like durability, aesthetics, and environmental impact. Each finish type comes with its unique set of advantages and disadvantages as we went over, so careful consideration of your options is necessary to choose the finish that fits your needs and lifestyle best.
Consider the purpose of the room, the amount of foot traffic the floor will endure, and your personal preferences for the floor’s appearance. For most customers, I think it mainly boils down to the extra pricing of these finishes as the final deciding factor. Assessing all of these options can aid you in making a sound decision about the best finish for you.
Durability and Maintenance
When choosing a finish for your hardwood floors, durability is a key consideration. A durable finish will protect your floors from:
Everyday wear and tear
Scratches
Stains
Discoloration
However, it is also important to note that wooden floors are not tile or concrete. They can not withstand as much traffic or force as stone can. I always tell my clients to have realistic expectations when it comes to wear and tear on your floors.
Maintenance also plays a significant role. Different finishes may require varying levels of care and upkeep, so it’s critical to choose a finish that aligns with your lifestyle and cleaning habits. For instance, oil-based and water-based polyurethane finishes are sturdy and low-maintenance, while wax finishes might require more upkeep to maintain their appearance. Opt for a finish that provides an optimal balance of durability and maintenance for your requirements.
Aesthetics and Wood Grain Enhancement
The finish you choose can also have a significant impact on the appearance of your walnut floors. Different finishes can bring out different features of the walnut, such as enhancing the warm hues or giving the wood a glossy shine.
Think about how the finish will accentuate the wood grain and improve the overall aesthetics of your walnut floors. You may prefer a clear finish that highlights the natural beauty of the wood, or a warm, amber hue that enhances the wood’s depth and richness. By taking aesthetics into account, you can ensure that your chosen finish will enhance the overall look and feel of your walnut floors.
Lately, the trend has been very matte floors. Most customers don’t even want to look at samples of shiny finishes anymore. And I whole heartedly agree with them. The lower the sheen of the finish that you choose, the more beautiful the flooring project will turn out, in my opinion.
Walnut floor finished with Loba Invisible
Environmental Impact and VOCs
Considering the environmental impact and the levels of volatile organic compounds (VOCs) in the finish is also important when making a decision like this. VOCs are carbon-containing chemicals that evaporate easily at room temperature and can affect indoor air quality.
Oil-based polyurethane finishes generally contain higher VOC levels than water-based finishes, potentially leading to increased indoor air pollution and potential health risks. Consider the VOC content and the possible environmental impact of the finish on your home and the environment when choosing a finish. Additionally, using mineral spirits for cleaning up oil-based finishes is a common practice.
Our Recommendation: Loba Water-Based Finish or Rubio monocoat
Based on my knowledge and experience, I highly suggest either the Loba water-based finish or Rubio Monocoat for your walnut floors. Loba’s 2K InvisibleProtect is an excellent choice for its durability, scratch resistance, and protection against wear and tear. However, Rubio Monocoat is also an excellent choice for it’s very unique looks and special colors. Both finishes do a great job of protecting the natural beauty of the wood while still offering excellent protection from scratches. The Loba will give you more chemical resistance to spills, however the Rubio will give you better scratch protection but will require more maintenance later down the road.
Both of these options also have low VOC levels, marking them as an eco-friendly choice. With their numerous advantages and suitability for walnut floors, it is tough to choose the better finish out of these two. But if I had to choose, for most clients, the Loba water-based finish would be my top recommendation for the best finish to use, not just on your walnut floors, but on any hardwood floors.
Application Process and Tips
Adhering to the correct application process and tips will ensure a successful and long-lasting finish using Loba water-based finish. Begin by sanding the floor to prepare the surface for the finish.
Before applying the finish, ensure that the temperature and humidity are within the ideal range, with a temperature of 68°F (20°C) and a humidity level of 45-55%. Always make sure to use a roller that is acceptable for water-based finish. It must be microfiber, these are the ones we usually use. Wait at least 24-48 hours after applying the finish before placing furniture on the floors to ensure that the finish is fully cured.

Applying the final coat of Loba water based finish
Hiring Flooring Professionals
While you can apply a finish to your walnut floors yourself, hiring a flooring professional can guarantee optimal results for your project. Flooring professionals have the experience, knowledge, and tools necessary to properly install and finish your walnut floors, helping you avoid potential mistakes and ensuring a beautiful, long-lasting result.
When choosing a flooring professional, it is important to:
Do research
Check social media for pictures of their work
Check credentials and licenses
Review contracts and invoices
Undertaking due diligence can help you ensure that you’re collaborating with a competent and reputable contractor who can help you attain the best outcome for your walnut floors.
Questions to Ask Your Contractor
Before engaging a contractor, inquire about their experience, the products they use, and their suggestions for your particular flooring needs. Inquire about their equipment, and ask to see a portfolio of their past projects. Additionally, verify that they are licensed and insured to perform the type of work required for your project.
Asking pertinent questions and collecting information about your potential contractor can help you make a well-informed decision about whom to hire for your floor finishing project.
DIY vs. Hiring a Professional
When deciding whether to handle your walnut floor finishing project yourself or to hire a professional, consider the advantages and disadvantages of each option. DIY can save you money and provide a sense of accomplishment but may also result in accidental damage to the hardwood or a less-than-professional finish. On the other hand, hiring a professional can ensure better results, quicker and more efficient work, and increased home value, but may come at a higher cost.
Take into account factors like your experience, skill level, and the complexity of the project. Keep in mind you will need to rent very specialized equipment in order to do this properly. Walnut, even for professionals, tends to be a very difficult wood to sand correctly. Ultimately, the decision between DIY and hiring a professional will depend on your individual needs, preferences, and budget.
Caring for Your Walnut Floors
Appropriate care and maintenance are key to maintaining the beauty and longevity of your walnut floors. Frequent cleaning and maintenance not only maintain your floors’ appearance but also protect them from dirt and debris that can scratch and erode the floor finish.
Setting up a regular cleaning routine and implementing preventive measures, like using protective pads on furniture and avoiding too much moisture, will help ensure that your walnut floors continue to enhance your home’s beauty for years.
Cleaning Routine
To preserve the beauty and durability of your walnut floors, implement a regular cleaning routine that involves:
Daily sweeping or dusting to eliminate dirt and debris
Spot cleaning spills immediately to prevent stains and damage
Vacuuming every few days to remove additional dirt and dust
Using a damp mop with a soft terry cloth head or a special cleaning mop designed for hardwood floors when needed
Utilizing mild cleaning solutions, like Bona Hardwood Floor Cleaner or a homemade mix of white vinegar and water, can help maintain your floors’ appearance without causing harm. By following a consistent cleaning routine, you’ll protect your walnut floors and ensure they stay looking their best for years to come. If you want to dive a little deeper into the cleaning process and have more questions, check back into my blog in a month as I’ll have a new, very detailed, blog post about it.
Preventing Damage
Besides regular cleaning, you can take several steps to safeguard your walnut floors from damage. Position protective pads or glides under furniture to shield the floors from scuffs and scratches, and (for the love of God) please refrain from dancing or walking in stilettos & high-heeled shoes which can cause dents.
Be mindful of moisture, as excessive moisture can cause damage to walnut floors, such as warping, buckling, or swelling. Place walk-off mats at entrances to help minimize the amount of abrasive dirt and debris that can be brought in onto the floor. By taking these precautions, you can help preserve the beauty and longevity of your walnut floors.
Concluding Thoughts
In conclusion, choosing the perfect finish for your walnut floors is essential for protecting them and enhancing their natural beauty. By understanding the unique characteristics of walnut floors, exploring various types of finishes, and considering factors such as durability, aesthetics, and environmental impact, you can make an informed decision about the best finish for your needs.
With my recommendation of Loba water-based finish and the guidance provided in this blog post, you’re now equipped to choose the ideal finish for your walnut floors! I hope this info helped shine some light on all the different types of finishes that are available for not just Walnut floors, but all hardwood floors.
I hope you enjoyed reading my blog post. I’ve been doing my very best to get new blog posts for you guys and I’ve got a whole heck of a lot more coming. Stay tuned. And as always, reach out to us if you need your floors done!

Up close of a walnut floor fully finished with Rubio Monocoat
Frequently Asked Questions
What is the best Stain for walnut flooring?
Oil-based stains are the best choice for black walnut flooring due to their deep pigments; use a brush, cloth or rag to apply it following the grain of the wood. Wipe it dry once applied.
Should I stain walnut floors?
If you like the natural look of walnut, it's best not to stain it. The colors and texture will stand out well on their own, creating a classic wood look.
How do you make walnut floors shine?
Restore your walnut floor's natural shine by having a simple Buffing & Recoating process completed on the floors. Apply a new coat of finish and the sheen level of the floors will entirely be restored.
What is the difference between Brazilian and American Walnut flooring?
Brazilian Walnut is denser and more durable with a higher Janka hardness rating, while American Walnut offers a wider range of colors and better shock resistance.
Which type of finish is more durable, oil-based or water-based polyurethane?
Water-based polyurethane is generally considered more durable than oil-based polyurethane, as it is better able to withstand dents and other damage. Previously, this used to be reversed. But the water-based products have seen exponential improvement in our industry.

Discover the Impressive Benefits of Engineered Hardwood Flooring
There are many benefits to installing an engineered hardwood floor. Find out all of the benefits and upsides that are involved with engineered hardwood floors in our blog post.
Hey guys, Patrick here. This week I wanted to talk about a question I often get asked by homeowners. “Are engineered floors worth it? Should I get an engineered floor? Will an engineered floor increase my homes value?”
In this blog post, we'll explore the answer to that question and provide detailed information on engineered hardwood flooring. If you haven’t already, check out our blog post back from 2019. This’ll help you narrow down exactly what species of floors will look best in your home.

Durability and Stability for long lasting beauty
Engineered hardwood floors offer exceptional durability and stability, which make them an ideal choice for homeowners seeking long-lasting beauty. Unlike solid hardwood, engineered hardwood is constructed using multiple layers of wood, topped with a solid hardwood veneer. This innovative construction method provides enhanced resistance to moisture, temperature fluctuations, and warping, making it perfect for areas prone to high humidity or temperature changes. With engineered hardwood flooring, you can enjoy the timeless elegance of hardwood without worrying about its susceptibility to environmental factors. The plywood backed layer on the underside of the boards is what helps keep this wonderful stability.
Versatility and Style to Suit Any Home
One of the remarkable advantages of engineered hardwood flooring is its versatility in design and style. Whether your home boasts a traditional, modern, or eclectic interior, engineered hardwood offers a wide range of finishes, colors, and wood species to complement any aesthetic preference. From rich oak to exotic Brazilian cherry, the options are virtually endless. Engineered hardwood also allows for different installation methods, including nail-down, glue-down, or floating, enabling you to adapt the flooring to your specific needs and preferences.
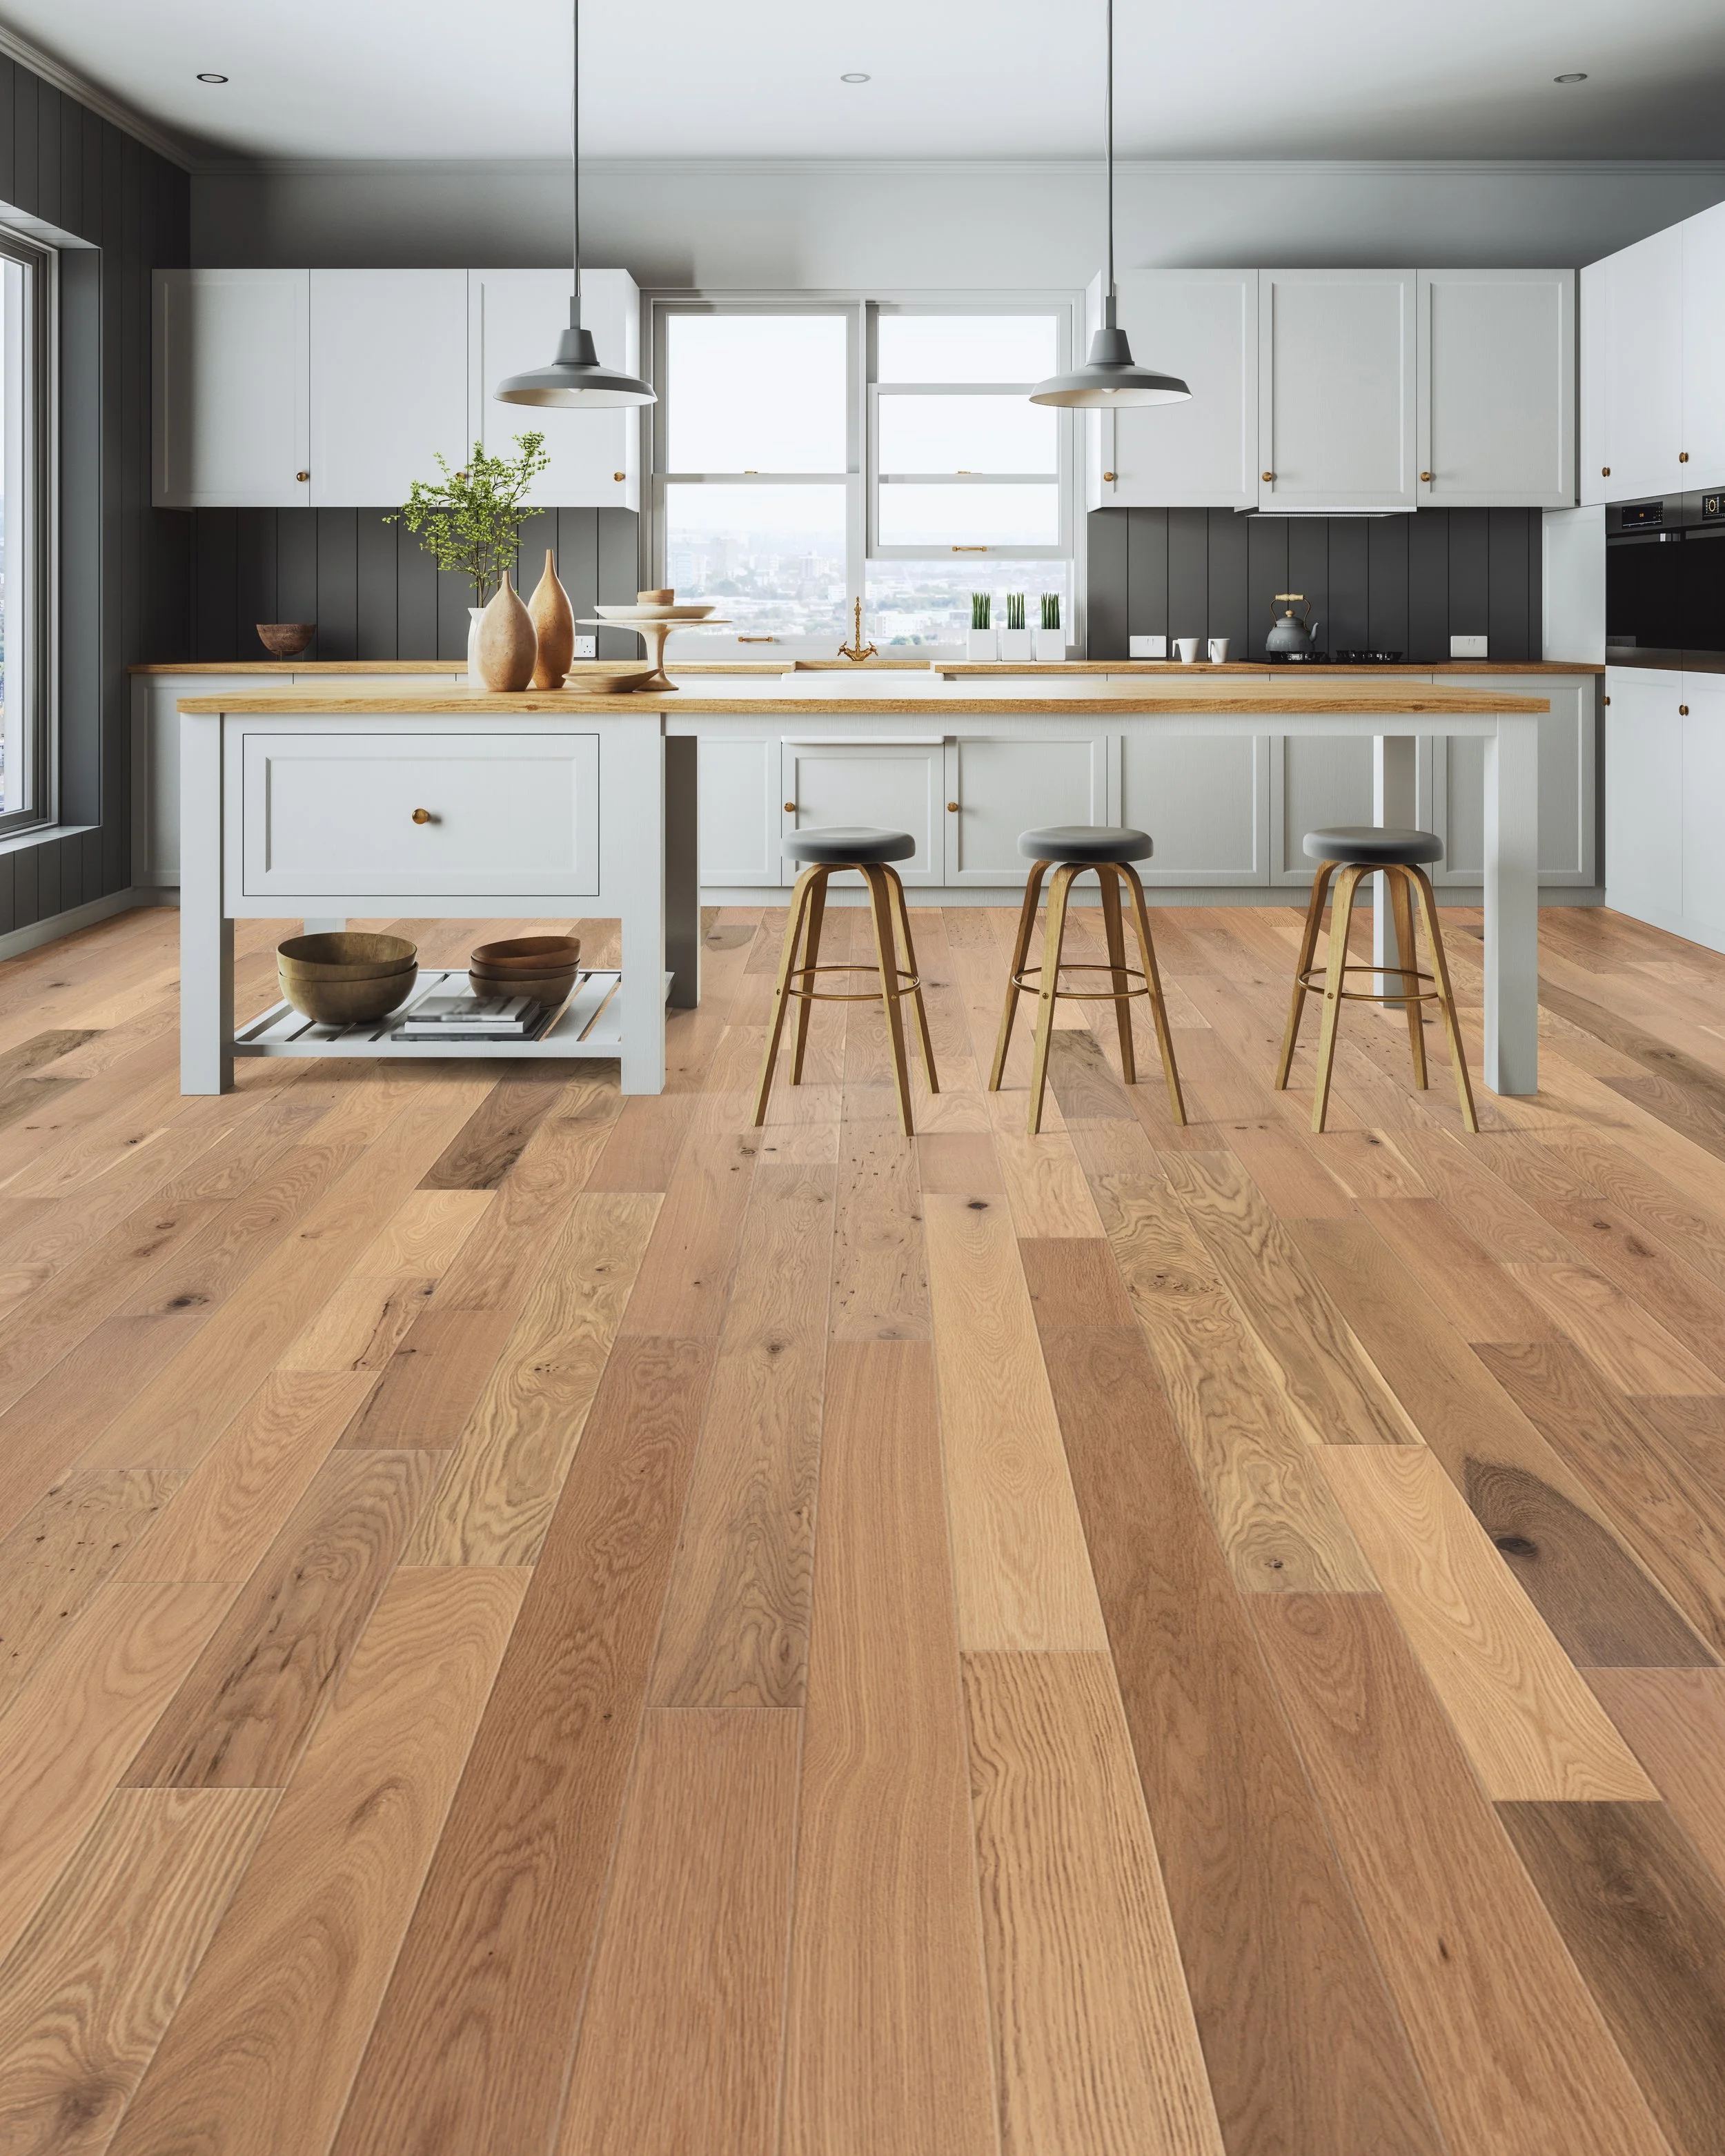
Easy Sourcing and easy Maintenance for Busy Lifestyles
Keeping your floors looking pristine shouldn't be a hassle, sourcing them also shouldn’t be impossible. The good thing about engineered floors is they are very readily available in most big box stores. Even a lot of sites like Amazon now carry some really quality products! Maintenance with engineered floors is a breeze. Its smooth surface and protective finish resist stains, spills, and scratches, making it highly resistant to wear and tear. Regular sweeping and occasional damp mopping are usually all it takes to maintain its natural beauty. Bona floor cleaning products are always recommended for floors like this. The one downside of engineered floors that is sometimes brought up with maintenance, is the beveled edges. Some homeowners prefer solid\site finished floors because of the beveled edges with the engineered products. The bevels can sometimes trap dirt and grime in them.
Enhanced Eco-Friendliness for a Greener Choice
If you're environmentally conscious, you'll be pleased to know that engineered hardwood flooring is a sustainable and eco-friendly option. The manufacturing process involves utilizing resources efficiently, as only a thin layer of solid hardwood is used for the top veneer. This means that more flooring can be produced from fewer trees, reducing deforestation. Additionally, engineered hardwood often incorporates recycled materials, further minimizing its environmental impact. By choosing engineered hardwood, you're making a responsible choice for your home and the planet.
Contact Us for Your Beautiful Flooring Transformation
Remember, the advantages of engineered hardwood flooring extend beyond its beauty. Discover the durability, versatility, easy maintenance, and eco-friendliness that make it a top choice among homeowners. Contact us today and let's embark on a flooring journey that will elevate your home to new levels of elegance and functionality.


Hardwood Floor Refinishing Project In Lake Forest, IL
In this blog post, we discuss and walk you through a typical floor sanding project. This particular project has Brazilian Cherry Wood Floors. The project is located in the northern suburbs of Chicagoland. Specifically, in Lake Forest Illinois.
Hey guys, Patrick here! I hope everyone has been doing well and I’m happy to report that I am back with a new blog post! This time, I thought it might be fun to bring you guys along on a cool and unique floor sanding project we recently completed in Lake Forest.
In this blog post, I’ll walk you through what was done and what the process was for this flooring project located in the North Chicagoland suburb of Lake Forest. You’ll also see some of the available color selections for an exotic species of flooring like Brazilian Cherry and the most common looks I tend to recommend with this species of wood.
I’ll offer tips, suggestions, and just general guidance as I walk you through this fun 2,000+ square foot project! If you’d like to learn more about whether or not hardwood flooring might be a good investment for your home, you can read more about it on our other blog post. If perhaps you’ve decided you’d like to add Hardwood Flooring to your home, you can always reach out to us directly here.

Rough Sanding Hardwood Flooring, The First Sanding Pass
Starting the floor sanding project
Well then, let’s jump into it shall we? As with any flooring project, it starts with the rough sanding. For this particular project, the homeowner was pretty unsure of whether they wanted to go with a lighter color or a darker color for their floors.
Realizing & Accepting Color Options
No matter what flooring project I am working on, I always like to clearly explain to the homeowners what their color options are so that they know what to expect. With Brazilian Cherry floors and exotic floors in general, expectations can sometimes be tough. This is because exotic woods like Brazilian Cherry do not take color in the same ways that more common household woods like Oak do.
Types of stains
There are many types of stains in the flooring industry. However, there are 2 brands that simply always beat out the rest. They are quick-drying stain products that are meant specifically for hardwood floor applications. Both of these brands are Duraseal Stain and Bona Stain. Both stains clearly specify that they are quick-drying products. I’d highly suggest staying away from products like Varathane or Minwax, as these can make the color application look uneven and sometimes take days to dry properly.
Stain Colors
Typically, I feel that in most cases when refinishing hardwood floors during the sampling process, many people will apply too many colors. This then only ends up being more confusing to customers. Making it much harder to choose a final stain color. Since we were very limited on what types of colors & stains this wood would take, I decided to present the customer with a small selection of 3-4 color options that I thought would look best in the final outcome. Below are the colors I decided to apply and a description of why I applied them.

Freshly Drying Stain Sample Applied Over Brazilian Cherry Hardwood Floors
Ebony Stain
Applied over Brazlian Cherry Hardwood Floors, this stain was the perfect option for presenting the client with the darkest option available. If they wanted to go super dark and hide as much of the Red color in the wood as possible, this was the choice.
Espresso & Spice Brown Stains
These were both applied right next to each other because they were both very similar. This typically tends to be the problem with Brazilian Cherry in general. A lot of the stains & pigments react identically on the wood. These two colors did present a beautiful variety of grain that still showed through the wood, and overall gave the floors a very rich feel while still highlighting a lot of the unique grain in this wooden floor.
Natural Clear Coating
This option presented the customer with the lightest possibility available. If we wanted the floors to go even lighter, a white tint could have been used over the top which would have mixed into the water-based finish. However, the customer did not want any white, so a natural clear coating without stain was the next best option in order to give them a good color variety to choose from.
Hardwood Stair Sanding Project With a New Spindle Installation
So the colors have been applied, and the floor sanding is underway, what’s next!? Well, I’ll tell ya what’s next, the stair project, haha. After the sanding project started, the client also decided to renew their staircase. This meant that we would be refinishing all of the stair tread tops, and replacing all of the old-style spindles.
Removing Spindles
Since the client had decided on new spindles to make the staircase look a bit more modern, it made sense to cut out and remove the spindles at this time. This is so that the team can sand the entire stair tread with the larger edge sander, therefore minimizing the amount of additional handwork that will be left over to do afterward.

Removing Old Staircase Spindles
staining & Finishing the newly sanded hardwood flooring
After days and days of continuous rough sanding, medium sanding, and fine sanding…it was finally time for the fun stuff, staining, and finishing, the Brazilian Cherry floors!

Rough Sanded Brazilian Cherry Hardwood Floor
The client opted to go with the Spice Brown stain. I agreed that this was a wonderful selection and would really highlight the beauty of this floor while also still darkening it up tastefully.
Preparing Hardwood Floors For Staining
When all sanding was completed, the floors were vacuumed thoroughly and then water was applied to the flooring. This is a technique that I have discussed before, called “water popping”. This essentially opens up the grain of the wood and helps promote a deeper color penetration. On exotic woods like Brazilian Cherry, this is particularly important because it also helps guarantee a more even color application of the stain. I highly recommend applying the water with a backpack pump sprayer. You can find some options here. A sprayer makes it easy to mist the water over the entire floor surface, helping it to dry quicker.
Finishing Hardwood Floors After Staining
After the staining portion of the floors is completed, I highly recommend leaving the flooring project to dry overnight. Sometimes, when using a quick dry stain like Duraseal or Bona, hardwood floors can be coated on the same day. But, when dealing with more than 1,000 square feet, it’s best to play it safe and allow the finish an ample amount of drying time. This will help to avoid issues in the floor finishing process.
Type Of hardwood floor finish to use on Brazilian cherry
For this project, as for many projects, I opted to go with the Loba Invisible finish. I offer this as an additional option on quotes where clients are looking for a tiny bit more durability. This is a water-based finish that has an additional added hardener that gets mixed into every gallon. Loba Invisible is applied in a 2 coat system and dries very quickly.
This finish is a wonderful choice for people that have harder and more durable woods inside of their home, like Brazilian Cherry. But also, it’s great for homes that get more wear & tear from dogs as well as children. Loba Invisible and all 2 component finishes, in general, are highly recommended for commercial spaces like restaurants and museums.
final touches
Well, the finish line is almost here, can you feel it? After the first coat of finish was dried, it was time to reassemble the steps.
Installing New spindles
The new spindles were brought on-site, and installation began. Square, modern, and new spindles were chosen for the staircase this time. I thought the straight lines of the new spindles would greatly modernize the staircase and the overall look of the home. These are the spindles that I purchased for this project.
Final Coat of Floor Finish
Once the steps were completed, the hardwood floors were once again buffed & lightly abraded to smooth away any imperfections from the first coat. With water-based finishes, the grain often raises quite heavily after the first coat of floor finish application. For this reason, it is always recommended to lightly buff the floors before the final coat of finish is applied.
After the floors were buffed, they were also vacuumed. The entire home was then cleaned and prepared for the application of the last finish coat. Below are some of the final pictures after the floor finish dried. I threw in a couple of before pictures into the mix as well.

Finished Hardwood Staircase With New Spindles Installed

Newly Refinished Hardwood Floor

Freshly Refinished Brazilian Cherry Hardwood Floor
Thanks for Reading!
If you’ve made it this far, thanks for taking the time to read this. This blog has grown quite tremendously over the years, so I’ve decided to really try providing more content regularly. If you enjoy these project walk-throughs, please like the page and let me know if you want to see\read more about our Hardwood Floor Sanding & Refinishing projects around the Chicagoland area. If these posts gain enough popularity with our blogging audience, I’ll make them a regular thing. As always, thank you for being here, and if you ever have any flooring questions or if you’d like to book a floor installation & sanding project you can call us or fill out our contact submission form.

Removing Floor Glue: A Step-by-Step Guide for Safe and Effective Removal
A step-by-step guide on how to safely and effectively remove floor glue, with a list of necessary tools and recommended glue remover products. The post also emphasizes the importance of proper glue removal and offers tips for maintaining the newly cleaned floor.
The Importance of Proper Floor Glue Removal
Proper floor glue removal is important for a few reasons. First and foremost, it ensures that the surface is clean and ready for new flooring installation or refinishing. Any remaining glue residue can interfere with the new flooring or finish adhesion, leading to potential issues down the road.
Also, removing floor glue can improve the appearance of the surface, as the leftover adhesive can create an uneven or discolored appearance. Proper removal also helps to maintain the integrity of the subfloor, as failing to remove all of the adhesives can weaken the surface and compromise its stability over time. Therefore, taking the time and effort to remove floor glue properly can save you time, money, and some big headaches in the long run.
Safely and Effectively Removing Floor Glue
Safely and effectively removing floor glue involves several steps, including preparing the area, choosing the right tools and products, and following a systematic process for removing the glue. First, it's important to prepare the area by removing any furniture or fixtures and covering nearby surfaces to prevent damage.
Next, the right tools and products should be chosen, such as a floor scraper, heat gun, and a quality glue remover for floors. The process typically involves applying the glue remover, allowing it to penetrate the glue, and then using a floor scraper to remove the softened glue.
The process may need to be repeated multiple times until all the glue is removed. Proper ventilation and safety gear, such as gloves and goggles, are also important during the removal process.
Gather the Necessary Tools and Materials
Tools Needed for Removing Floor Glue
It’s a good idea to have a vacuum cleaner or broom and dustpan on hand to clean up any debris. The specific tools required may vary depending on the type of floor glue being removed and the condition of the surface beneath it.
Here's an explanation of each tool and its purpose for safely and effectively removing floor glue:
Protective Gear - Before starting the process, put on some protective gear such as gloves, safety glasses, and a respirator mask to prevent skin irritation, eye damage, and respiratory problems.
Floor Scraper - A floor scraper is used to remove the top layer of glue and any debris from the surface of the floor. It's important to choose the right kind of scraper blade based on the floor material and glue type.
Heat Gun - A heat gun softens the glue, making it easier to scrape off. It's especially useful for removing stubborn and thick layers of glue.
Floor Buffer - A floor buffer with a sanding or scrubbing pad can be used to remove any remaining residue or glue that's stuck on the surface after scraping and heating.
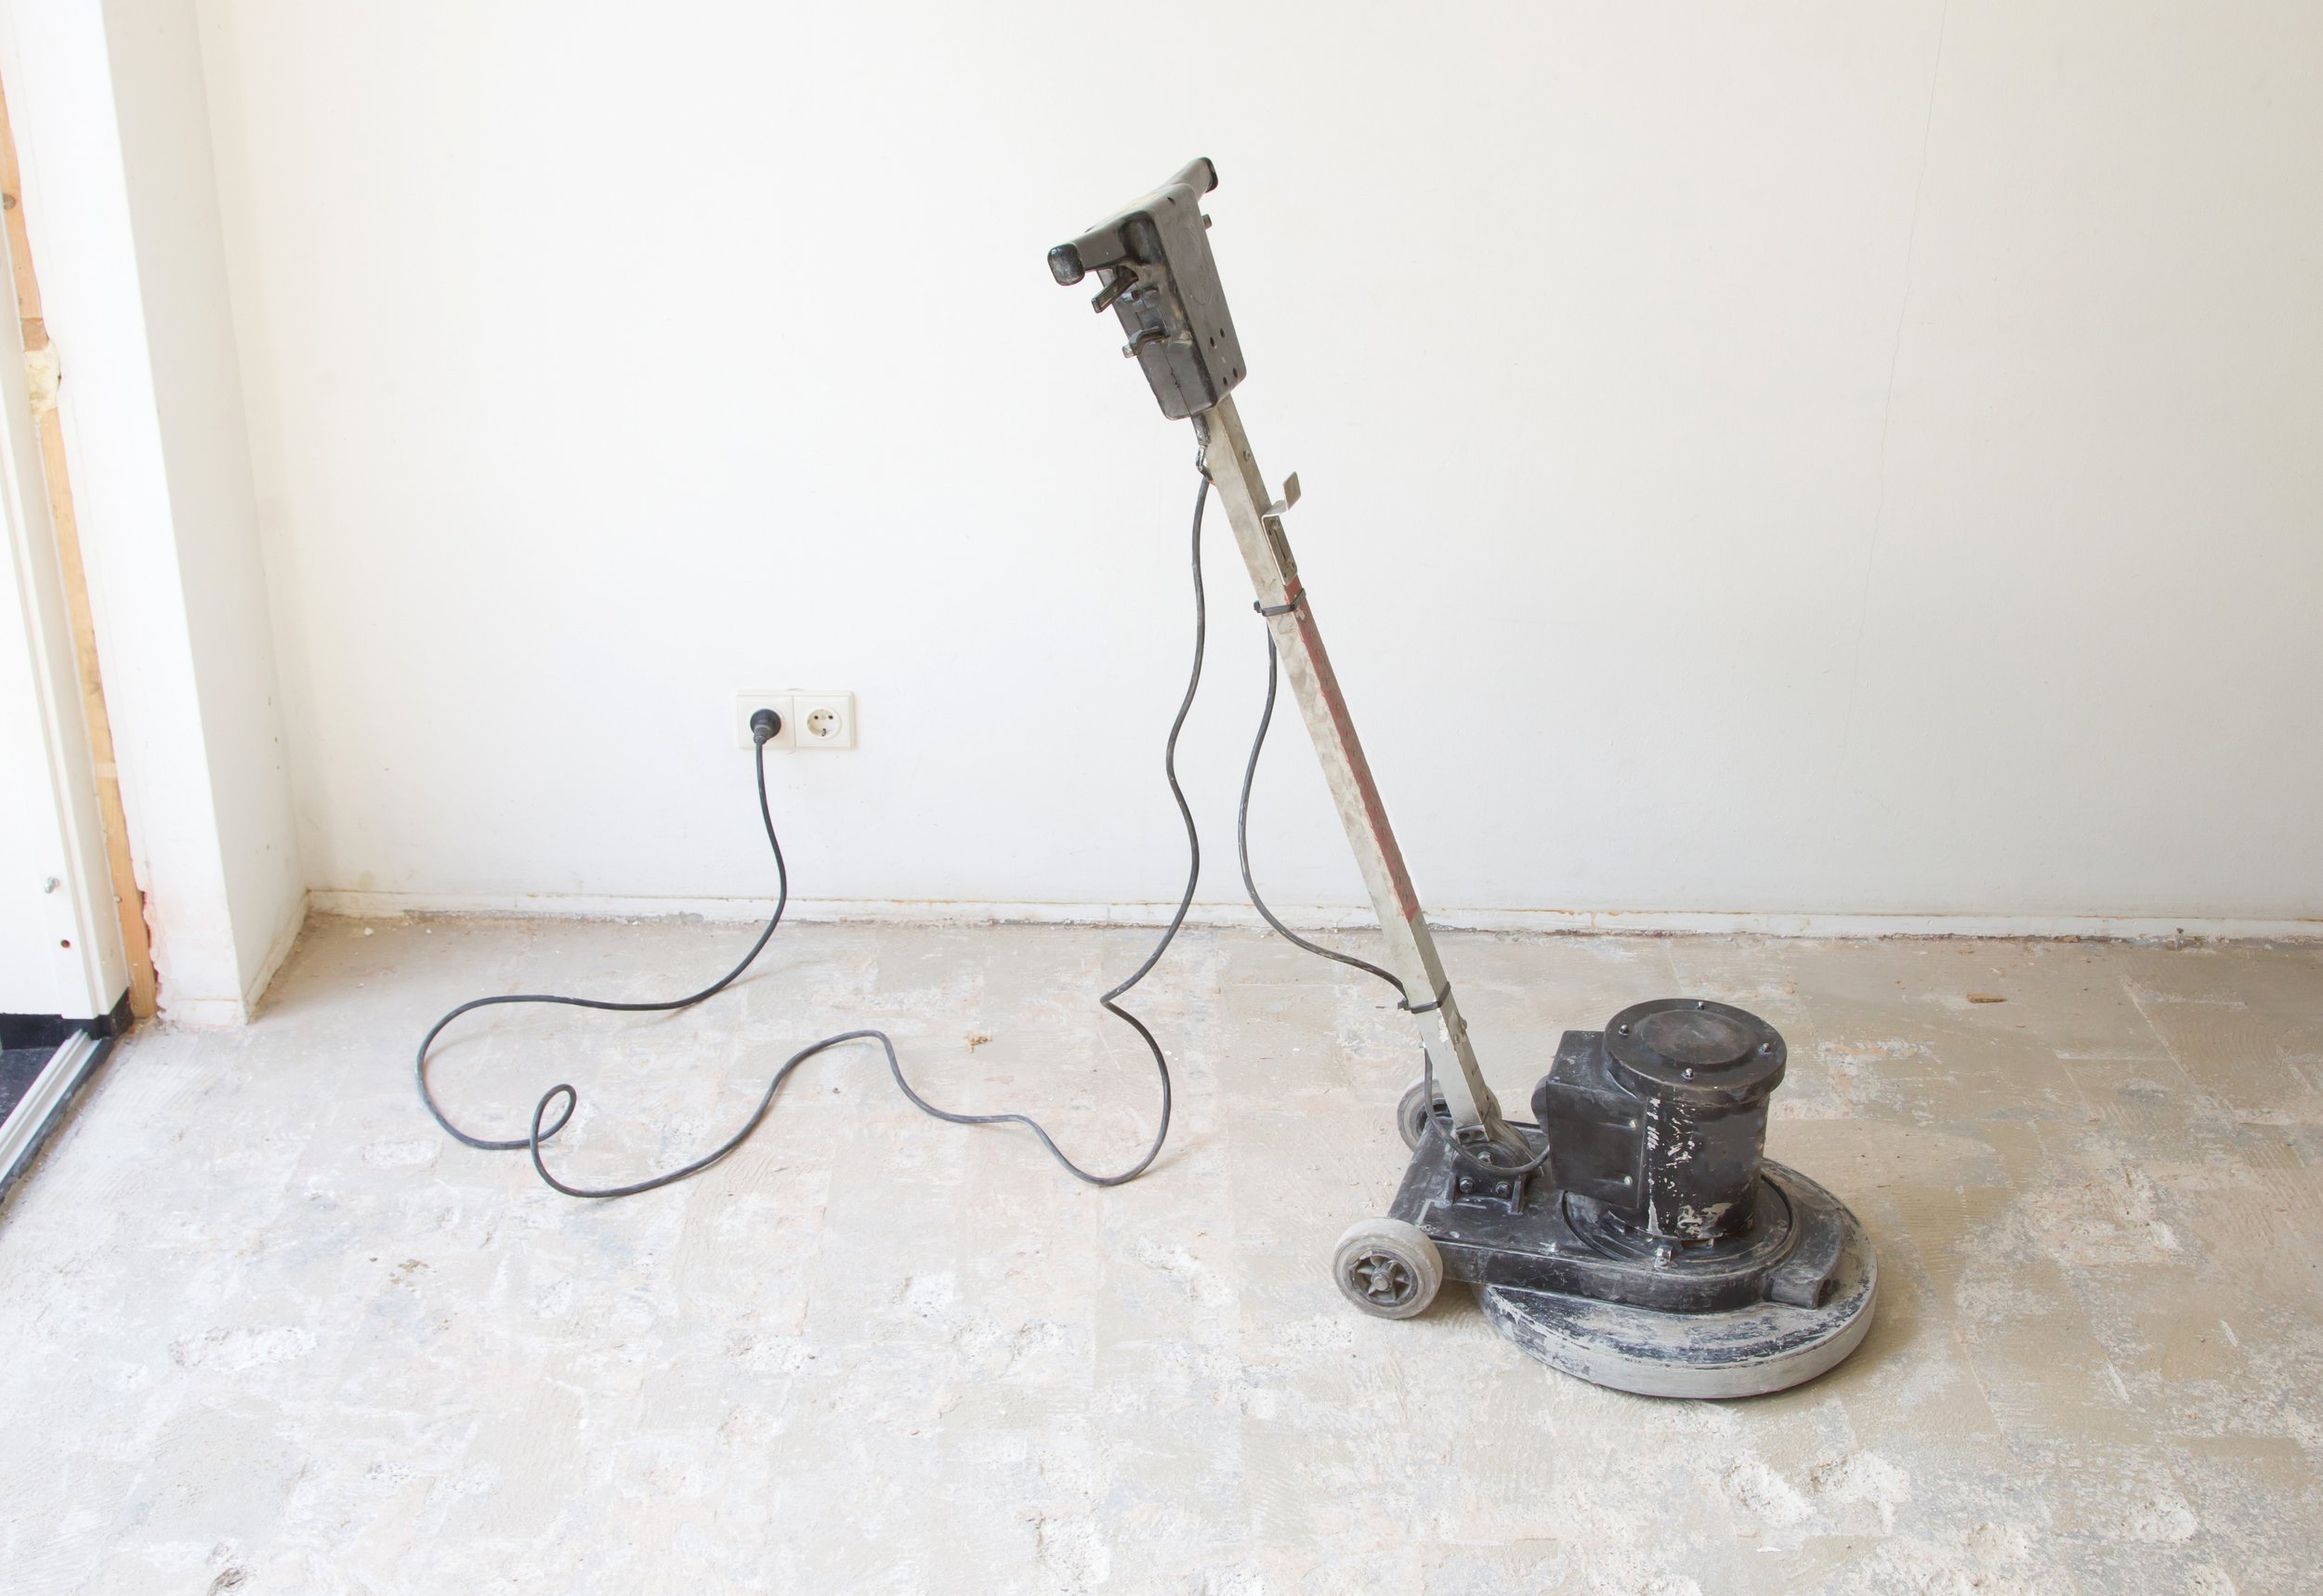
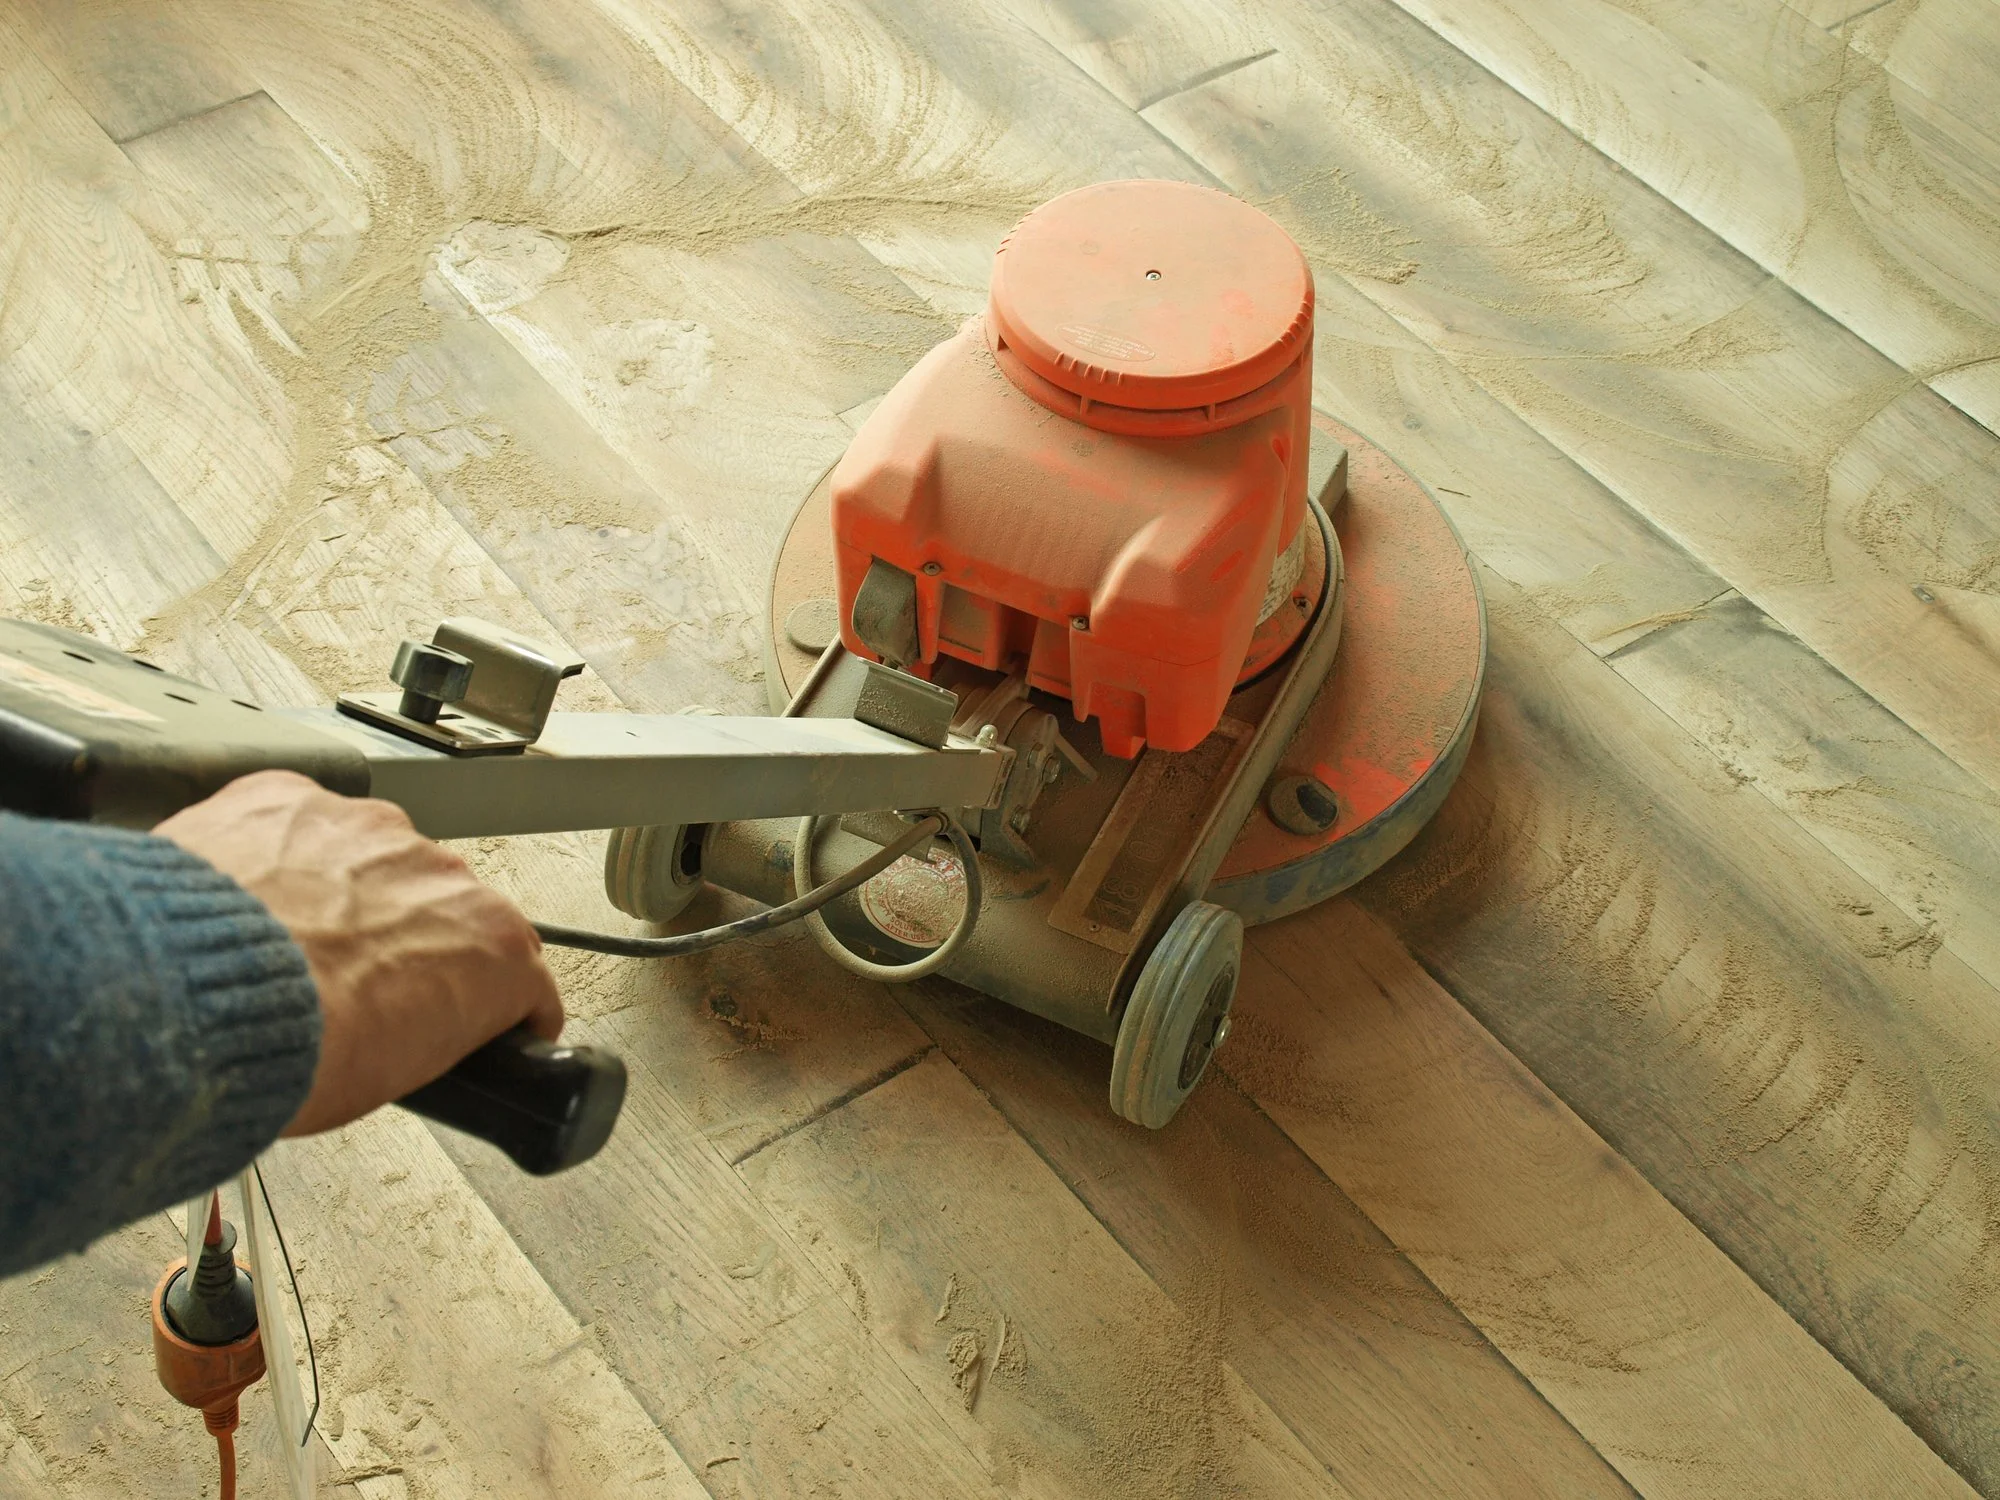
Glue Remover for Floors - If other methods fail, a glue remover for floors can be used to break up the glue. However, it's important to use it in a well-ventilated area and follow the manufacturer's instructions to avoid any damage to the floor or health hazards.

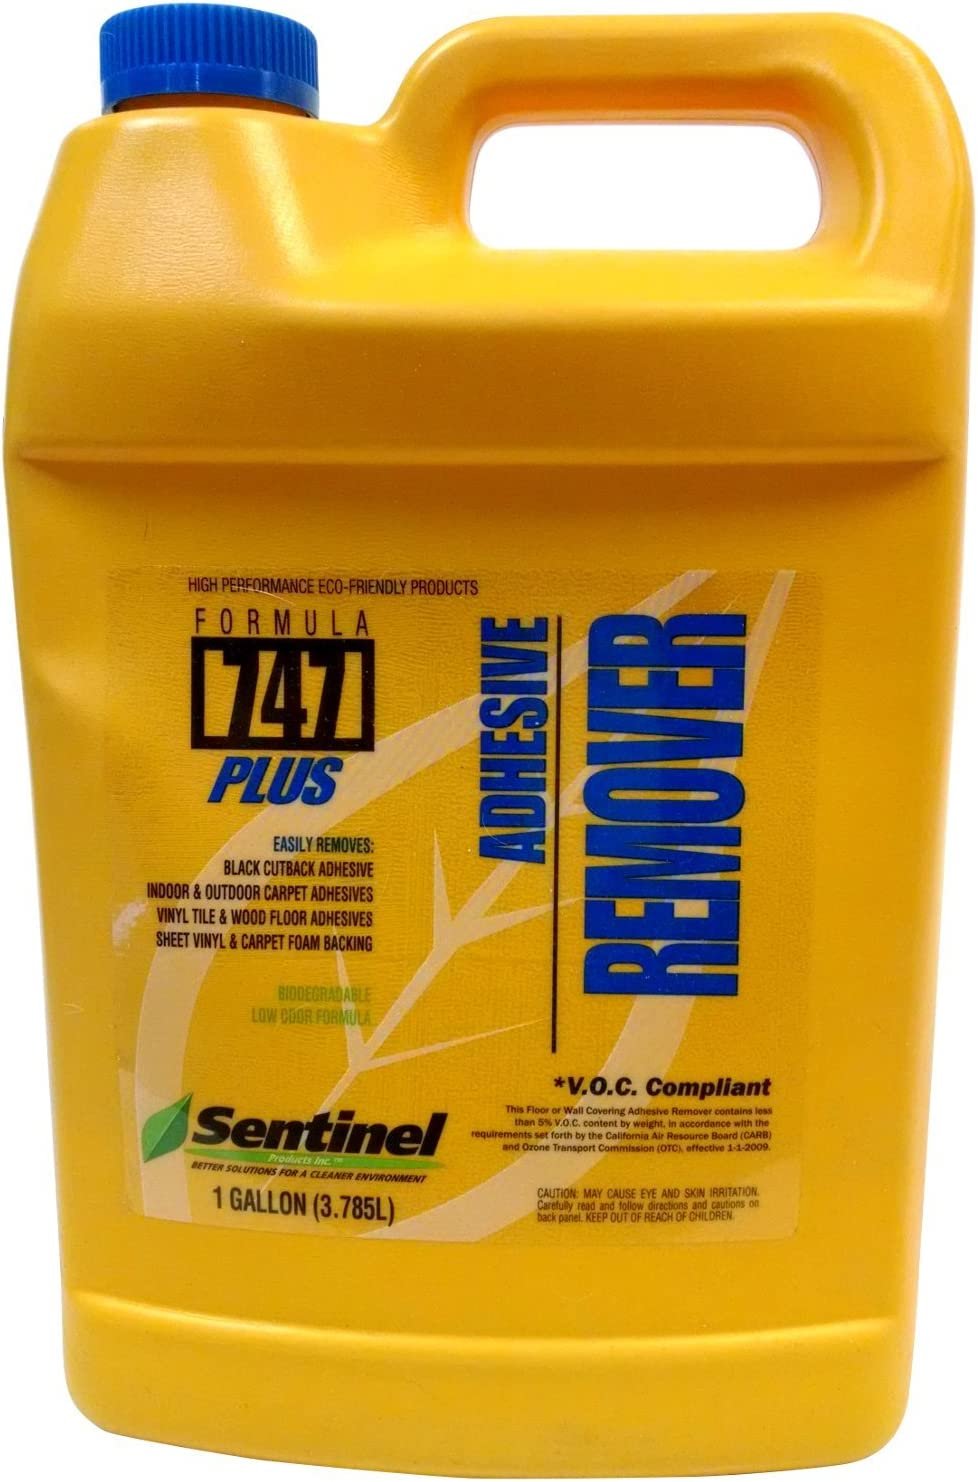
Applicator - If you end up needing to use a glue remover for floors, you’ll need a roller, paintbrush, or sprayer to apply it with.
Recommended Glue Remover for Floors and Where to Purchase It
When it comes to removing floor glue, there are many different products available on the market. One of the most effective and highly recommended options is a glue remover specifically designed for floors.
We recommend Sentinel Formula 747 Plus. This powerful glue remover is designed to safely and effectively remove a wide range of adhesives, including carpet glue, vinyl glue, and tile adhesive.
It's also environmentally friendly and safe for use in homes with children and pets. Sentinel Formula 747 Plus can be purchased at most home improvement stores or online retailers such as Amazon or Home Depot.
Prepare the Work Area
Clear the Room of Furniture and Other Obstacles
To prepare the work area for removing floor glue, the first step is to clear the room of all obstacles and furniture. This will make it easier to move around and ensure that the entire floor surface can be accessed.
Cover the Surrounding Areas With Protective Materials
Be sure to cover any surrounding areas with protective materials. This includes furniture (the furniture you can’t move), baseboards, walls, and any other surfaces that could be damaged by the glue remover or other tools used during the process. The best way to protect these surfaces is by using drop cloths or plastic sheeting.
Ensure that the protective materials are taped securely in place to prevent any shifting or movement during the glue removal process.
Ventilate the Area to Reduce Fumes
In order to reduce the fumes and odors that can be harmful to your health, proper ventilation is critical when removing floor glue. Before starting the removal process, open windows and doors to allow fresh air to circulate through the room.
Got a fan? Use it to increase the airflow. It's also recommended to wear a respirator or mask specifically designed for fume protection. Taking these precautions will make the process much safer and more comfortable.
Begin the Glue Removal Process
Applying the Glue Remover to the Floor
After the room is well-ventilated and all safety precautions are taken, apply the glue remover to the floor using a paintbrush, roller, or sprayer, depending on the type and size of the area. Make sure to apply the glue remover evenly and generously, covering the entire surface.
Follow the manufacturer's instructions for the application process, as some removers may require more or less time to penetrate the adhesive, depending on the type of glue used.
Allowing the Glue Remover for Floors to Soak In
Once you’ve applied the glue remover to the floor, it's important to allow it to soak in for a specified period of time. This can vary depending on the type and strength of the remover being used, as well as the type of glue and the amount of residue left on the floor.
It's important to follow the instructions provided by the manufacturer to ensure that the remover is given enough time to work effectively. This step allows the glue remover to break down the adhesive properties of the glue, making it easier to remove from the floor.
Scraping the Glue Off the Floor
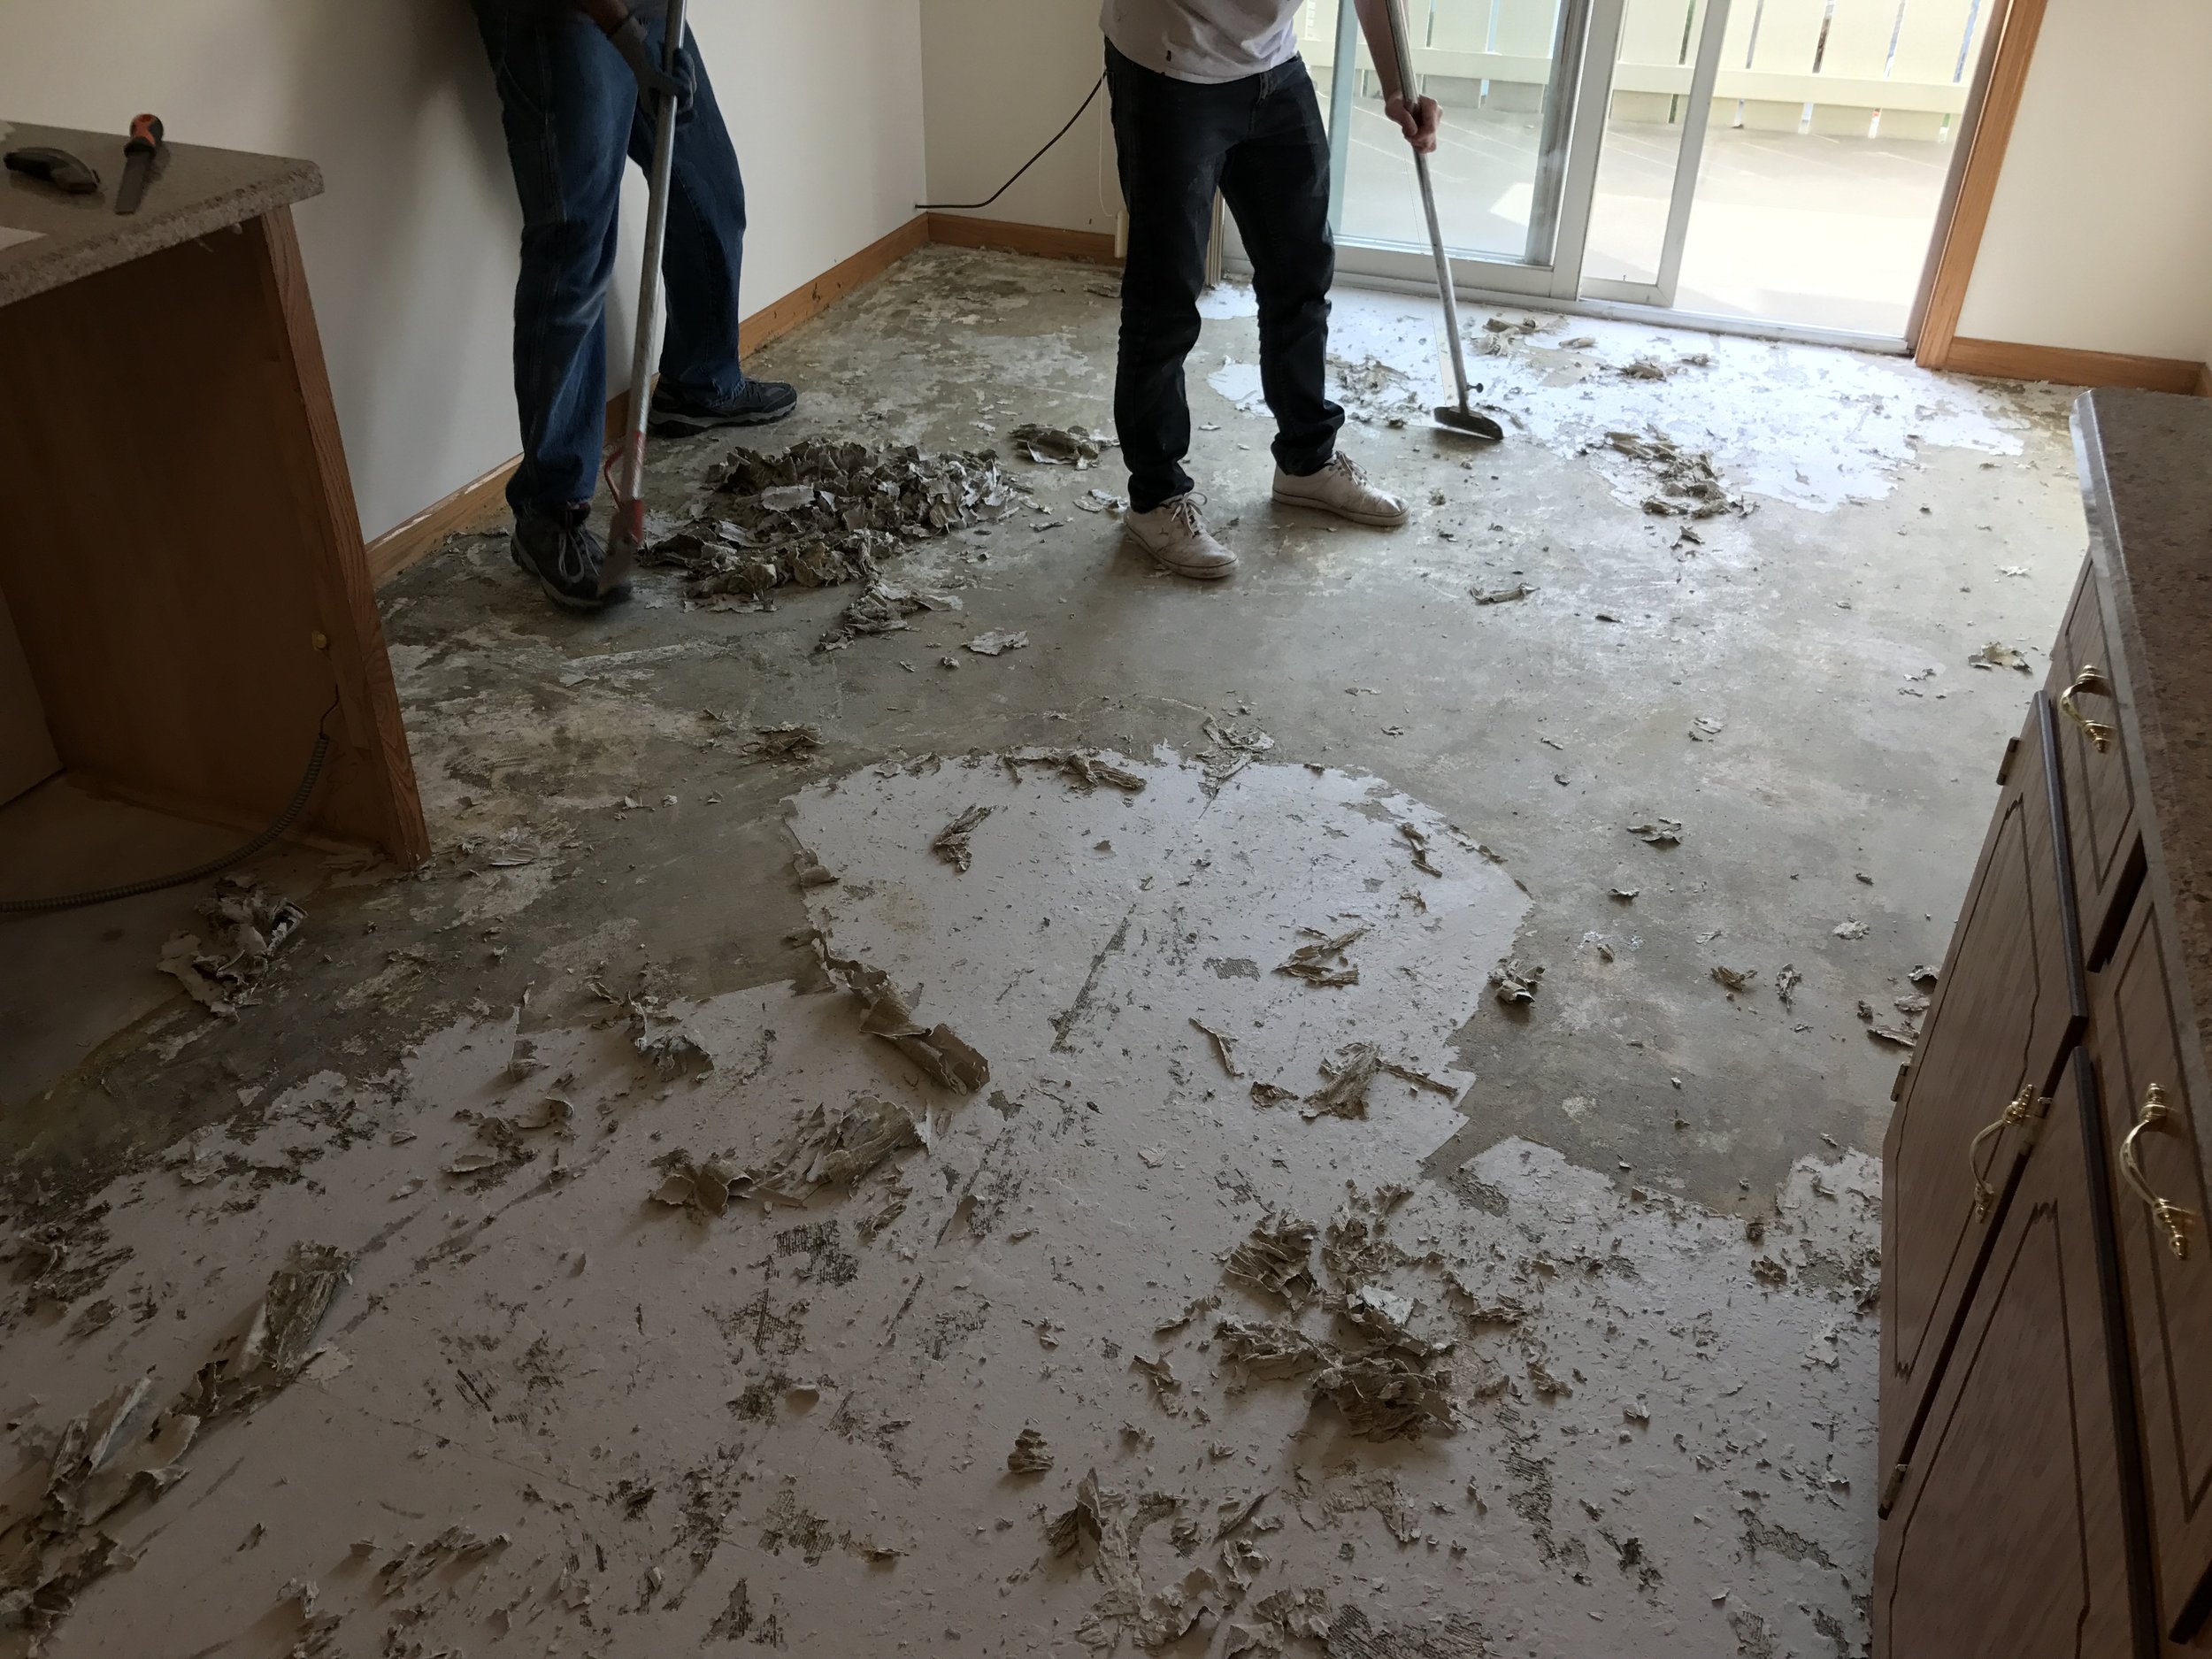
Once the glue remover has soaked into the floor for the recommended time, it's time to start scraping the glue off the surface. Use a scraper tool to gently remove the glue from the floor. Be sure to use a light touch to avoid damaging the floor, especially if using a razor blade scraper.
Work in small sections to ensure that the glue is completely removed before moving on to the next area.
Repeating the Process as Necessary
During the glue removal process, it is important to repeat the application of the remover as necessary. This will ensure that all glue is fully removed from the floor. If the glue is being stubborn or it’s in hard-to-reach areas, the glue remover for flooring should be applied again and left to soak in for a longer period of time.
Additionally, multiple rounds of scraping may be necessary to remove all of the glue. It’s important to be patient during this process and take the time to remove all of the glue thoroughly.
Clean Up and Disposal
Cleaning the Work Area to Remove any Residue
After removing the floor glue, it’s essential to clean the work area thoroughly to get rid of any residual materials. This step will ensure that there is no leftover glue, which can interfere with the installation of new flooring. Begin by sweeping or vacuuming the entire floor to get rid of dust and debris.
Then wipe the surface with a damp cloth to remove any remaining glue residue. Be sure to dispose of the cloth and any other materials used for cleaning properly. Finally, inspect the area carefully to ensure that there is no debris or residue left on the floor, especially if you’ll be installing new flooring on top of it.
Properly Disposing of the Glue and Other Materials
Once you’ve removed all of the floor glue, residue, dust, and debris, it’s important to dispose of the glue and other materials properly. This helps to avoid any damage to the environment and ensures safety in the work area. The glue and other materials should be placed in a sealable bag or container and labeled as hazardous waste.
Depending on the amount and type of glue, it may be necessary to dispose of it at a hazardous waste facility. It’s important to research the local regulations and guidelines for the proper disposal of hazardous waste to avoid any penalties or fines. By disposing of the glue and materials properly, you can complete the job safely and responsibly.
Tips for Maintaining the Newly Cleaned Floor
After removing the floor glue, it's important to properly maintain the newly cleaned floor. Here are some tips to keep your floors looking great:
Regular cleaning: Vacuum or sweep regularly to keep dust and dirt from accumulating on the floor. Use a damp mop with mild soap and water to remove any stains or spills.
Avoid harsh chemicals: Avoid using harsh chemicals or abrasive cleaners on your newly cleaned floors. They can damage the finish and cause discoloration.
Use rugs and mats: Place rugs and mats in high-traffic areas to prevent wear and tear on the floor. Be sure to use rugs with non-slip backing to prevent slips and falls.
By following these tips, you can help maintain the cleanliness and appearance of your newly cleaned floors.
Conclusion: Recapping the Steps Involved in Safely and Effectively Removing Floor Glue
In summary, to safely and effectively remove floor glue, the following steps should be followed:
Gather the necessary tools, including a floor scraper, heat gun, gloves, safety goggles, applicator, and a respirator mask.
Select a recommended glue remover for floors and purchase it from a hardware store or online.
Prepare the work area by clearing the room of furniture and other obstacles, covering surrounding areas with protective materials, and ventilating the area to reduce fumes.
Apply the glue remover to the floor, allowing it to soak in for the recommended amount of time.
Scrape the glue off the floor using a floor scraper, repeating the process as necessary until all glue has been removed.
Properly dispose of the glue and other materials, and clean the work area to remove any residue.
After the glue has been removed, take steps to maintain the newly cleaned floor, such as regular cleaning and avoiding exposure to moisture.
Final Thoughts on Proper Floor Glue Removal
Proper floor glue removal is a crucial part of any flooring project. Failing to remove old adhesives can lead to a range of issues, including uneven flooring, poor adhesion of new materials, and unsightly residues that can detract from the overall look of the space.
By following the steps outlined in this guide, you can safely and effectively remove old floor glue, ensuring that your new flooring materials adhere properly and look their best. Remember to take your time, work carefully, and use the right tools and materials for the job to achieve the best possible results.
Need help with your next flooring project? Contact Plus Hardwood Flooring today for a free estimate!

Can You Sleep in a House After Hardwood Floor Polyurethane Application?
It's important to be aware of the safety concerns when it comes to sleeping in a house after hardwood floor polyurethane application. Find out recommended waiting times and safety tips.
Hey guys, Patrick here again! This week the main topic I wanted to talk about on our Chicago Flooring Blog was a question I often receive from homeowners. “Can I sleep in my house after you apply the polyurethane?” as well as “How soon can I move back in after you apply the final finish coat to my hardwood floors?”
By this point, we all know that one of the key steps in installing & refinishing hardwood flooring is applying a finish, such as polyurethane, to protect the wood and give it a smooth appearance. However, many homeowners may wonder whether it is safe to sleep in their homes after a polyurethane application.
In this blog post, we'll explore the answer to that question and provide detailed information on how long you should stay out of the house after a polyurethane application, depending on the type of finish used.
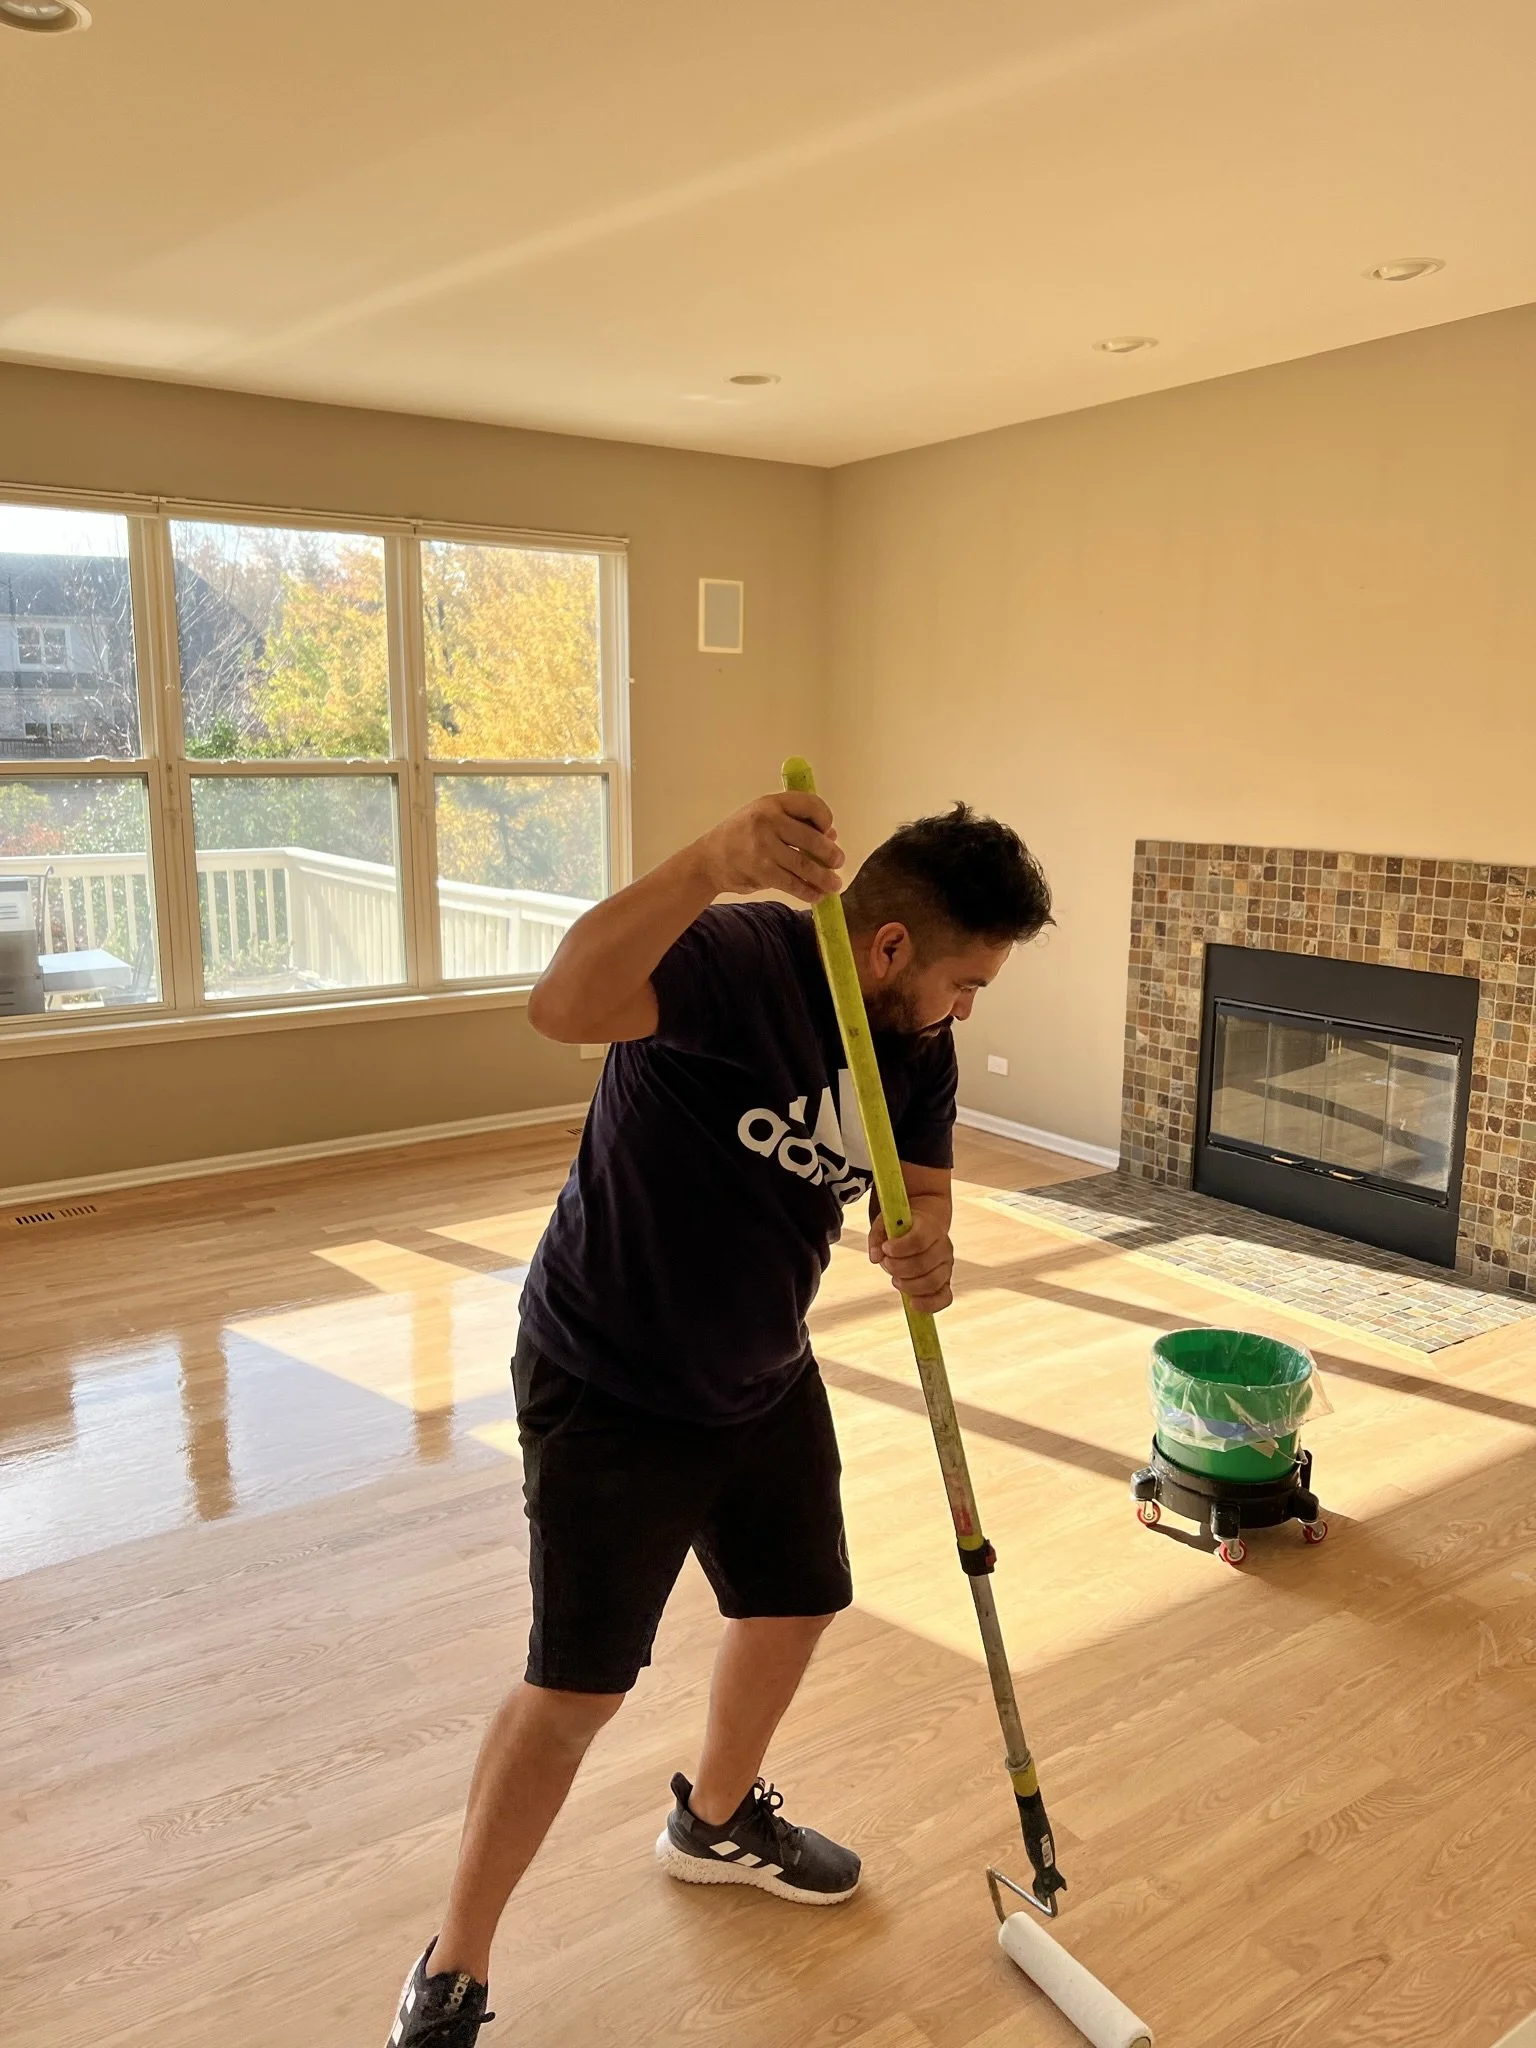
Applying the first coat of water based finish
Types of Finishes for hardwood flooring
First, it's important to understand that polyurethane is a type of varnish that is applied to hardwood floors to protect them from wear and tear. However, it is not only available in both oil-based and water-based forms, but there are also other products that exist which do the same job as polyurethane.
The main difference between these products is that some are oil-based, which have a strong odor and take longer to dry and cure. Others are water-based polyurethane and have a milder odor which dries and cures more quickly. Lastly, some finishes are also wax-based hybrids that smell & dry differently as well.
Can I sleep in my house after you apply Polyurethane to my hardwood floors?
In general, I do not advise sleeping in your home after a polyurethane application, regardless of whether you are using an oil-based or water-based finish. The fumes from the polyurethane can be toxic and may cause eye and respiratory irritation. In addition, the fumes can be flammable and should not be exposed to any open flames or heat sources.
Is polyurethane toxic after it dries?
It's best to stay out of the house until the polyurethane is dry and the fumes have dissipated. Once it has dried, it is considered to be relatively safe and non-toxic. However, while it is still wet, it can release fumes that can be harmful to breathe.
Some homeowners make the mistake of thinking that since water-based finish does not have as toxic of a smell, it is fine to spend the night in the home with it. This is not recommended, because even though the finish may not smell as bad, it still off-gasses toxic fumes while it dries.
Oil Based Polyurethane Dry times

For oil-based polyurethane, it can take up to 24-48 hours for the finish to dry and up to 72 hours for the fumes to dissipate completely. Therefore, it is recommended that you stay out of your home for at least 72 hours after applying an oil-based polyurethane finish.
It's also recommended to have proper ventilation in the room during the drying process. In order to fully cure, this finish typically requires at least 30 days. This means you will want to refrain from putting down any surface area rugs or furniture that completely blocks sunlight exposure to the floor. Otherwise, you will end up with light spots.
Single Component Water Based Polyurethane Dry Times
For water-based polyurethane, the drying and curing time is much shorter. It can take as little as 4 hours for the finish to dry and 8 hours for the fumes to dissipate. It's recommended that you stay out of your home for at least 8 hours after applying a water-based polyurethane finish, though usually, you can walk on it much sooner. For a single-component water-based finish, full cure time is usually 7-14 days.
This is the finish I recommend to 99% of clients. My favorite single component finishes are from Loba and they include Hybrid, EasyFinish, and Viva.
Two Component Water-Based Polyurethane Dry Times

The drying and curing time for two component water-based finishes is even shorter. This is because these finishes are considered commercial grade instead of residential grade. Meaning, they are formulated in order to be used much sooner and to dry much harder than single-component finishes. The drying time for these finishes is usually between 2-4 hours. The full cure time is 6-9 days.
For clients that want as much durability as possible, I always recommend this finish. This is also the polyurethane we apply in all restaurant and commercial settings. My favorite dual component finishes are Loba Invisible as well as Loba Supra.
Hard-wax Oil Finishes/Rubio Monocoat

Hardwax oil finishes are the last in the category of hardwood floor finish, and they aren’t considered a typical polyurethane. They fall more along the lines of oily wax. These finishes are the most eco-friendly as they let off very low amounts of VOCs. However, we’ve found that they can still smell quite harsh and the gasses can be quite toxic. This is especially true for projects larger than 500 square feet.
The wax finishes typically take 24-48 hours to fully dry. They can take upwards of 14-15 days to fully cure. Meaning you’ll want to leave any surface area rugs off of the floors until then to avoid light spots. Since these finishes are still considered oil, they will behave like oil and change color over time. My favorite wax-based finish to use is Rubio Monocoat.
Concluding thoughts and why it’s best to stay out of the home
In conclusion, I think it’s important to note that there are many finishes out there and the drying/curing times of all of them can vary depending on the specific brand of polyurethane, the humidity and temperature of your home, the thickness of the finish applied, and even the weather factors happening outside of your home.
Always follow the manufacturer's instructions regarding drying and curing times and consult with a professional if you have any doubts or concerns. But in most cases, play it safe and stay out of the home for a couple of days. After all, nobody wants to have their clothes and themselves smelling like icky oil all night long while trying to sleep! It’s important to note that if you have any fish or pets, without a doubt you should also relocate them for the duration of your flooring project.
While polyurethane is a great way to protect and enhance the appearance of your hardwood floors, it's important to understand the risks and precautions involved. It is also important to understand that your specific scenario will vary greatly depending on your location and flooring project. More often than not, it’s best to rely on the recommendation of the flooring contractor you have hired.
The duration of time you should stay out of the house will greatly depend on the type of finish you use, with oil-based by far requiring more time for drying and curing than water-based. Always consult with a professional and follow the manufacturer's instructions to ensure that the installation is done correctly and safely.
Call Plus Hardwood Flooring today at (773) 954-4982 or send us an email through our contact page for a free estimate!

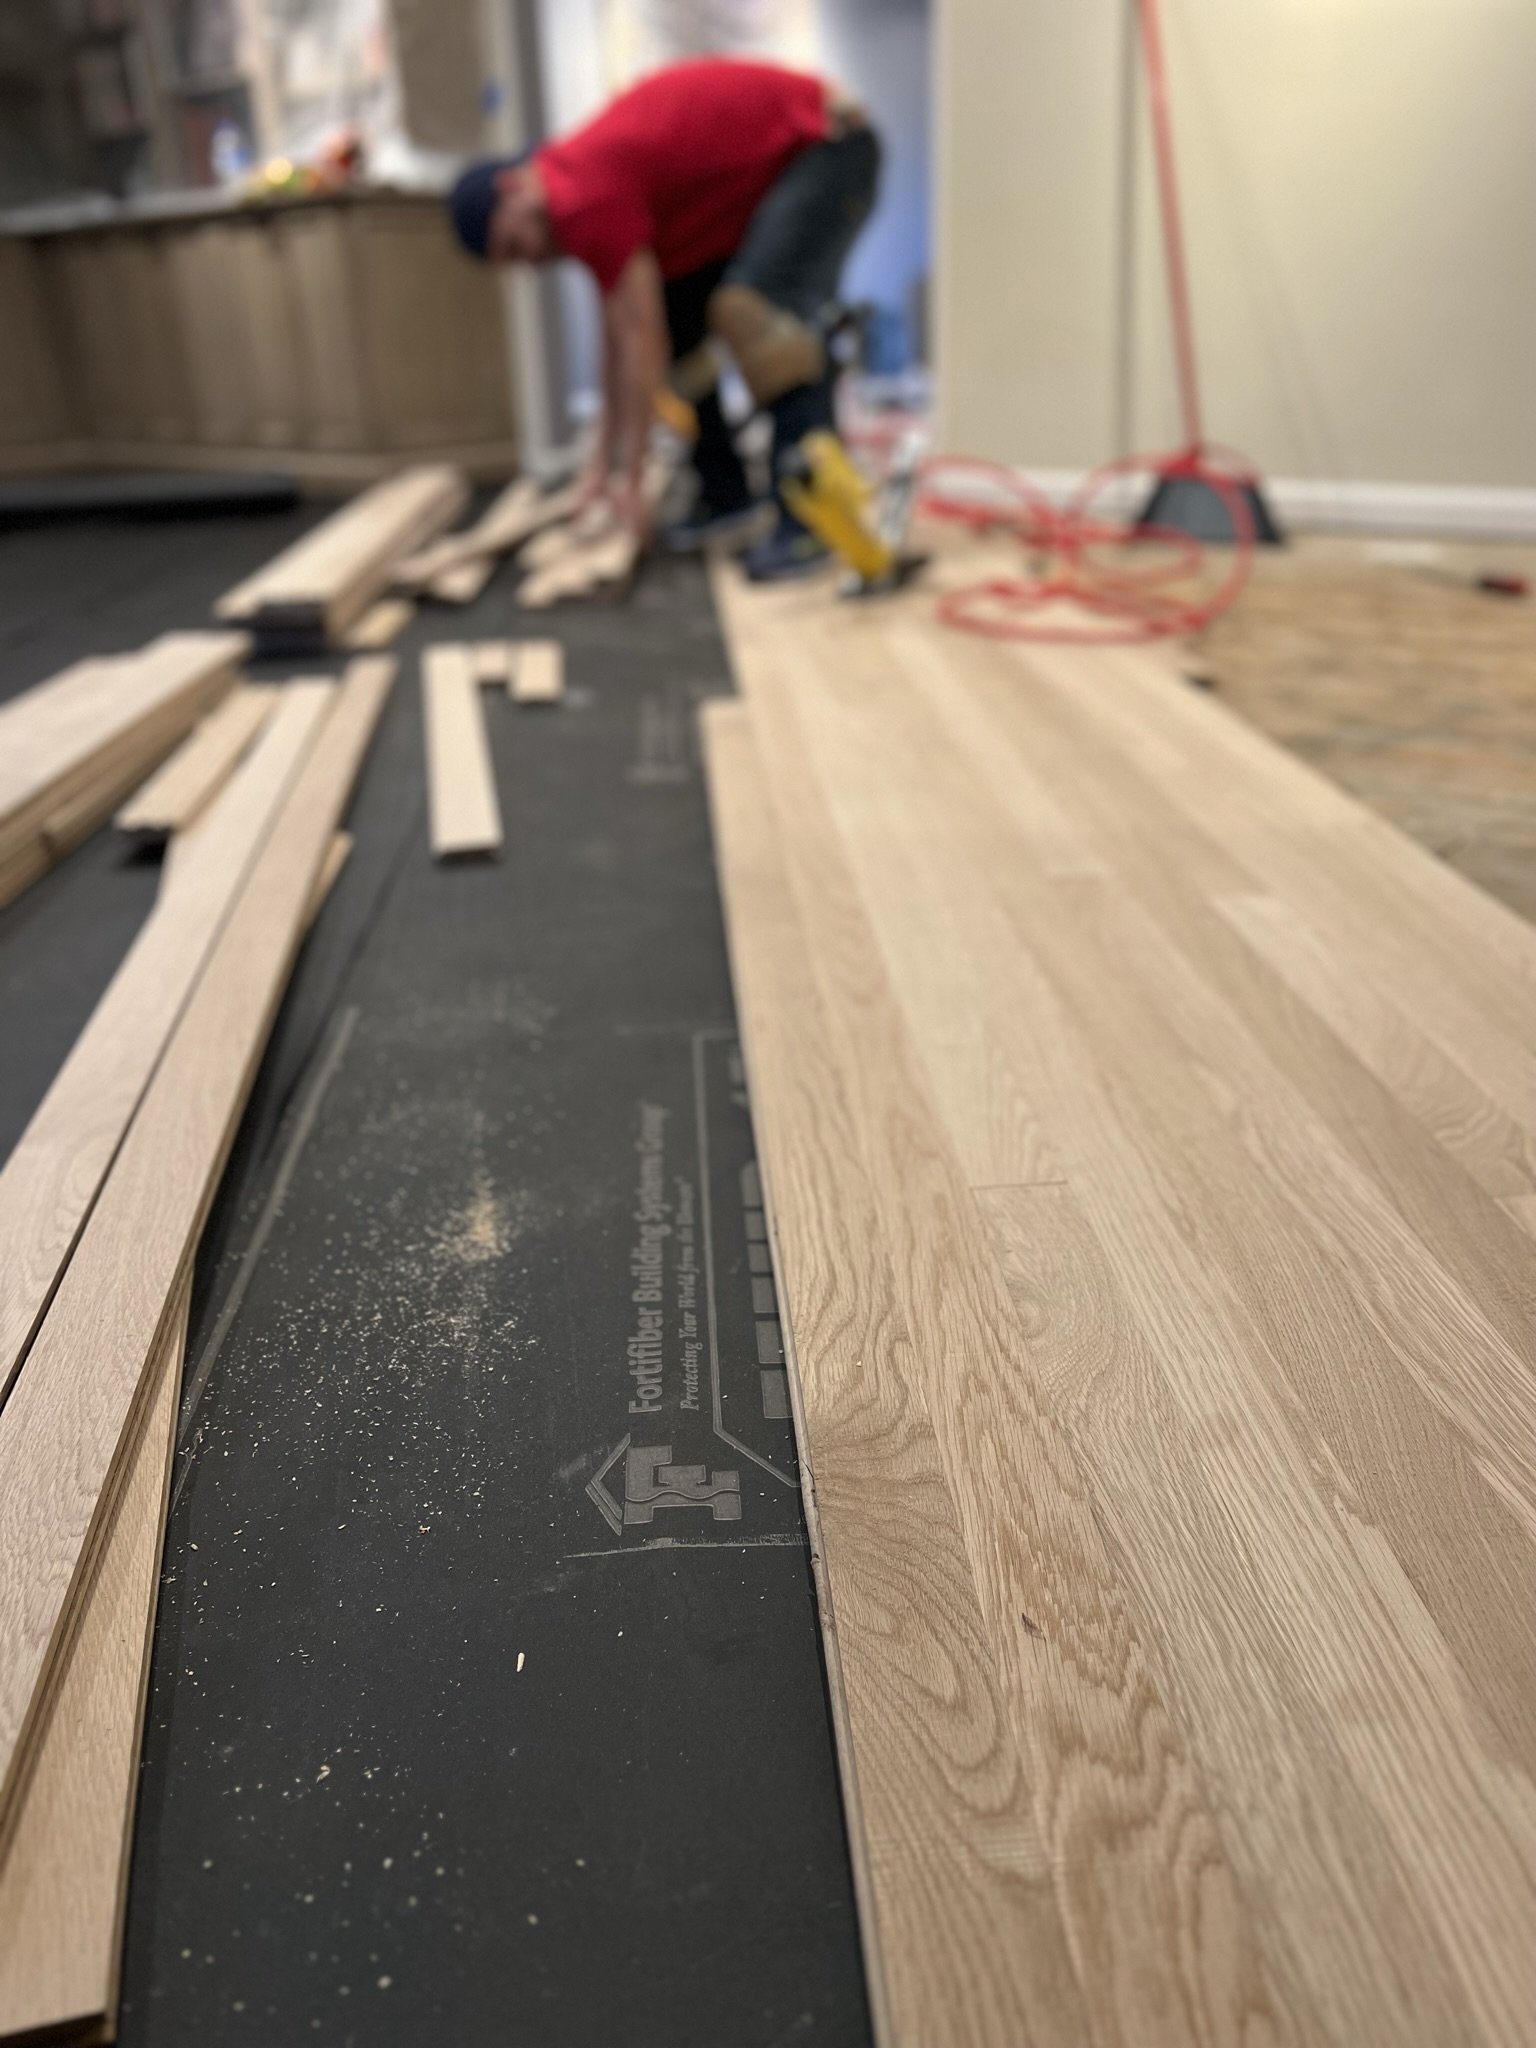
How Much Does Installing 1,000 Square Feet of Flooring Typically Cost in Chicago?
In this blog post, we discuss how much it typically costs to install 1,000 square feet of flooring in the Chicago area as well as the surrounding suburbs.
Hardwood flooring is a popular choice for homeowners looking to add a touch of elegance and warmth to their homes. However, installing hardwood flooring can be a significant investment, and it's important to understand the costs involved before making a decision. We are a local flooring company located in Chicago, so our prices will be relative to our specific area.
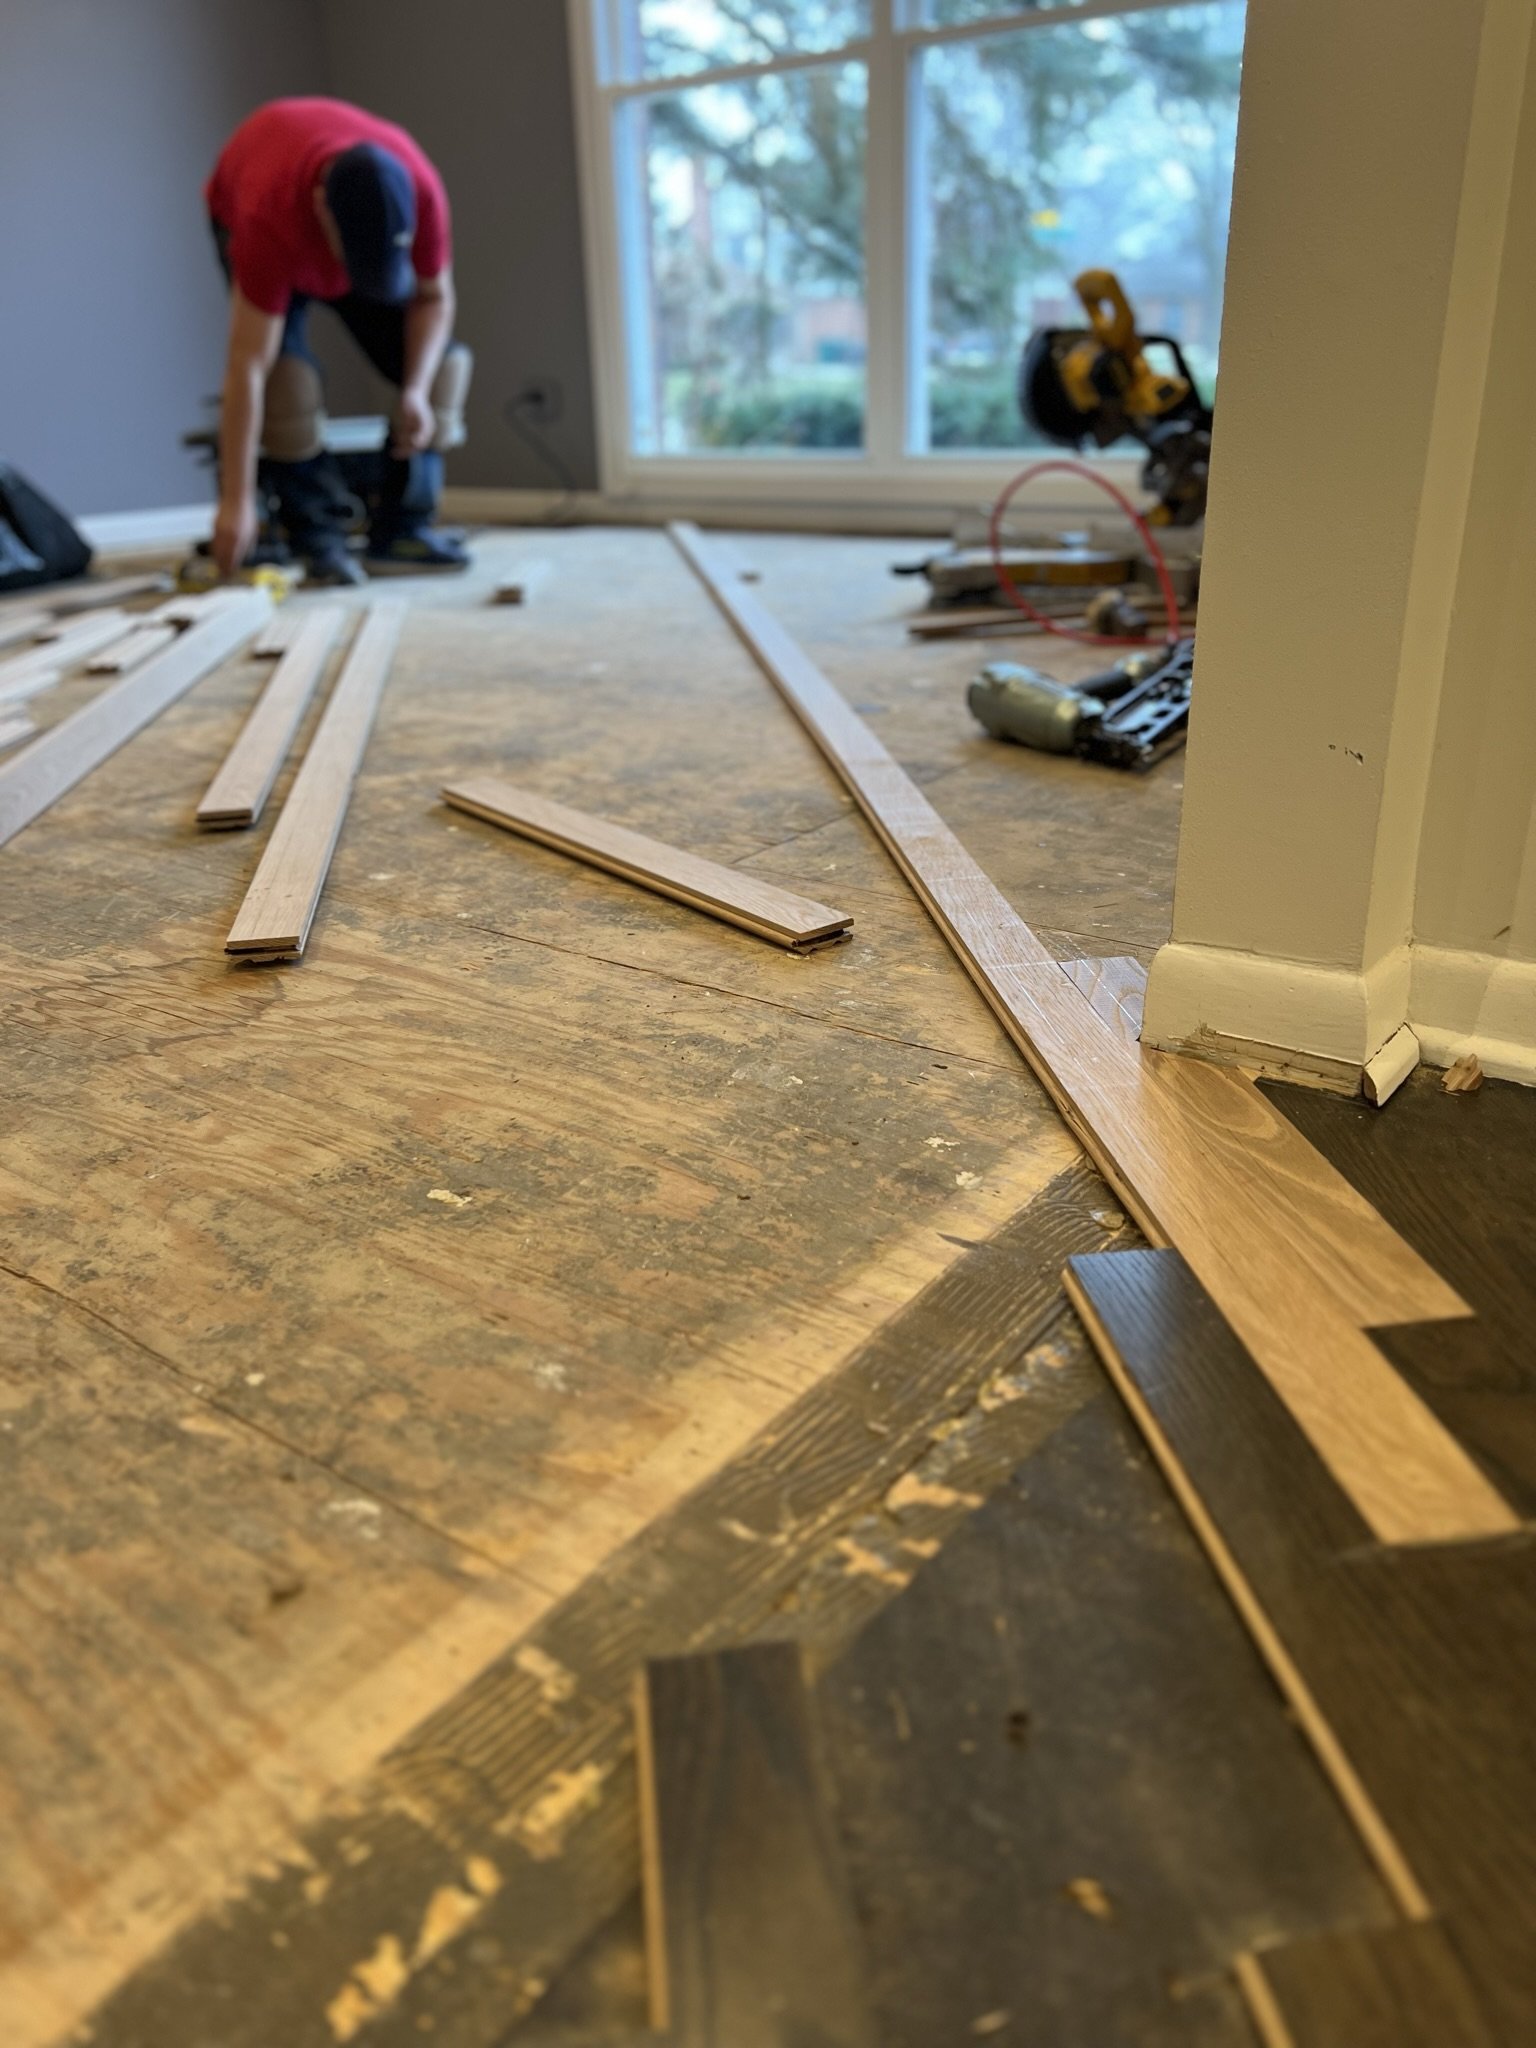
Red Oak Flooring Being Installed Into an Existing Floor
Hardwood Flooring Cost in Chicago
The cost of installing hardwood flooring varies depending on a number of factors, including the type of wood, the quality of the flooring, and the location of the home. On average, it can cost anywhere from $12 to $22 per square foot to install hardwood flooring, with the national average cost hovering around $11 to $12 per square foot.
To install 1,000 square feet of hardwood flooring, you can expect to pay between $12,000 and $22,000 dollars. The exact cost will depend on the factors mentioned above. For example, installing a solid hardwood floor will likely be more expensive than installing an engineered hardwood floor, as the former is made of solid wood throughout its thickness, while the latter is composed of several layers of wood with a veneer of hardwood on top. However, going solid can also have many benefits as well. The main benefit being reusability. A solid hardwood floor can be sanded to look new many times. Sanding hardwood floors in Chicago is one of our other main services that our company offers, besides installing wooden floors.
Other Costs involved For Hardwood Flooring Installation in Chicago
Other factors that can affect the cost of installing hardwood flooring include the subfloor, the condition of the existing flooring, and whether or not the homeowner is providing the material or the labor. You will find a wide range of material cost of the wood flooring itself. Labor costs are generally higher in urban areas than in rural areas. Though in Chicago, you will find that the farther out into the suburbs you travel, costs may also increase. This is because there are fewer hardwood flooring contractors available in the suburbs of Chicago.

A Couple Rows of Red Oak Flooring Being Nailed Down
It's also important to note that the cost of the installation is just one aspect of the expense. You should also factor in the cost of any permits your area might require, and any additional costs that may come up like trim work. It can also be wise to consult with professionals, like Chicago home remodelers, Chicago flooring installers, or contractors, to get more accurate cost estimates for your specific project and location. Here at Plus Hardwood Flooring we even offer very easy and quick online estimates for those who prefer dealing more online.
Flooring Cost Final Thoughts
Overall, installing hardwood flooring is a great investment that can increase the value of your home and improve its overall appearance. However, it's important to understand the costs involved and work with a reputable contractor to ensure the installation is done correctly. Call Plus Hardwood Flooring today at (773) 954-4982 or email us for a free online estimate.

Fully Finished Hardwood Floors After Installation & Sanding

What to Look For in a Hardwood Floor Contractor
When searching for a hardwood floor contractor, it's important to look for a professional with experience and a proven track record in the industry. Make sure that the contractor is licensed, insured, and has all the necessary certifications and qualifications to perform the work. It's also good to ask for a detailed written estimate that includes all costs and a clear breakdown of the scope of work.
Hardwood floors can be quite a costly investment in your home, but one that many homeowners consider worthwhile as it can add considerable value. If you have decided to have hardwood floors installed in your home, you’ll want to pay particular care to make sure you hire the best possible flooring contractor.
The process of hiring a hardwood flooring contractor is no different than hiring any other type of service provider. You’ll want to get several estimates and compare them carefully to see what each contractor brings to the table and which one offers the best package to cover your needs.
When considering those estimates, it’s important to remember that you get what you pay for, so even though you might be inclined to go with a lower estimate to save money you may not get the best possible quality of work. Sometimes you need to pay a little more to ensure that you’re getting what you need.

10 Things to Look for in a Hardwood Flooring Contractor
Before you hire a contractor there are several points you’ll want to bear in mind so that you know what to expect.
1. Licensing and Insurance
Most states require some type of licensing in order for contractors to operate legally. You should check to make sure that any contractor you consider hiring has met any and all legal requirements. Also, no matter how careful a contractor may be it is still possible for things to go wrong on a job so you’ll want to make sure that your contractor is fully insured.
2. Workers Compensation
Again, since it is possible for things to wrong, you’ll also want to check and make sure that your contractor offers workers comp to all employees. That way if something happens while the workers are on your premises, you won’t be on the hook for their injuries or missed work time.
3. NWFA Certification
The National Wood Flooring Association, or NWFA, provides certification to contractors who have mastered the installation process and are recognized as the best in the business. Having NWFA certification isn’t required but it’s an extra reassurance that not only does a contractor know their business but they are also committed to ongoing education to keep up to date with the latest innovations in the industry.
4. Measuring and Recording of Moisture Content
Guidelines from the NWFA dictate that proper measurements should be taken of the moisture content of hardwood flooring and the relative humidity of the surrounding environment. If there are problems with the flooring, the manufacturer will require this information or they could void the warranty. In order to save yourself that potential cost, you’ll want to ensure that your contractor makes careful measurements and keeps good records.
5. Warranty Offered
A good contractor should be willing to back up the quality of their work by providing a warranty. They know that hardwood floors are a costly investment for you and should be willing to offer you this common safeguard.
6. References
Perhaps the most important way to ensure the quality of a contractor’s work is by getting input from other customers. Always ask a contractor to provide references and make sure they give you a good sampling of them. The more references you have, the easier it will be to determine the overall quality of a contractor’s work.
If they have a total of 15 or 20 reviews and only 4 are negative, that’s considered normal as compared to 7 total reviews with 4 negative. Also, pay attention to how they handle the negative reviews and whether they were addressed professionally.
Another good way to find a quality contractor is by checking when a family member or neighbor is having floors installed. You can ask if they’re satisfied with the contractor’s work and see the quality of the work for yourself. If it looks good, ask the contractor for a business card.
You may also want to do some research online, using review sites such as Yelp and Angie’s List, which can provide good input on the quality of an individual contractor’s work. Finally, the Better Business Bureau can also offer good input in terms of complaints received and how they were handled.
7. Dust Control and Clean Up
The installation process can be a messy one, from cutting the boards to sanding and finishing, and you’ll want to pay particular attention to how a contractor handles the mess. There are many ways to contain the mess and you need to ask your contractor up front about the steps they plan to take. Will they set up their saw outside and use any special equipment to contain the dust?

Will they move any furniture or appliances or expect you to do that? Will they protect windows, lighting fixtures and other built-ins? You may be able to save yourself some money by moving as many things as possible yourself, but larger items may require the contractor’s help.
Also, don’t forget to ask how they’ll handle baseboards as they usually overlap flooring. Find out if the contractor will remove and re-install the baseboards or cut under the existing baseboards or will they simply butt up against them and cover with quarter-round trim. This is an important step as it will directly affect the finished look of the room.
Finally, you’ll want to ensure that they’ll also clean up after installation, which isn’t always guaranteed. Your home is important to you and you’ll want it returned to its original state when the job is done, so make sure your contractor knows this going in and is willing to do their part.
8. Length of Job
Installing hardwood floors can be a time consuming job and you’ll want to know going in exactly how long it’s going to take. Such items as delivery of materials and acclimation can add to the overall length of the job. Also, you’ll want to know if the contractor intends to skip any days during the project, whether to allow for drying time or just because they don’t work on certain days.
Since flooring installation often requires you to be out of the room that’s worked on or even out of the house entirely, it’s important for you to have a good idea of the overall timeline so that you can make any necessary plans ahead of time.
9. Acclimation
Because wood has a tendency to expand and contract depending on temperature and humidity level, it is vital that the materials be allowed to acclimate to the environment in your house before installation. This will allow the wood to settle and help to prevent buckling and warping.
You should always check to make sure that your contractor does not skip over this extremely important step in the installation process. Some contractors may skimp when it comes to acclimation in order to meet their client’s desired timeline, but this is a serious mistake that you want to avoid. For reference, check the manufacturer’s instructions for recommended acclimation times.
10. Payment
Since most contractors know that unforeseen problems may come up during the installation process, they will generally not expect full payment beforehand. Most contractors will require a deposit up front and then the balance of the payment after the job is complete. If a contractor is asking for the full payment up front, that’s a pretty good sign that they can’t be trusted to do quality work.
Remember that contractors will generally begin with a size estimate, taking complete measurements of the area where the installation will occur to determine the amount of materials required. Once they have a size estimate, they can then produce a price estimate. They may do this on-site or need to go back to their office and then call you with the estimate.
Next will come the delivery of materials and acclimation time, which should occur at least three days before the work begins. Finally, the installers will arrive, set up their equipment and begin the installation job. When the job is complete, they should clean up after themselves, ensuring that your home is left in good condition.
Putting It All Together
Knowing what to expect from your flooring contractor can save you a lot of headaches and a lot of money in the long run. You’re spending a substantial amount of money to add the beauty of natural hardwood to your home so you want to be sure that your job will be handled with the utmost care. Do your homework ahead of time and you’ll be able to breathe easy knowing you’ve got a contractor you can trust.
Contact Plus Hardwood Flooring today for a free estimate.
When is it Time to Refinish Your Hardwood Floors?
Refinishing your hardwood floors is an important aspect of maintaining their beauty and longevity. Learn the signs that indicate it's time to refinish your hardwood floors and how often you should consider refinishing.
Hardwood floors can add a lot of value to a home. Nothing compares to the elegance, beauty and warmth of rich natural wood. Unfortunately, even the most carefully protected hardwood floors will eventually suffer some wear and tear over time and that will inevitably lead to the need for refinishing.
Not all damage is equal, of course, and some can be taken care of easily, while more severe damage requires immediate attention. If your floors are beginning to show damage and you don’t take care of it quickly, it’s likely to become more serious and require repair and replacement.
The issue for homeowners is knowing exactly when it’s time to refinish your floors. Exactly how do you determine when your floors are in need of more than just regular cleaning and maintenance? Please note, that I’ve also got a brand new blog post on this topic, diving deeper into when exactly is the right time to refinish your floors, as well as just finding out whether they can be refinished at all. Here is the new post!

Following are some conditions you can look for that indicate it may be time to refinish your hardwood floor.
Water Damage
Water is the worst enemy of hardwood floors. Even the smallest amount of water can eventually lead to damage. If there is any kind of leak or other emergency that results in standing water, it’s vital that you dry out your hardwood as quickly as possible.
Severe cases of water damage may result in warping, cupping, or buckling of the wood, in which case it will need to be replaced. In less severe cases you may only have staining, which can usually be fixed by sanding and refinishing. Again, the sooner you can address the problem, the better off you’ll be and the more money you can save yourself in the long run.
Scratches
Any time you have a wood floor, some scratching will occur. It’s a natural side effect of normal use, especially in heavy traffic areas. Light scratches in an isolated area are generally not a cause for concern. If the scratches are only in the stain, they may not require any repair.
Scratches that go deeper, into the wood itself, are a more serious matter and a sign that your floor requires refinishing. Any scratch that penetrates into the wood opens up a potential entryway for water, which can do more serious damage, so the scratch needs to be addressed.
It’s also important to remember that you can’t repair scratches by simply applying a new coat of stain as that will change the color of the wood, making the repair obvious. The only way to ensure proper repair is by sanding and refinishing the floor.
Gouges and Chipping
Unfortunately, wherever you have wood and traffic there is likely to be damage that goes beyond simple scratches. This is especially true in homes with children and pets, but can happen in any home over time. Deep scratches, gouges, and large chips can let water seep in and seriously damage the wood, and splintering of wood can be hazardous for everyone in the family.
Graying of Wood
If you notice sections of your wood floor beginning to look gray this is not just a normal sign of aging. Graying or other discoloration of wood is a sign of water damage and likely means that the polyurethane finish has begun to wear off. The gray color is an indication that the wood is oxidizing and if it is not addressed it will continue to darken until it turns black.
The more discolored your floor gets, the more structural damage is occurring and this can become dangerous. If your floor has begun to look gray in spots, that is a good indicator that it is time to refinish in order to avoid more serious damage.
Excess Staining
As with scratching, staining is an unavoidable byproduct of life with hardwood floors. It may be impossible to prevent staining but if the staining becomes excessive then you should take this as an indicator that refinishing is necessary. You can try to remove stains with regular cleaning products but if that doesn’t work then you’ll need to sand and refinish.

Sun Damage
While having lots of natural light in your home is a plus, it can lead to damage and discoloration of hardwood floors. In areas that get a lot of direct sunlight, you may notice your floor become faded or washed out. Reapplying the stain can help, but it won’t solve the problem. The only way to completely resolve the issue is by refinishing.
Worn Areas
Any time you have a lot of traffic on hardwood, it will eventually start to look worn. If you notice areas where the stain looks like it’s wearing away then it’s time to consider refinishing. Once the stain begins to wear away if it is not addressed it can lead to splintering, which can be even more dangerous.
This kind of regular wear is most noticeable in places like doorways or hallways that see a lot of traffic but it can also occur in other areas of heavy usage, such as beneath chairs and tables that are regularly moved.
Remember, too, that once the stain begins to wear away it can allow water to seep in and warp the wood or lead to mold growth. That kind of damage, if not addressed promptly, can become very costly as it may require a replacement of the entire floor.
While these are the most common signs of damage that require refinishing, there are other indicators as well. Whenever you have hardwood floors it’s always important to be aware of their condition so that you can spot any potential problems as quickly as possible. Not only will this keep your hardwood floors looking good, it will also help them to last for years.
Even if your floors seem to be in good condition, it’s always a good idea to regularly check and ensure that the seal coat is still intact and providing the proper barrier to prevent water damage. You can do this easily by pouring about a tablespoon of water on the floor, particularly in areas that look worn.
If the water beads up in small droplets or pools together and doesn’t seep into the wood then the seal is still intact and doing its job. If the water seeps into the wood itself, then you’ve got damage to the seal and should immediately consider sanding and refinishing.
Refinishing is important if there are signs of damage but you don’t have to wait for these indicators to refinish your floor. If you are dissatisfied with the design of your home and want to change the color of your hardwood floors, you can do this by refinishing. Floors that are in good shape can easily be changed up by sanding and refinishing with a new stain color.
Not only will this help to keep your home looking fresh, it can also improve resale value should you eventually decide to put your home on the market. There is almost no better way to add value to your home than with good quality hardwood floors, which most realtors will tell you are among the first things buyers look for in a home.
If you do make the decision to refinish your hardwood floors it’s important to do the job properly in order to maintain the overall condition of your floor. In most cases that means relying on a professional flooring contractor who will have the tools and experience necessary to do the job right.
Ready to Refinish Your Hardwood Floors?
Hardwood floors can be a great investment in any home, but they require a lot of care and attention. Be aware of the condition of your floor and watch for any signs that it may be time to refinish. The sooner you get your floors refinished, the better off they’ll be and the longer you’ll be able to enjoy them.
Call Plus hardwood Floors at (773) 954-4982 or send us an email for a free estimate!

Should You Use Hardwood Floors in Your Basement?
Hardwood flooring can be a great option for basements, but it's important to consider the potential issues that come with it. Learn about the pros and cons and how to ensure the longevity of hardwood floors in your basement.
Hardwood flooring can provide a beautiful, refined look to any home which is what makes it such a popular choice for homeowners. Although it can add elegance to any room, it isn’t always the ideal choice, specifically when considering the building or renovation of your basement.
Because basements are built directly over the ground and have a concrete slab as their foundation layer, they necessarily have specific maintenance issues that aren’t common to the rest of the house. Specifically, most basements are much more vulnerable to water damage and so your choice of flooring needs to be able to stand up to this kind of damage.
If you are building a new home you have the advantage of ensuring that your basement floor is properly designed to avoid moisture build-up and accept your choice of flooring. This involves installing a proper foundation and a vapor barrier in order to improve energy efficiency and either an interior or exterior drainage system to minimize water seepage. It’s also important to make sure that your foundation has proper grading and an adequate sump pump to mitigate water damage.
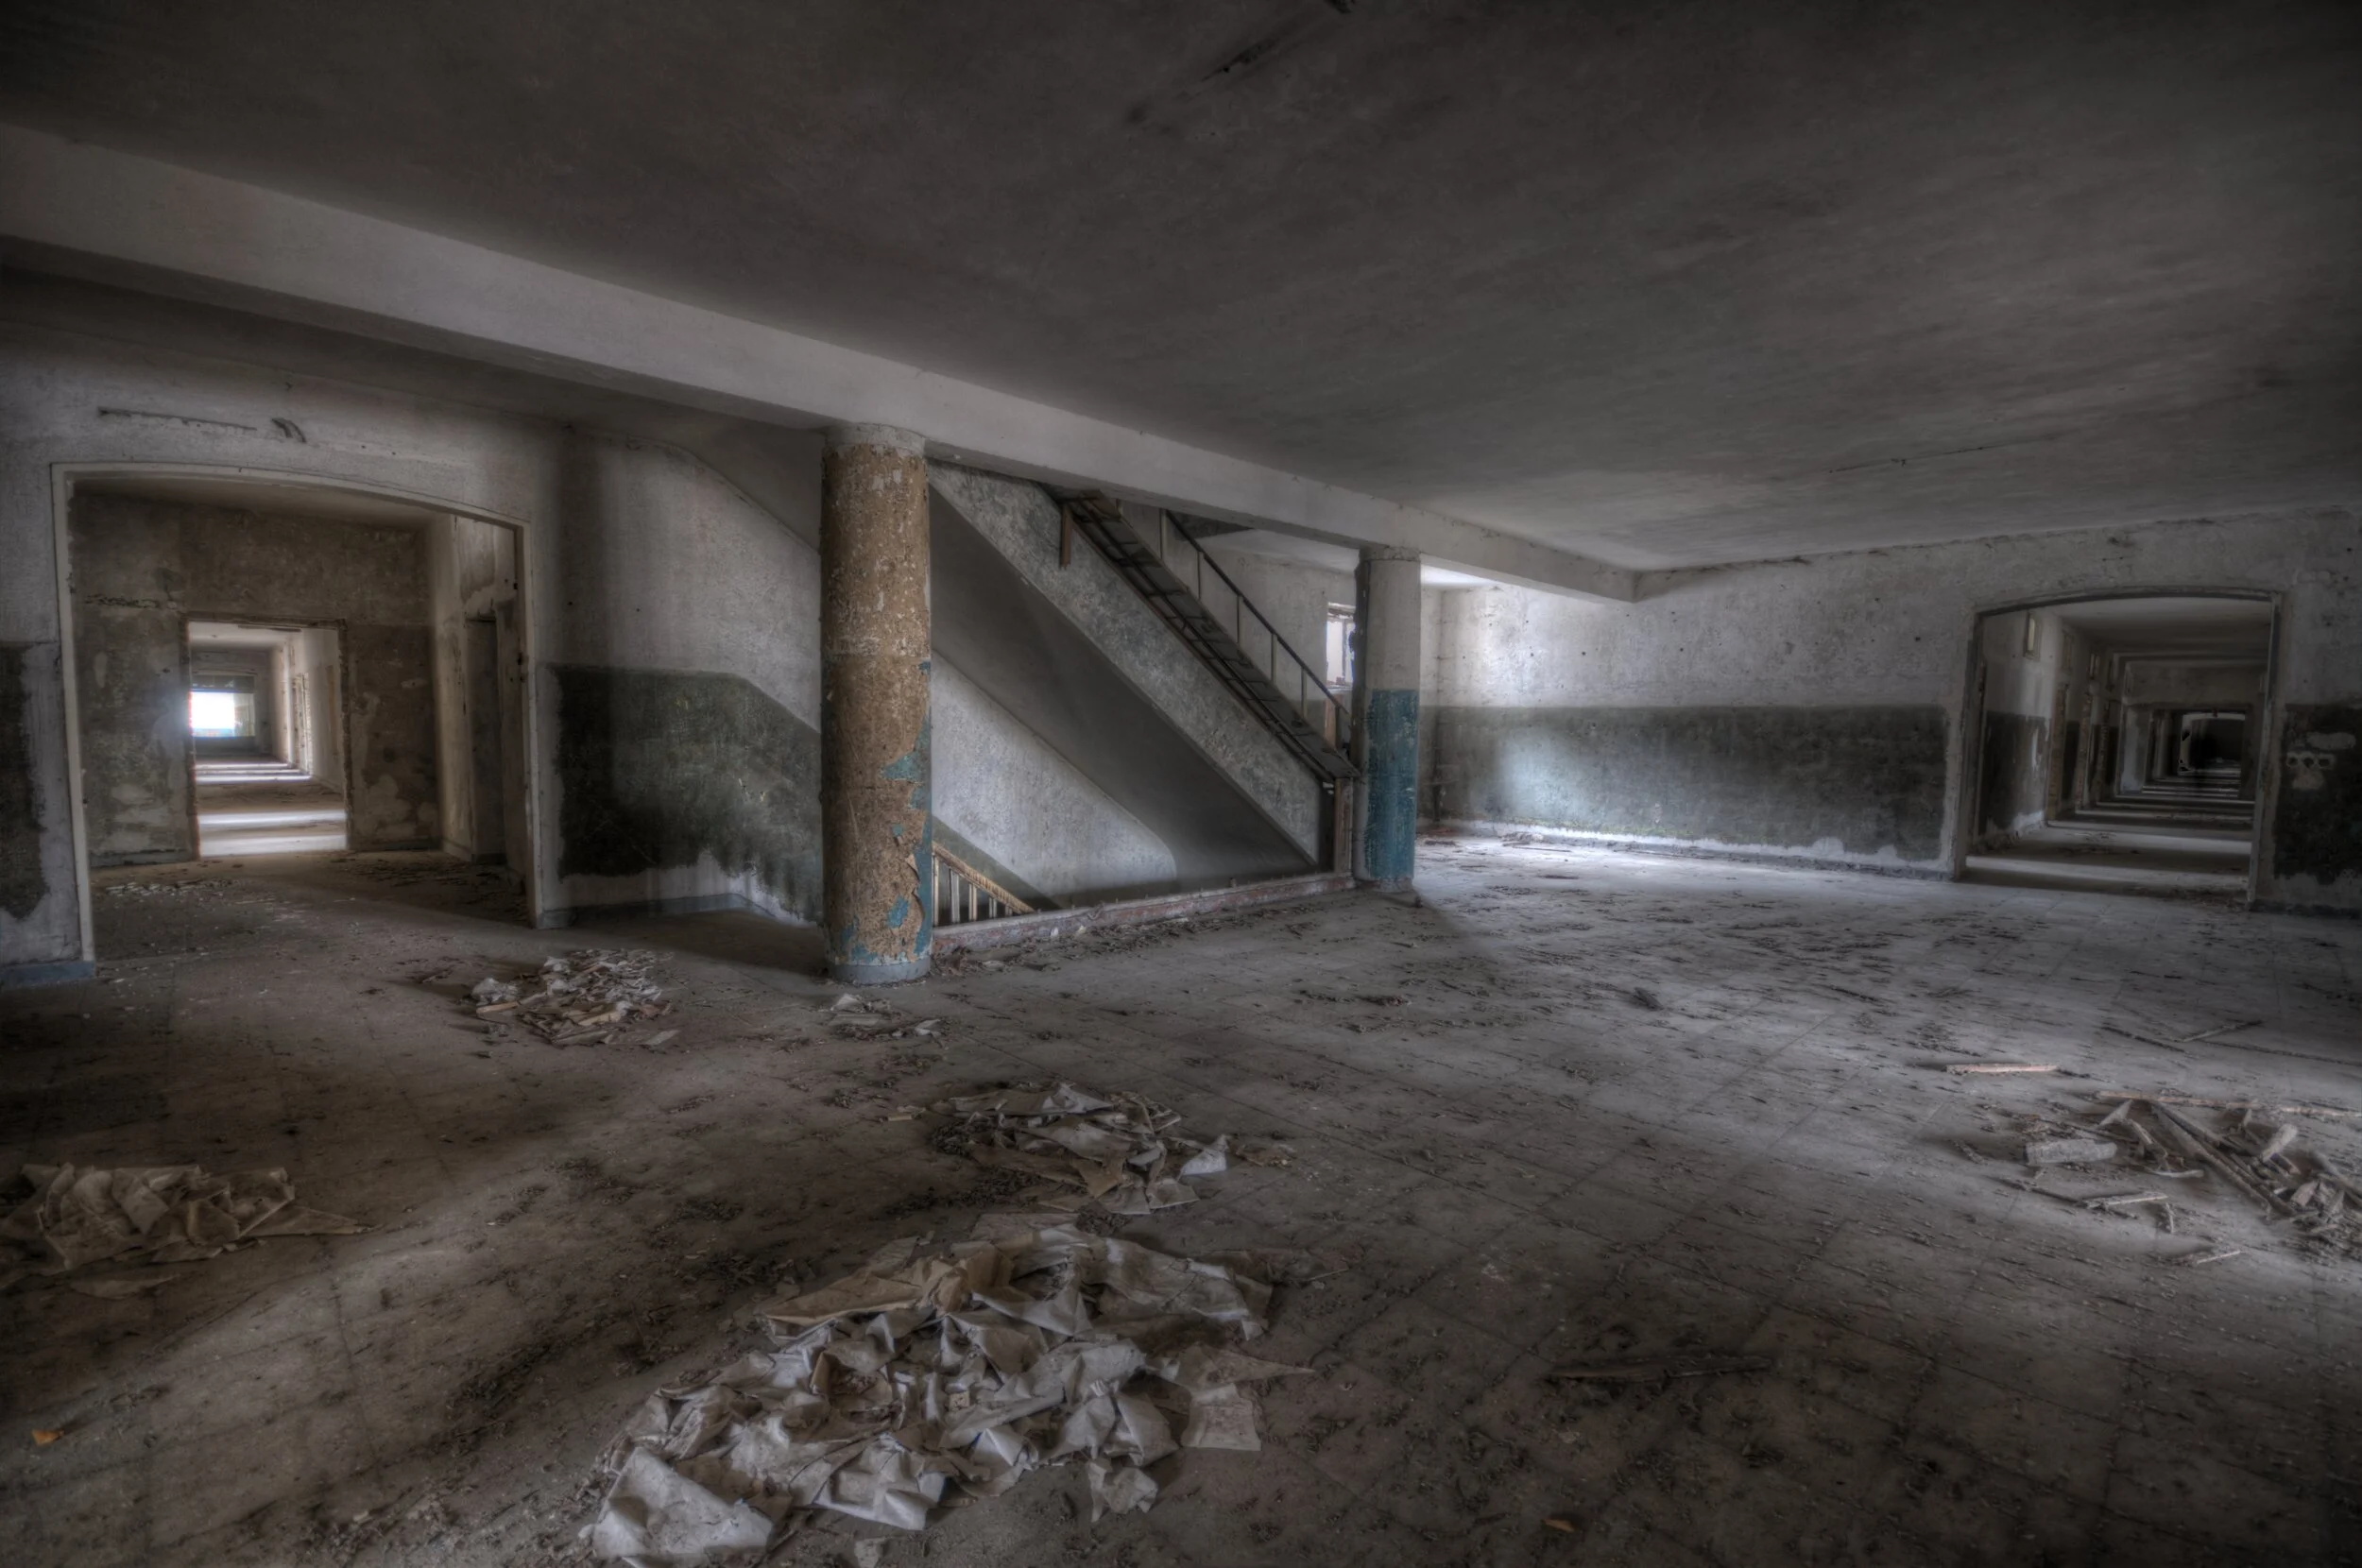
Basement Preparation
There are certain steps you can take when building your home to ensure that your basement will be able to accommodate your choice of flooring material. The concrete slab should be in good condition and in most cases should include a layer of porous fill in the aggregate bed to allow for better drainage of groundwater. The groundwater should be directed underground away from your home or toward a sump pump basin.
In many cases, when finishing a basement for regular use you’ll want to install a radiant heating system beneath the concrete slab to counter the natural cooling of the concrete. In this case it will be necessary to install a system of flexible tubing before the concrete slab is poured.
Once poured, the concrete slab should be allowed to cure for a minimum of 30 days before installing any of the subflooring. In order to avoid water damage to any flooring option, a vapor barrier should be included as part of the subflooring. This extra protective barrier effectively seals off the ground, preventing moisture seepage into the concrete slab.
This is particularly important when the concrete is freshly laid and still wet, but it remains vital even after the concrete has fully dried as moisture can still seep up from the ground and cause damage to the concrete slab and the flooring laid over it.
Vapor barriers can consist of a number of different materials, including PVC, polyethylene sheets or 15-pound roofing felt. A layer of insulation should be laid on top of the vapor barrier to prevent the leeching of heat through the exterior walls. The insulation layer should be anywhere from 1 to 2 inches thick, depending on the environment where you live, with colder climates requiring a thicker layer of insulation.
Polyethylene is the newest type of vapor barrier, preferred because of its ability to withstand heavy loads and resist mold, mildew, and fungus. It is compatible with any kind of flooring including tile, laminate, linoleum, carpeting, and hardwood but you may need to check with the manufacturer to determine the type of adhesive to use.
Choosing Your Basement Flooring
Whether you are building a new home or finishing an existing basement, choosing the right flooring is critical. As moisture can cause cupping, swelling, warping, and splitting, it is generally not recommended to use hardwood in a basement as most basements are more prone to excess moisture. While ground seepage can cause gradual damage, a burst pipe or broken hot water heater can cause extensive damage to any flooring but particularly hardwood.
If you are determined to get the look of natural wood in your finished basement area, there are several options you might want to consider in order to mitigate potential water damage issues.
Laminate
Laminate is the recommended choice for most basements as it has distinct advantages over solid hardwood. Since laminate is constructed from a core of High-Density Fiber it is more resistant to water damage and other potential hazards. A top layer is added over the HDF with a photographic representation of natural wood.
The top layer of laminate can be made to replicate a number of different wood grains, vinyl or tile patterns giving homeowners a wide range of design options. Laminate can be installed using a floating, tongue in groove, interlocking or locking method allowing for more stability and accommodating in-floor radiant heating.

Engineered Hardwood
Engineered hardwood is a newer option that may make it easier to incorporate the look and feel of hardwood in moisture-heavy environments such as basements. Unlike laminate, which fuses a photographic layer over a core of High-Density Fiber or HDF, engineered hardwood consists of a combined core of plywood, hardwood, or HDF with a hardwood veneer glued on top of it.
Since it uses a veneer of actual hardwood, engineered hardwood more accurately replicates the look of solid hardwood. It comes in a variety of wood types to fit any room design making it a flexible choice. It is generally constructed of three or more core layers laminated together using a high-pressure bonding process for greater stability.
Using the multiple-ply planking and bonding technique helps to counteract any warping, splitting or cupping caused by water and provides a better protective layer over radiant heating systems. The hardwood veneer comes in a variety of thicknesses and most flooring contractors suggest using a veneer that is it at least 2 mm thick.
The thickness of the veneer can vary depending on the type of wood, the use pattern of the room and your budget. You can determine the best choice of wood for your environment and budget by using the Janka Hardness Scale. Generally, the harder the wood the more durable it will be so if your basement is going to get a lot of traffic you’ll want to choose a harder wood.
Solid Hardwood
Solid hardwood is usually constructed from whole planks and consists of natural wood throughout the entire core. It is most often installed using the tongue and groove method and requires sanding and finishing to remove any imperfections in the wood. It is more expensive to install than laminate or engineered hardwood and more prone to damage from water or other elements.
Since water damage or other damage would require the replacement of the entire floor, installing solid hardwood in a basement can be even more costly. It can also sustain damage from radiant heating systems, which are often necessary to install in basements.
Basement Floor Installation
Because basements include a concrete slab, traditional installation methods for hardwood that include nailing are not possible. Installation can be completed using a floating method or by gluing the flooring in place. If a radiant heating system is used, then gluing is not recommended as the heat from the tubing system can damage adhesives.
When installing any type of wood flooring in a basement where moisture damage can be an issue, it is important to have the heating and air conditioning systems working during the installation process. The furnace can aid in drying out the cement slab and the air conditioner can help to reduce moisture in the air.
Bottom Line
While hardwood is generally not recommended for use in moisture-prone areas such as basements, new alternatives including laminate and engineered hardwood are providing other options for homeowners intent on getting the look and feel of hardwood in their finished basements.
Before choosing flooring for your existing basement, check carefully to ensure that the concrete slab is in good condition with no cracks or breaks. If any damage does exist it is essential that you repair it before installing any kind of flooring.
Research your options thoroughly and make sure you follow all instructions for proper installation to minimize potential damage from water and other elements.
Whether you are finishing an existing basement or constructing a new home, you should consult with a flooring contractor to get professional advice on which flooring option is right for your home. With the proper choice, you can enjoy the beauty of hardwood without the risk of serious damage and the added cost of repairs.

What are Your Color Options When It Comes To Hardwood Floors?
Hardwood flooring comes in a variety of colors and finishes, allowing you to choose the perfect look for your home. Learn about the different color options and how to choose the perfect color for your hardwood floors.
Once you’ve opted to install or refinish hardwood floors, you’ll have several choices to make. There are a number of different types of wood that can each bring a different look to a room. With your wood selected, you can further customize the look by choosing a specific color.
Colors range from rich, darker tones to warm browns to lighter colors, each of which can have its own distinct effect. Before making your choice, there are several factors you need to take into consideration that may help you decide.

The style of your home/décor
Different types of woods and different colors lend themselves better to certain designs. If you have a lot of lighter colors and sleek, modern design, for example, that might pair better with a darker floor, while a more traditional design may work better with warmer, mid-level colors.
The traffic pattern
If you have a very busy household, especially one with children and pets, then you’re probably better off with lighter colors that won’t show wear as much.
Your cleaning habits
If you aren’t particularly diligent about cleaning, then you’ll also want lighter shades and hardier types of wood that don’t tend to show dirt as much. Darker colors can be very attractive but they’ll also require more regular cleaning, so take that into consideration before you go in that direction.
Size of the room/amount of light
Both the size of the room and the amount of natural light it gets can affect the look of your wood floors. Darker colors may be too heavy for small rooms, while rooms that get a lot of regular sunlight will need a color that won’t fade as much.
Other colors in the room
Your design choices can also help to dictate the color of the wood you choose. Everything from the color of the walls and furnishings to other wood surfaces in the room such as cabinets or built-ins can affect your choice of floor color, as you want your floor to complement the rest of your design.
With all of that in mind, it’s time to look at your color options so that you can make the right choice for your home.
Brown
Brown is, of course, the classic choice for most hardwood flooring. There is a wide range of shades within the brown family, however, and you can opt for anything from a medium warm-toned antique oak to a dark chocolate brown maple. The shade of brown you choose will depend on the style, size, and color of your room and your personal preference.
Using a brown shade generally makes it easier for you to change the design of the room as they are usually more adaptable. Also, since brown is the most popular choice for flooring it is also your best bet in terms of resale as it is likely to appeal to the most people.
Natural/Beige
On the lightest end of the color spectrum is natural hardwood flooring. These are bright, clean tones that lean toward a more modern look. They can range from rosy pinkish tints to light yellow and orange tones.
These tones tend to blend well with other neutrals but can become boring if they are overdone. Also, they may not work with all colors, so you’ll want to choose carefully depending on the overall design of your room.
Yellow/Tan
Despite the name, this group of colors doesn’t actually include bright, vivid yellows but rather rich, warm tones of honey and caramel. Oak most often leans toward these tones but you can also find yellows and tans in maple or lighter walnuts.
These shades add a wonderful touch of warmth to your home, and as they can look a bit more aged they can also give any home a “lived-in” feeling. They work perfectly with rustic designs that include leathers and wools and homespun fabrics.

White
This is one of the less traditional colors but it can be a perfect choice, particularly for small spaces, as the ability of white to reflect light can make a space feel larger. White floors and light-colored walls can be a great backdrop to highlight a statement piece of furniture or art and they work particularly well for a light, beachy design.
Gray
Gray is very much on trend, considered the “new neutral”. It’s a great choice if you want an alternative to natural or beige tones but still want something that will serve as a neutral. Also, gray tends to bring out the grain in wood flooring, so it is ideal for woods that have a distinct grain that you want to highlight.
Orange/Red
Not for the faint of heart, coppery or russet-tinted hardwoods can add a real eye-catching dash to your décor. You need to tread carefully with these tones, though, as they don’t mix well with all decors. Better to test out a small patch before you stain a whole floor to make sure you can live with it.
Black
For the boldest statement of all, you can opt for black or dark hardwood floors. Again, this doesn’t go with all designs so you need to choose carefully, but in the right setting dark floors can add a touch of elegance to a room. As darker shades can make a room feel smaller, they tend to work best in larger rooms with plenty of light.
Bottom Line
With hundreds of subtle shades to choose from, selecting a color for your hardwood floor can be a daunting task. You need to take the design of your home, the traffic patterns, the amount of light and other factors into consideration as they can all have a bearing on what color of hardwood will work best for you.
With a little careful thought, you can find the right shade that helps to make your hardwood floors the perfect accent for your home.
Contact Plus Hardwood Flooring today to help you determine your best colors and get a free estimate.

How Much Does Hardwood Floor Installation/Refinishing Cost?
The cost of hardwood floor installation or refinishing can vary depending on a number of factors. Learn about what you can expect to pay and how to budget for hardwood flooring.
When you want to add a touch of natural beauty to a room, or even a whole home, nothing beats the warmth and elegance of hardwood. Of course, hardwood can also be quite expensive. Whether you’re installing new floors or refinishing existing hardwood, there are several factors that affect the overall cost of the job.
The type of wood you choose, the size of the room and the various steps required in the installation or refinishing process determine the final cost, so it’s important to consider everything before you decide which way to go.

Installation of Hardwood Flooring
While hardwood is among the most expensive flooring options, installing new hardwood can change the entire look of a room and can also add value to your home when it comes time to sell. This makes it well worth the investment. In general, it costs more to install a new hardwood floor than to refinish an existing one but there are several ways that you can help to cut back on costs.
The average cost of installation is $4,500, though it can vary from $2,000 to $11,000, depending on the type of flooring, where you live, if you need to remove furniture or appliances from the room, repairs to the subfloor and the removal and disposal of old flooring.
Floor Type
There are many different types of wood to choose from, each of which can provide a different look to a room. Softwoods such as pine are usually the cheapest, averaging between $3 and $6 per square foot, while mid-priced varieties like cherry and oak range from $5 to $10 per square foot. More exotic woods like Brazilian walnut and mahogany can cost as much as $8 to $14 per square foot.
The cost to install these woods also varies; from $3-$5 per square foot up to $4 to $8 per square foot.
Location
Whether you choose to install a new hardwood floor or refinish an existing one, you’ll likely need to hire a flooring company to do the work for you. Choosing a company that is local to your area can help to save you money.
Removing and Replacement of Furniture and Appliances
In order to install new floors you will need to completely clear any furniture, appliances or furnishings in the room. This is usually not included in the estimate for the project and if they have to do it themselves, contractors may charge a premium. You can save money by clearing as much of the room as possible yourself.
Repairs to Subfloor
If the subfloor beneath your hardwood is in poor condition it will need to be repaired before a new floor can be laid. Again, this will be an additional charge that can raise the overall cost of installation. Materials for subflooring can cost as much as $22 per sheet of plywood and anywhere from $20 to $35 per hour for labor.
Removal and Disposal of Old Flooring
Obviously, before the new floor can be laid the existing floor will have to be removed and disposed of, which can add another extra expense.

Refinishing
If your floor has only minor damage, refinishing can be a much more cost-effective option. While there are various factors, including the size of the room and the availability and cost of labor that can affect the overall cost, the average for refinishing a hardwood floor is $1,700.
Depending on the circumstances involved in your specific job, prices can range anywhere from a low of $1,050 to a high of $2,400. Costs per square foot average between $3.25 and $5.00.
The per-square-foot price can vary depending on if you’re having an entire home done or just refinishing a single room. Detailed areas like stairs can be more expensive, generally between $40 and $75 per tread, because they require more skilled work.
When getting an estimate, your contractor will take into consideration the various steps required in refinishing: preparation, sanding, staining, and top coating. The amount needed for each will affect the overall price.
There are several factors that can have an effect on pricing, including the size of the floor, local labor costs, skill, furniture moving, removing carpeting or flooring, repairs, and cleanup.
Size of Floor
In general, smaller rooms will cost more to refinish per square foot because they may be too small to accommodate sanding equipment and will therefore require specialized equipment.
Local Labor
Your location can determine cost in several ways. In large metropolitan areas where the demand for work is higher, contracting companies may charge more. Also certain regions, such as the Northeast, have higher labor costs.
Skill of Labor
You may be able to find a company that charges considerably less than the competition but often that reflects the level of their skill. Bargain basement shopping can lead to a less-than-ideal finished job and extra costs to repair it, so shop wisely when hiring a contractor and you could save yourself money in the long run.
Furniture Moving
Whether refinishing or installing, the room that requires the work will have to be cleared before the job can begin and contractors will usually charge extra for this. Again, you can save some money by doing as much of the moving as possible yourself.
Removing Carpeting/Flooring
If there is carpeting or another flooring on top of the hardwood you want to refinish, it will need to be removed first, which is another added expense. This is another job you can probably take on yourself to help cut costs.
Repairs
If the floor is too damaged, refinishing won’t be possible. If this is the case, the floor will have to be repaired before it can be refinished, adding another charge to your overall cost.
Cleanup
Because it includes several rounds of sanding, staining, and finishing with a top coat, refinishing can be a messy process. Unless your contractor specifies a cleanup cost in their estimate, you may have to pay extra for a cleaning service after the refinishing is completed.
Do It Yourself Costs
You can always try to save yourself some money by taking on your refinishing or installation job yourself. Sanding machines can be rented from your local hardware store for around $300 to $400 and you’ll also have to purchase supplies like stain, finish, and brushes.
This can cut down on overall costs significantly as it eliminates the cost of labor, but unless you are very secure in your abilities, you can’t ensure that you’ll get the same results as the professionals do.
Bottom Line
Nothing can match the natural beauty of hardwood floors and most people find it worth the investment to make sure their floors are in the best shape possible. That can mean either refinishing an existing floor or installing a new one.
Installing a new floor is more expensive than refinishing an existing one, but either can go a long way toward enhancing the beauty of your home. Before you make your choice, you should shop for comparison, getting several contractors’ estimates to give you an idea of the cost. With the right choice, you can get the most out of your hardwood floors without spending a fortune.
Call Plus Hardwood Flooring today at (773) 954-4982 for a free estimate.

What Type of Wood Should I Consider For My Flooring Project?
Are you looking for the perfect wood flooring option for your Chicago home? With so many options available, it can be overwhelming to decide. In this blog post, we'll break down the pros and cons of popular wood flooring choices to help you make an informed decision. From traditional oak to trendy parquet, we've got you covered. Check it out for the ultimate guide to wood flooring options for your home renovation or new build.
There are many factors that go into selecting and installing a hardwood floor. It’s a multi-faceted process and each step along the way will require careful thought and decision making. One of the most crucial choices of all is selecting the type of wood to use for your flooring project.
Choosing a hardwood floor isn’t as simple as deciding whether you prefer dark or light wood. There are many types of wood to choose from and the one you ultimately choose will depend on a number of factors.
Before you make your choice, ask yourself a few key questions:
What kind of home do you have and where in the home will the hardwood be installed?
How much traffic will the room get?
What is the décor of the room?
How much sun does the room get?
Are you looking for a particular color?
What kind of home do you have and where in the home will the hardwood be installed?
In single-family homes, the floor you choose can depend upon the existing subfloor, while your choice may be limited by your landlord or condo association in rental properties. The location of the room where you install the floor may also factor in, e.g. basements or mudrooms would likely require engineered wood rather than hardwood due to the additional moisture.
How much traffic will the room get?
The more heavily trafficked an area is, the more important it is to choose flooring that is durable and can stand up to regular wear and tear. This is especially important in homes with pets whose claws can take an even heavier toll on floors. Oftentimes, it is much more recommended to choose a denser hardwood rather than a softer one.
What is the décor of the room?
You want your hardwood to complement the overall design of your space, so you need to take the décor into consideration. If there are other woods in the room, you’ll want flooring that will work with them for a more attractive finished look. In general, some types of wood will lend themselves better to modern and elegant décor, while others are better suited to cozy, country looks. We find that the lighter the wood color, the warmer & larger the space becomes.
How much sun does the room get?
Sunlight can take a toll on wood, causing it to lighten or change hue over time, so you need to consider how much sun your room gets before choosing the type of wood to use. In rooms that get a lot of sun, you’ll want to choose a type of wood that will not fade easily. In these situations, it’s best to go for an engineered product.
Are you looking for a particular color?
Each wood has its own natural color and you can add to that with stain to achieve a more individualized look. However, not every type of wood takes to stain the same way, so if you want a particular color of flooring, you need to consider how easy it will be to achieve it with a specific type of wood.
Most stain samples you’ll find online are completed using Red & White Oak. Woods like Maple take stain entirely differently.
Where Hardwood Floors Work Best
Let’s start here, just to get a base understanding of where you might want to put your new hardwood flooring. Hardwood floors are best in rooms that are less exposed to natural elements, like water. They are not suited for mudrooms or bathrooms due to the excess moisture.
It is also best not to use solid hardwood floors in sunrooms or porched areas because the relative temperature and humidity in these locations are much less stable.
It’s a good idea to have hardwood floors in the main living parts of your home and high-traffic areas, like hallways & living rooms. This is because maintenance is much easier on wooden floors. If you get some dirt or debris somewhere it’ll be much easier to clean up on hardwood flooring than on a carpet.
If you need some advice on cleaning hardwood floors check out our blog, The Yes’s and No’s of Cleaning Hardwood Floors.
Wood floors are also great when you need to solve a design or structural problem. They are the main design component in any new home or remodel. When installed by hardwood floor contractors accordingly, they can even strengthen a floor system making it firmer and quieter to walk over.
Another place where hardwood floors are great is in areas that would otherwise be aesthetically and temperature-wise cold. They can help warm up an environment since wood is an excellent insulator.
Types Of Flooring
Now that you’ve got a better grip on where wood flooring will work best let’s take a look at the three major types: strip, plank, and parquet. Because these are the three major types of wood flooring, they are very likely to be available in a large variety, whether you are looking for finished or unfinished flooring.
Strip Flooring
This type of flooring consists of narrow boards nailed side by side to the subfloor, all running straight from wall to wall. For most, when they think of this type of flooring, red oak hardwood flooring comes to mind. It is by far the most popular method of installation as well as wood type here in Chicago.
Strip flooring comes in a wide variety of widths, ¾ in., 1 ½ in., 1 ¾ in., 2 ¼ in., and 3 ¾ inch widths. Most strip flooring installed by hardwood floor contractors today are side and end-matched. This means that both the long edges and short ends of each piece are tongue and grooved.
Most flooring today is milled this way, with a tongue and groove. This type of flooring is very versatile, so it’ll work in just about any space.
Plank Flooring
This type of flooring is very similar to strip, yet it is wider and is making inroads into strip’s dominance. Plank flooring is heavily used in modern architecture and new construction builds. For most, when they think of plank flooring, wide plank white oak flooring comes to mind. Plank flooring is available in 3 ¼ in., 4 in., 5 in., 6 in., and 7 inch widths.
The assembly of this flooring is very similar to strip flooring, with planks being nailed to the subfloor, but plank flooring is also often glued onto the top of the subfloor as well. This is because this type of flooring tends to move and react to moisture changes much more frequently and responsively.
If you have a very large open floor plan to cover, plank flooring would be the best option for you, because it offers a more homogeneous look than strip floors in the same species.
Parquet Flooring
Unlike the other two types of flooring, this one comes in individual tiles and is hand-milled piece by piece. Some say that it aesthetically is more similar to ceramic tile than hardwood floors. For installation, it is sometimes end-matched with tongue and groove, other times it’s square-edged. They are sold in individual tiles, therefore, the idea is to nail them down in a pattern.
This flooring must also be trowel glued down as well. Regular tube glue assistance will not do with this type of floor. A full trowel gluing method is required over the entire subfloor. This floor is not great to install just anywhere in your home.
The geometric patterns if not installed properly in the right space can be a jumbled mess. Yet, if the floor is installed and handled nicely it can add an inviting formality to a living or dining room. I highly recommend installing this floor design and pattern in more traditional homes.
Usually, it works best as a centerpiece of the room or in an entryway of a house. The cost of this type of installation method plus the flooring itself also makes it not super feasible to use throughout an entire home.

A Look At The Popular Hardwoods
Ultimately, the type of wood you choose is your personal preference, but as a final tip, it also helps to have an understanding of the popular hardwoods that are used for flooring so that you can make an informed choice.
Hardwoods vary in color, grain, and hardness. Each of these factors can determine which wood will work best in certain conditions.
Oak
This is one of the more popular woods and it comes in two distinct types: red and white. Red oak comes in warm tones ranging from creamy pink and golden red to rusty browns, all with light swirled grain patterns, while white oak is slightly harder than red and has gray undertones.
Both types of oak can complement a wide range of décor styles, which is what makes them the most common hardwood flooring choice. This is the type of wood you will find in 96% of residential homes, especially around the Chicago area.
Cherry
Cherry is not as hard as some of the other woods so it should ideally be used in areas with less traffic as it won’t hold up to abuse as well. Still, it is prized for its rich, warm hues and smooth grain pattern, which make it a good choice for sleek, modern designs. This wood can be very expensive and is usually used as a highlight piece in a border.
Walnut
With deep, rich, chocolate tones and a large, straight grain pattern, walnut works well in mid to light-traffic areas. Some cuts of Walnut can be harder than others. There is very little variation in color from one board to another, resulting in a smooth and consistent overall look to the completed floor. Walnut can also be quite pricey and is again usually used for borders or highlights\centerpieces to a floor.
Hickory
Hickory rates very high on the Janka scale, which is used to determine the hardness of wood, making it an ideal choice for high-traffic areas such as family rooms and kitchens. It ranges in color from creamy beige to warm brown with darker streaks and contains large knots, making it particularly suited to country and rustic décor.
Hickory can also be stained just as beautifully as Oak can, which makes it an ultimate substitute for a customer with a higher budget that would like more wear and tear resistance to their floors.
Maple
Maple is another wood that ranks high on the Janka scale, making it quite durable. It is lighter colored than many of the other top hardwoods, with shades ranging from light cream and beige to tan with a slight reddish tint.
It has a fine grain pattern with some dark streaks that add visual interest and allow it to complement a wide range of styles. Usually, Maple looks quite blotchy after staining so it is recommended to keep it looking nice, light, and natural.

What About Pine?
Many people like the knotty look of pine and it has been used for flooring for hundreds of years, but as one of the softwoods, it doesn’t necessarily hold up well to heavy use. The knots and distinct grain patterns may also make it more difficult for pine to accept stain and finish, which can affect the overall look of your room.
Consult The Experts
If you’re not sure about which type of hardwood to choose, call us! Or send us an email for a free quote here. We have an intimate knowledge of the various kinds of wood and will know which is better suited for your particular needs.
The final decision will be yours, of course, but it never hurts to get some professional input so that you can feel more confident making your ultimate choice. Don’t be afraid to ask us questions, especially if you are local to Chicago or the surrounding Northern Suburbs!
Bottom Line
Choosing from the many types of hardwood flooring available can be a daunting prospect, but it doesn’t have to be. Take the time to consider the style, traffic pattern, and location of your room, and check out all of your options so that you can decide which one will work best for you.
In the end, the choice you make should be one that suits your design style and adds the natural beauty of hardwood to your home. But it should also be one that you fall in love with and want to live with.
Wait! Before you go, don't forget to follow us on Instagram to make sure you stay up to date with our latest projects!

How Clean/Messy is an Actual Hardwood Flooring Project?
Hardwood flooring projects can be messy and disruptive, but with the right preparation and planning, the process can be as clean and seamless as possible. Learn about how to minimize the mess and disruption of a hardwood flooring project.
Nothing can beat the look of beautiful hardwood floors. The natural grain of the wood and the warmth of the color convey a sense of coziness or even elegance to your home. But no matter what end look you’re going for, you should expect some amount of mess whether you’re installing new hardwood or refinishing existing floors.
Both processes involve several complicated steps, each of which can produce plenty of mess. So, before you begin installing or refinishing hardwood floors, it’s important to understand exactly what to expect. That way you can prepare and make it a bit easier on yourself.

Refinishing = Sanding
In order to refinish existing hardwood, it will be necessary to sand the floor to remove the existing finish and prepare the wood to accept the new finish. No matter how careful your installer is that will mean creating plenty of dust. There’s no way to avoid it completely but you can take some measures to help minimize the mess.
Clear the room
You’ll need to remove all furniture and rugs from the room so that the workers can have complete access to the floor. In order to prevent your belongings from being covered in dust, you should also remove anything hanging on the walls or any clothes hanging in closets.
Move your family and pets
You and your family will need to stay out of any room where the floors are being finished. If your house is big enough you may have the option to stay but in most cases, it’s recommended that you leave the house while flooring work is being done. You’ll also want to keep your pets away so that they don’t damage the floors.
These simple steps can help minimize the inconvenience and the overall mess, which should make the whole process easier on you and your family. There are also important steps that the workers can take to further contain the inevitable disorder.
Use plastic to contain the mess
Before they begin, the workers should put plastic drop cloths down on any areas that aren’t being worked on so that they won’t be damaged. The plastic will also help to contain the dust and make removal easier.
Vacuum
The workers should vacuum between each coat. Again, this will help to minimize the overall production of dust and keep your home cleaner.
Dust removal
Many flooring companies use specialized equipment to suck the dust out of the room and collect it in a special container outside the house. This can go a long way toward reducing the amount of dust that settles in your home.
Of course, no matter how careful the workers are, they still can’t guarantee that there will be no dust. Chances are, after the work is done the dust will have settled on window ledges, base molding, chair rails, and the tops of doors as well as any other surfaces in the room. So, expect to be doing a lot of dusting once the floors are done.
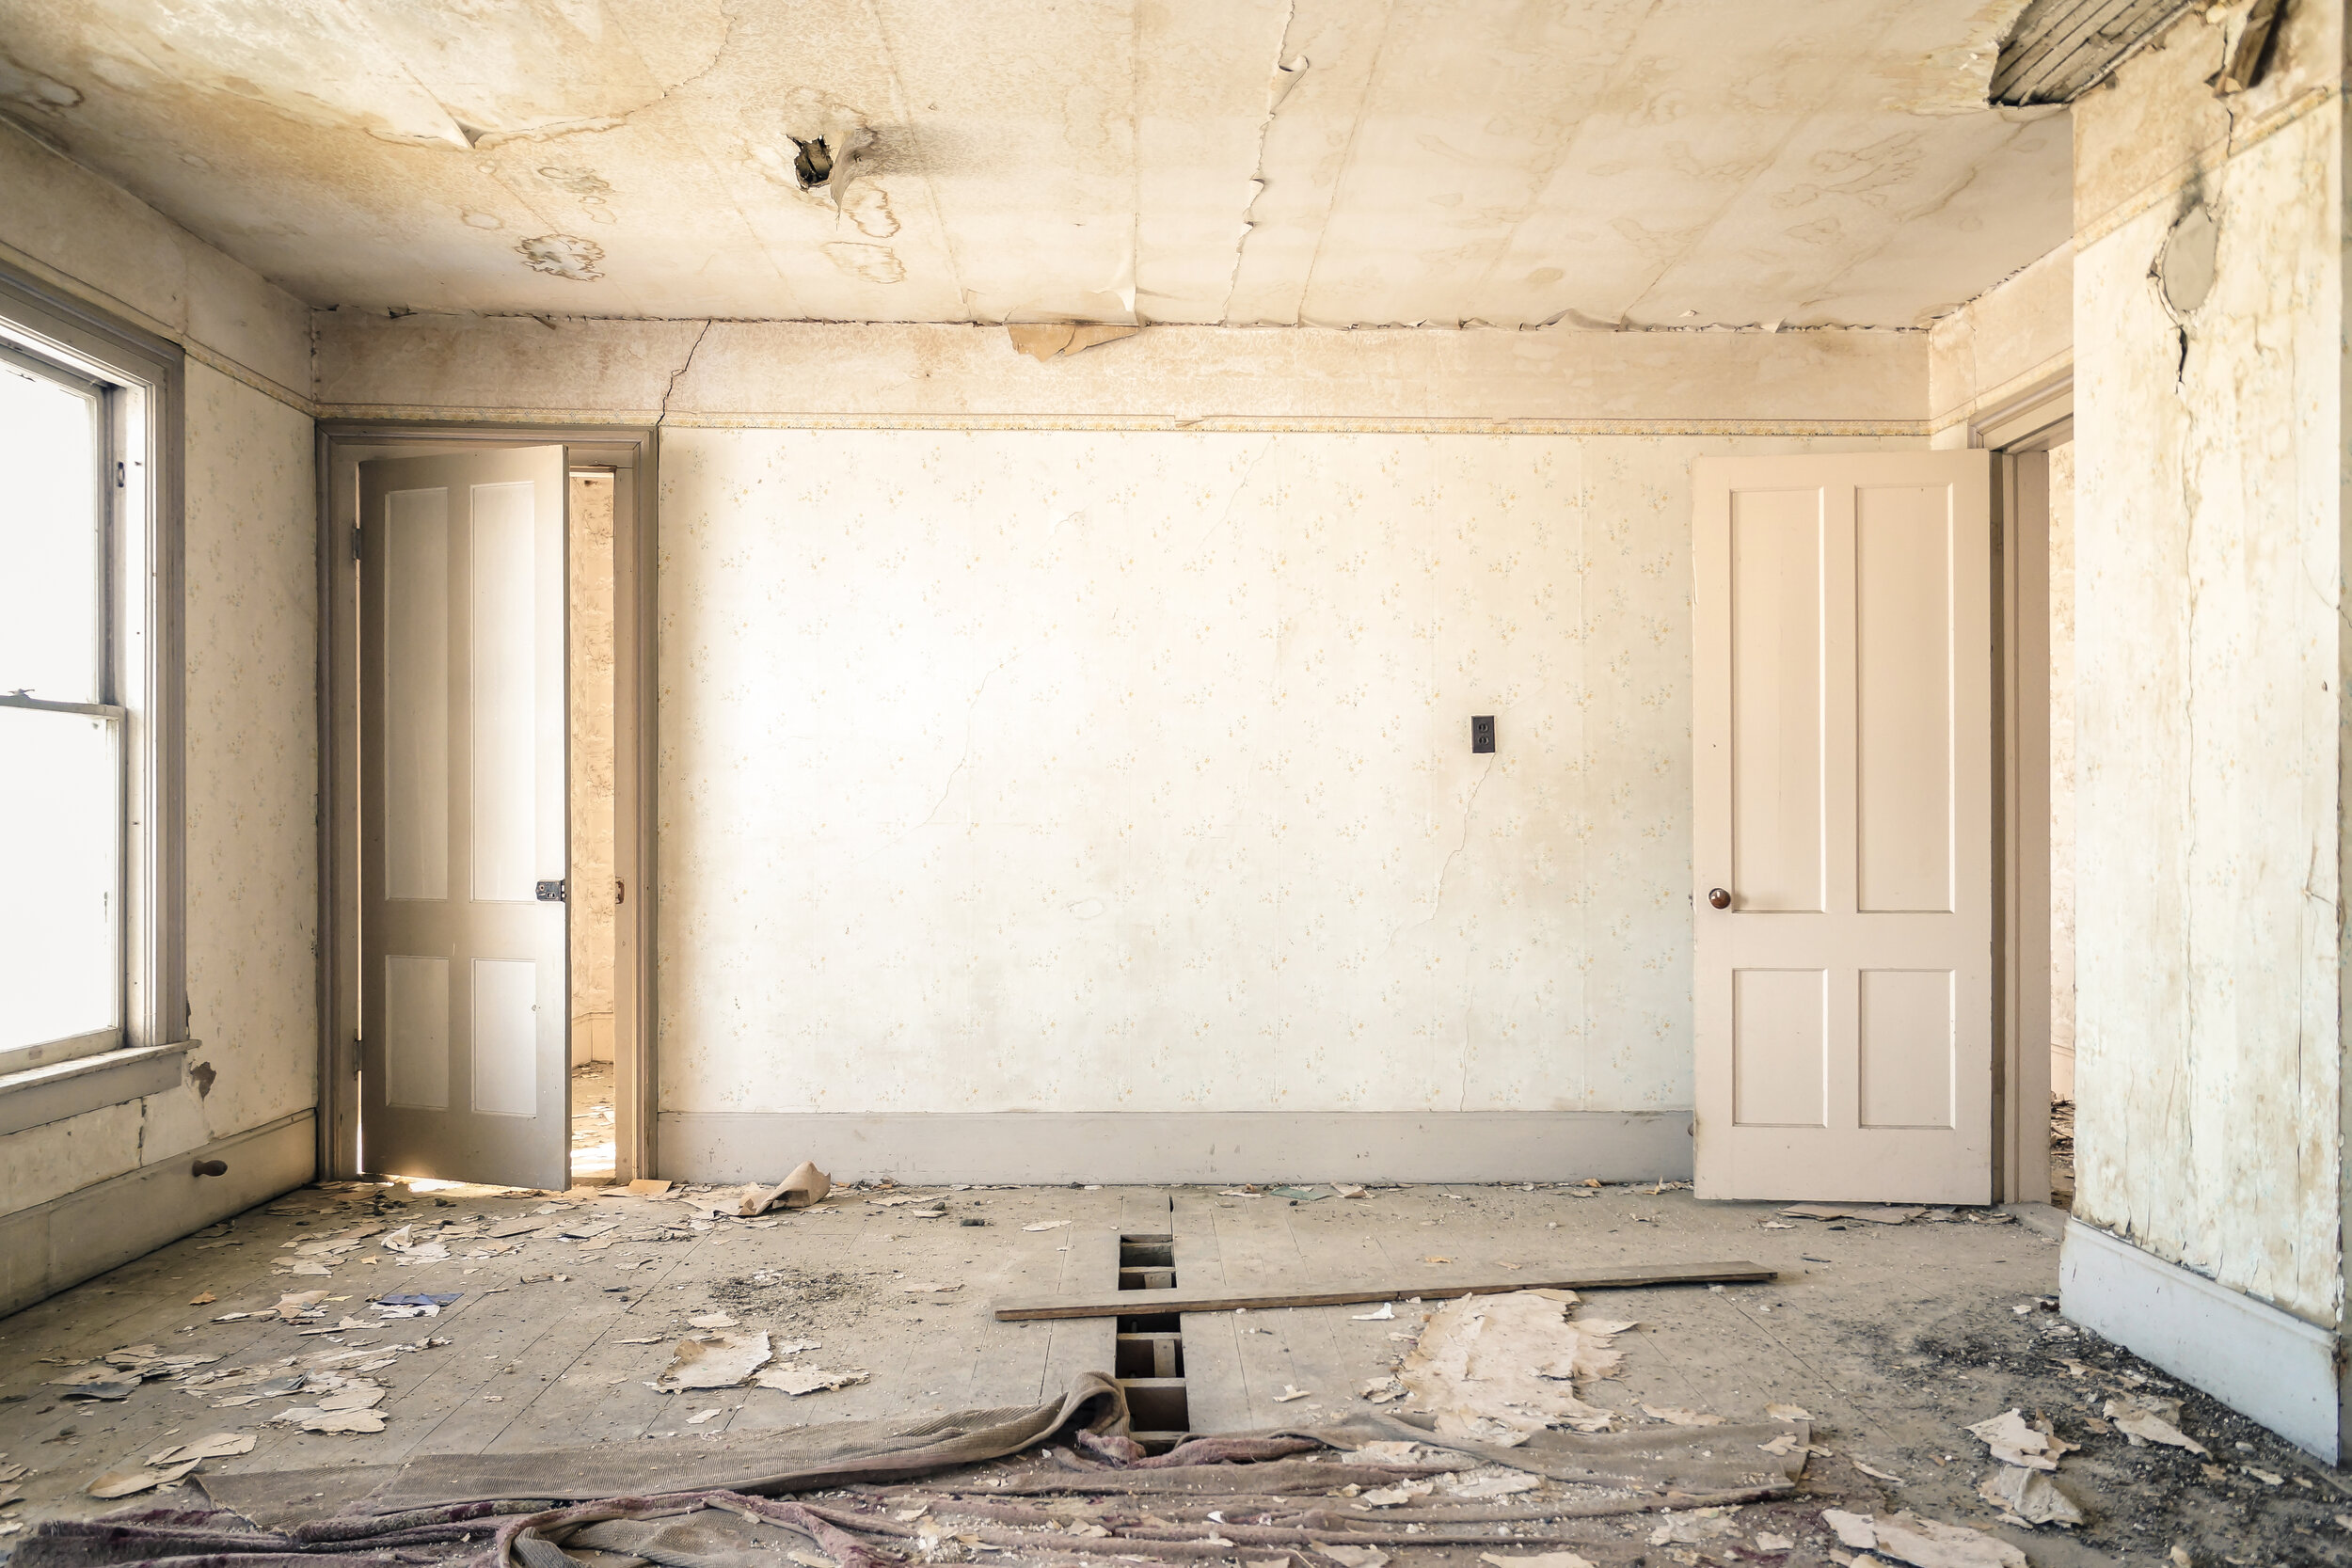
Installing can be messy too
Installing new hardwood can be just as messy as it can involve several steps including removing or preparing the existing floor and cutting the planks of the hardwood to the proper size. While the saw will usually be set up outside of your house, even that can’t prevent some dust from collecting inside. Again, most flooring companies will use some sort of dust containment equipment but even that can’t completely eliminate dust.
As with refinishing, there may also be some sanding required when new hardwood is installed before you can apply stain and finish. Sanding will also cause dust to settle on unprotected surfaces but that can easily be swept up before the stain and finish is applied.
Staining and finishing
While sanding and cutting the boards to size usually comprise the worst of the mess, applying stain and finish can be dirty business as well. Just as with painting, it’s important to protect any surfaces directly adjacent to the floor so the stain and finish don’t get on them. As with sanding, most companies will take necessary measures to protect the rest of your room as best they can but you can expect to do some cleanup no matter how careful they are.
Avoid foot traffic to keep the mess from spreading
The longer you can stay out of the room being worked on, the better your chances of confining the mess to that room. As you walk through, dust, stain and other substances may get on your clothes or shoes and can be transferred to other rooms. Let the newly refinished or installed floors rest fully before you go into the room and you can minimize the headache.
Clean up quickly and thoroughly
Once you do regain access to the room, you’ll want to thoroughly dust every surface as soon as possible. You’ll likely need to wait as long as a few days before returning rugs and furniture to the room and when you do, you should put felt or rubber pads under the legs to prevent damage to the floor.
If you had to move any appliances or other electrical equipment during the flooring work, be sure to test them to make sure there are no leaks or electrical problems that could damage the floors. You also may want to wait a few days longer before you let your pets have access to the room as their claws can also cause damage to the newly applied finish and the floor beneath it.
Bottom Line
No matter how careful you and the flooring professionals you hire are, there is no way to completely avoid the mess when it comes to refinishing or installing hardwood floors. Most homeowners feel that the tradeoff is worth it when it means enjoying the unparalleled beauty of hardwood. Just do what you can to help contain the dust and thoroughly clean afterward and you can put the mess behind you and begin enjoying your new hardwood floors.